How to Change Your DNS Server on Your Mac Devices?

Many times when a website shows down on your web browser, it is not actually down. It is just that you can’t see them because your device doesn’t know the route.
In Mac devices, the Domain Name System (DNS) is used to access websites on the web browser. This means if DNS servers are not working or configured properly, the website may load slowly or not show at all on your Mac.
Thus, it is important for Mac users to know how to change DNS server settings for smooth web browsing. Before moving ahead, we recommend our readers get the CleanMyMac X software for improving Mac devices’ speed. The program can remove all malicious and junk files in order to improve system performance and internet speed.
What is a DNS Server?
Domain Name System server maps domain names to IP addresses. When a DNS server is used in conjunction with a search domain, it lets you access websites and servers you often visit without even typing the complete web address.
Your home or office router is likely to be set up default to use your ISP’s DNS servers, which might not be reliable. Thus, many users prefer getting third-party DNS servers such as Google Public DNS, OpenDNS, and Cloudflare.
Third-party DNS servers are secure and contain comprehensive IP address database options. They can also assure high privacy and speed to Mac users.
How Do DNS Servers Work?
The DNS works pretty simply. When you enter a domain name in your Mac browser, the computer will contact a DNS server to locate the IP address associated with the domain name.
Basically, DNS is a directory that contains Internet Protocol (IP) addresses of all the websites available on the internet. Every Internet service provider manages its DNS servers.
But when the DNS servers are not available at the time of web browsing, Mac can’t load any website. And then, you have to use the third-party DNS servers support.
How Does a DNS Server Help With Privacy?
By default, your Mac computer is programmed to reach out to a DNS server regulated by your ISP. That means your ISP can easily see the websites you have visited because they got your IP address and name. So, your web browsing is not private.
However, if you use a DNS server offered by a different company, they might also record your information. But it will be harder for them to figure out who is browsing those websites, which can make the data less valuable.
In addition, DNS providers like Cloudflare say they never collect data from you and are even open to third-party evaluation.
How to Change a DNS Server on Mac via the DNS Settings
On Mac devices, there is a dedicated section for the DNS server settings. From there, you can access all the available server settings and change them. Here’s how you can change a DNS server settings on Mac:
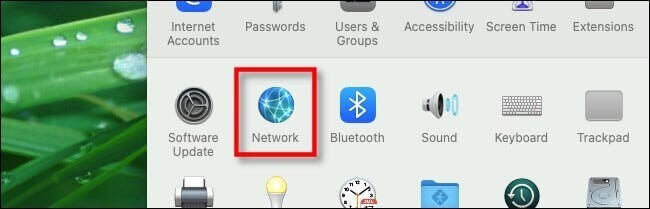
Step 1. Go to the Apple Home Menu and select System Preferences. Alternatively, you click on the Dock option.

Step 2. Under the System Preferences window, click on the Network Preferences window through the Network option. The screen will display all the active network connections.
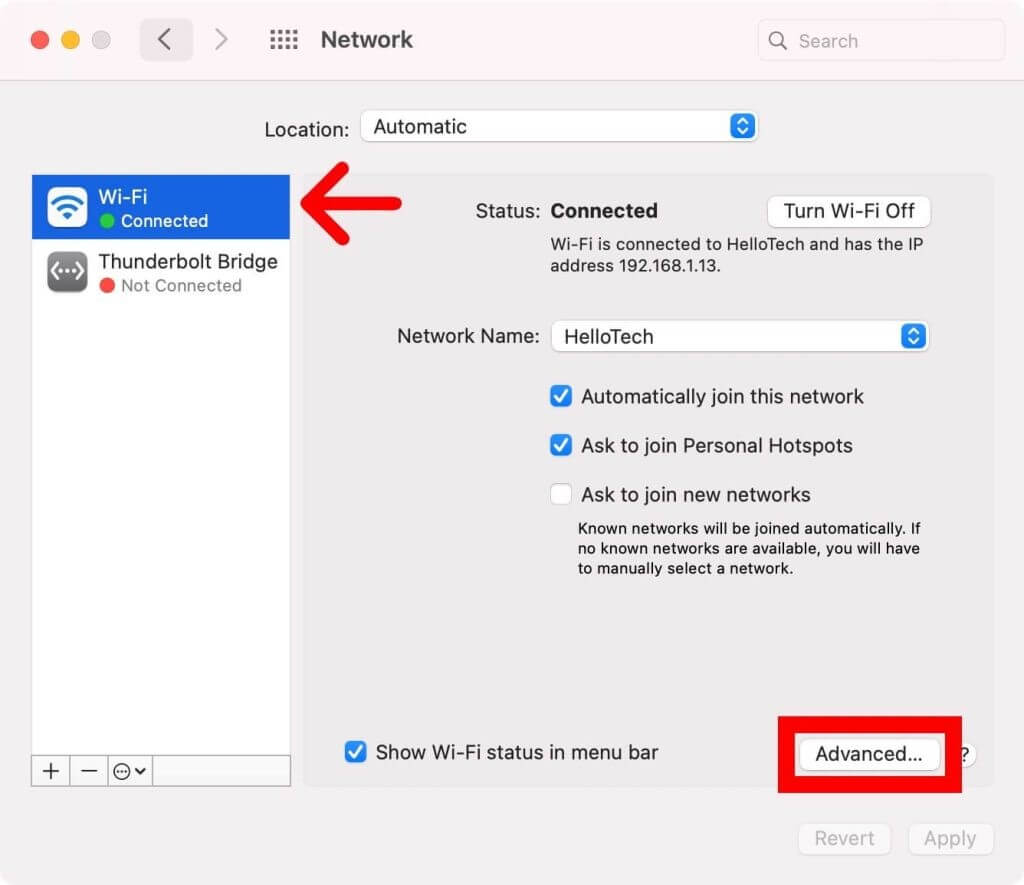
Step 3. Select the preferred connection for your DNS and access the Advanced window. Normally, one connection is active — WiFi. The green dot will appear beside the active network. That could be anyone like Bluetooth, Ethernet or Thunderbolt Bridge.
Step 4. Click on the DNS tab that will show two separate panes — Search Domains and DNS Servers. The DNS Server list can appear empty or have entries in dark text or greyed-out areas.
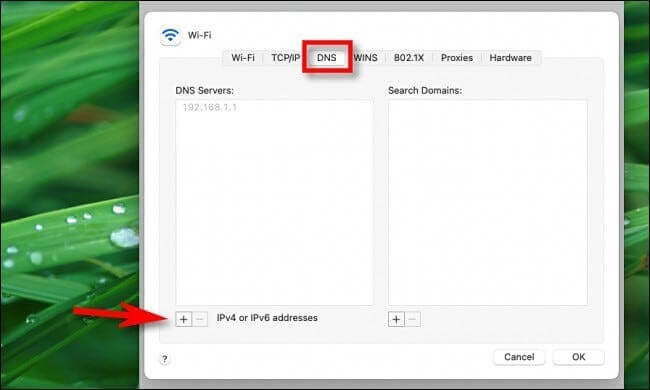
If the entries are greyed, it means the IP addresses are running with another device or the network router. You can edit the list and overwrite it via the Network Preference window (we will discuss ahead).
On the contrary, empty entry fields mean that DNS servers are not yet assigned.
How to Change a DNS Server on Mac via the System Preferences
The simple method to change DNS servers is to access System Preferences. That’s how the process works:
Step 1. Click on the Apple Home Menu from the left-hand corner and select System Preferences.
Step 2. Select the Network options from the neck screen.
Step 3. After that, the system will show you all the available network connections. From the left sidebar, select the preferred network connection among all the green ones.
Step 4. Select the Advanced option that is available on the right side of the dialogue box.
Step 5. Click on the DNS tab on the upper side of the window.

Step 6. Select the Plus (+) icon below the pane for the DNS Servers list. A text input field will come up in the list. You can manually add your DNS address and click on Return.
Suppose you want to use the Google DNS address. In that case, you can add these addresses after clicking on the Plus icon—
8.8.4.4
8.8.8.8
2001:4860:4860::8844
2001:4860:4860::8888
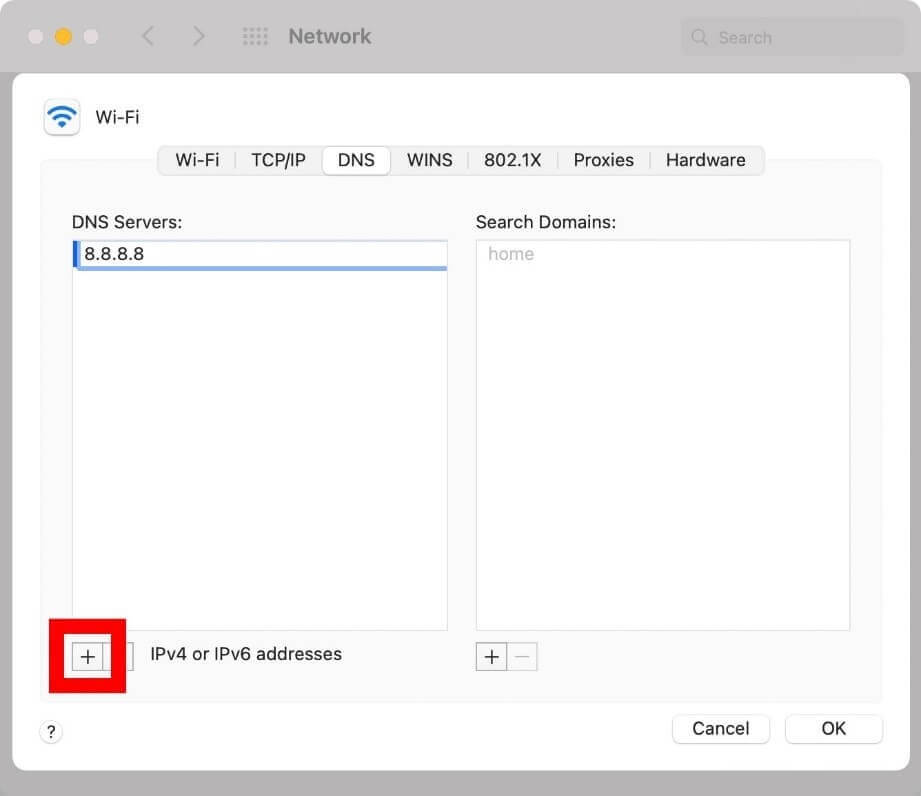
The first two addresses are IPv4 addresses, and the last two are IPv6 addresses. You can also replace any greyed-out entries that appear while adding the DNS servers. If you want, you can delete them too.
Step 8. Next, you have to add the primary and secondary DNS addresses. This will resolve an URL entry when you change the DNS server on Mac that the system will prompt when the first DNS server fails. The process will continue until the system receives a response from the website.
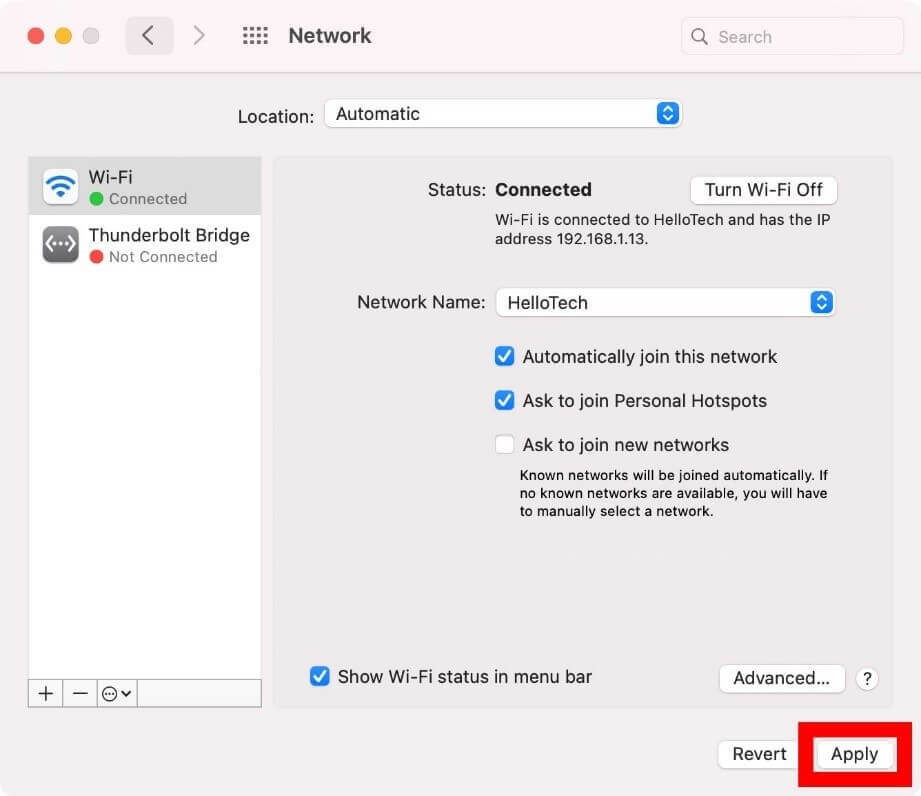
Step 9. Click on the OK button that will take you back to the pre-opened Network window.
Step 10. Finally, select the Apply button to activate the DNS changes.
Bottom Line
It is a straightforward process to change DNS server settings for Mac users. You simply have to use System Preferences and easily change the DNS settings. Also, ensure that you have an administrator account/password to access other DNS IP addresses.
In addition, download the MacPaw CleanMyMac X software to clean your device and boost its performance. Meanwhile, keep on exploring other helpful guides only here.
Popular Post


Recent Post
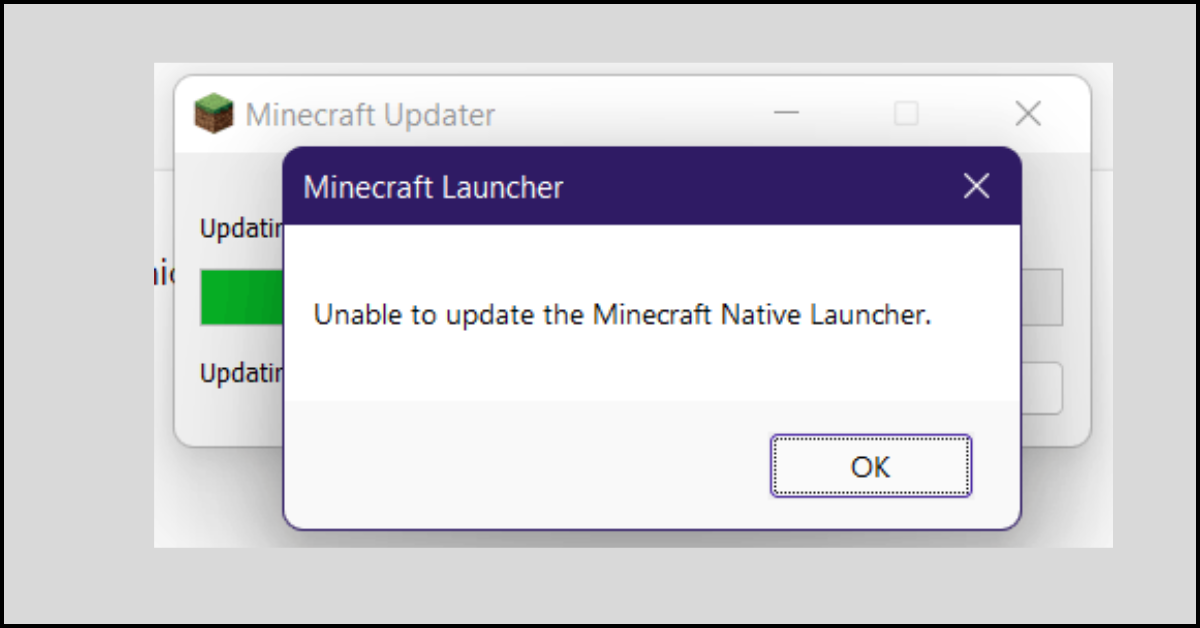
How to Fix Unable to update the Minecraft Native Launcher Windows 11
The “Unable to update the Minecraft Native Launcher” issue can be frustrating. However, there are many ways to fix it. Here, we will discuss some effective ways to fix this problem.

Troubleshooting Guide: How To Fix Copy And Paste Not Working On Windows 10/11
Fix the copy and paste not working issue on Windows 10/11 hassle-free with this comprehensive guide. Here you’ll find effective tried and tested methods that can troubleshoot and permanently resolve the problem.
How to Force Quit on Windows 11 and Windows 10
Encountering unresponsive programs or frozen applications on our Windows devices can be a frustrating experience. When a program hangs or stops responding, it can disrupt our workflow and hinder productivity. This is where the ability to force quit a program comes in handy. Here, we will explore different methods to force quit on Windows 11 […]

How to Enable Secure Boot Windows 11 and Windows 10
One of the key features that can significantly enhance the security of your Windows operating system is Secure Boot. By enabling Secure Boot on your Windows 11 or Windows 10 system, you can protect your device against malware and unauthorized operating systems. Benefits of Enabling Secure Boot in Windows 11 And 10 1. Protection Against […]

How to Change Administrator on Windows 10 and Windows 11
In Windows operating systems, the administrator account holds the highest level of privileges and control over the system. Sometimes, you may need to change the administrator account for various reasons such as security, ownership transfer, or simply to give someone else access to the system. Here, we will explore different methods to change the administrator […]

How to Open BIOS Windows 11 and Windows 10
Here are the best ways to Open BIOS Windows 11 and Windows 10. These steps are very easy.

How to Convert HEIC to JPG on Windows 11 and Windows 10
Learn the best ways to convert HEIC to JPG on Windows and Windows 10 computers.

How to Fix Valorant not uninstalling Windows 11 – Remove Valorant Completely
Online gaming has become increasingly popular, with many gamers enjoying multiplayer games. One such game that has gained a significant following is Valorant. However, like any software, Valorant is not immune to technical issues, and one common problem that players encounter is the difficulty in uninstalling the game, particularly on the Windows 11 operating system. […]
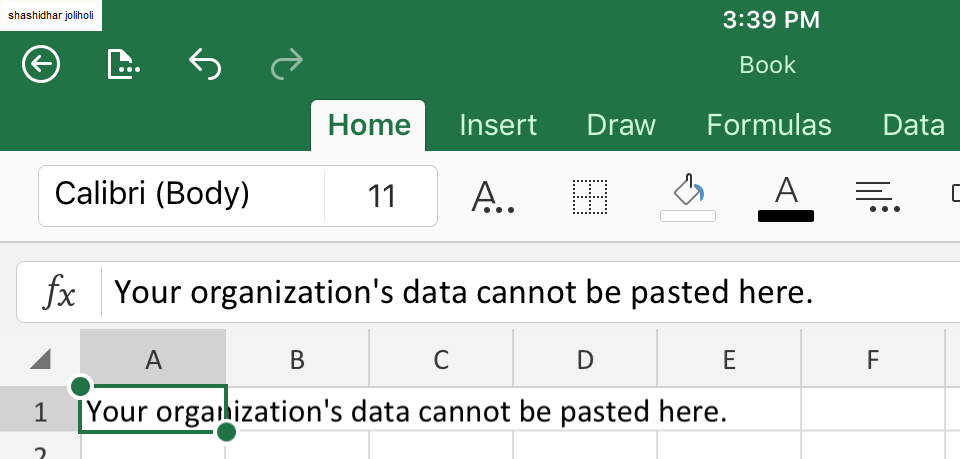
Your Organization’s Data Cannot Be Pasted Here: 7 Ways to Fix It
Encountering the “Your organization’s data cannot be pasted here” error can be frustrating, but armed with the right knowledge and troubleshooting steps, you can quickly overcome this hurdle.
Tenorshare Reiboot Review 2024 [Fully Unbiased]
Read The Complete Unbiased Review of Tenorshare Reiboot

