How to Fix No Startup Disk on Mac? — Complete Guide
Are you trying to update your Mac operating system? But you are constantly getting “no startup disk” or “Macintosh HD not showing up in Disk Utility”.
This means that the drive is not available for Mac OS to update. And this error can also make your Mac unbootable. Not only that, but no startup disk is available on Mac can also lead to—
- Selecting the Mac HD in Disk Utility has grayed out all operations except the Erase button.
- Your Macintosh HD is grayed, and you cannot access files on it.
- The disk is not at all showing in Disk Utility.
- Macintosh HD doesn’t show up in the startup disk.
- Mac’s select startup disk is not showing while reinstalling MacOS.
If you face any of these issues, there is definitely something wrong with your Macintosh HD. But no need to worry about it because most disk issues are fixable.
This guide will walk you through some simple solutions to fix no startup disk on Mac. So, let’s get started.
Reason Behind No Startup Disk on Mac
Wondering why there is no startup disk on your Mac? Well, there could be several possible reasons, such as:
Damaged File System
In Mac, the file system ensures how to manage data and store it in a drive. The master file table will be impacted if the file system is corrupted, leading to the Macintosh disk not mounting during the startup.
Disk Utility Errors
If your Disk Utility fails or shows any error, it can directly impact the Macintosh HD functionality.
System Failure
System malfunctions and device malfunctions can lead to multiple operating system errors. For example, if your Mac device or system keeps crashing, your hard disk cannot mount properly during the startup phase.
Catalog File Corruption
Catalog files maintain the record files of partitioned volumes. Thus, if your catalog file gets corrupted, your Mac will not be able to get the volume size location. This can impact the volume content description and other volume information, including the drive mounting.
Virus Attacks
There might be a chance that a virus or malware will attack your Mac system or disk. Viruses can attack your safest MacOS devices, resulting in data corruption and no startup disk on Mac.
7 Ways to Fix No Startup Disk on Your Mac
The reason could be anything, but no startup disk is real trouble. However, it can corrupt your data and impact your workflow.
So, before panicking and calling your Macintosh repair guy, try the following solutions to fix the no startup disk problem:
1. Use Recovery Mode to Repair Startup Disk
When your startup disk is not working, you cannot access Disk Utility from the Application folder. Thus, you have to use the Recovery Mode to launch Disk Utility and try to repair the startup disk. Here’s how you can do that:
Step 1. Based on your MacOS processor, you have to use different keys to activate the Recovery Mode. For instance—
- Apple Silicon users have to press and hold the power button until they see the startup options while turning on their Mac. After that, click on the icon labeled Options and hit Continue.
- Intel Processor users must press and hold the Command and R keys until an Apple logo appears on their screen.
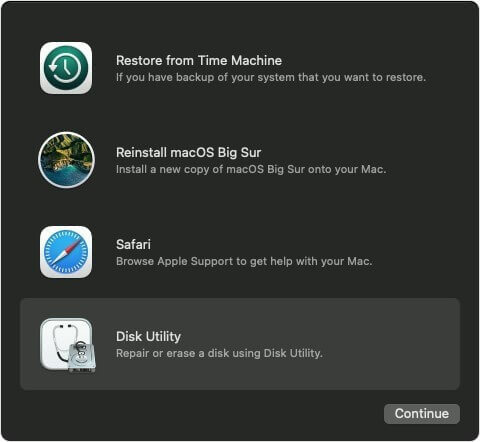
Step 2. To enter the Recovery Mode window, select a user and enter the password to continue. After that, select Disk Utility and click Continue.
Step 3. Once on the Disk Utility window, go to View > Show > All Devices.
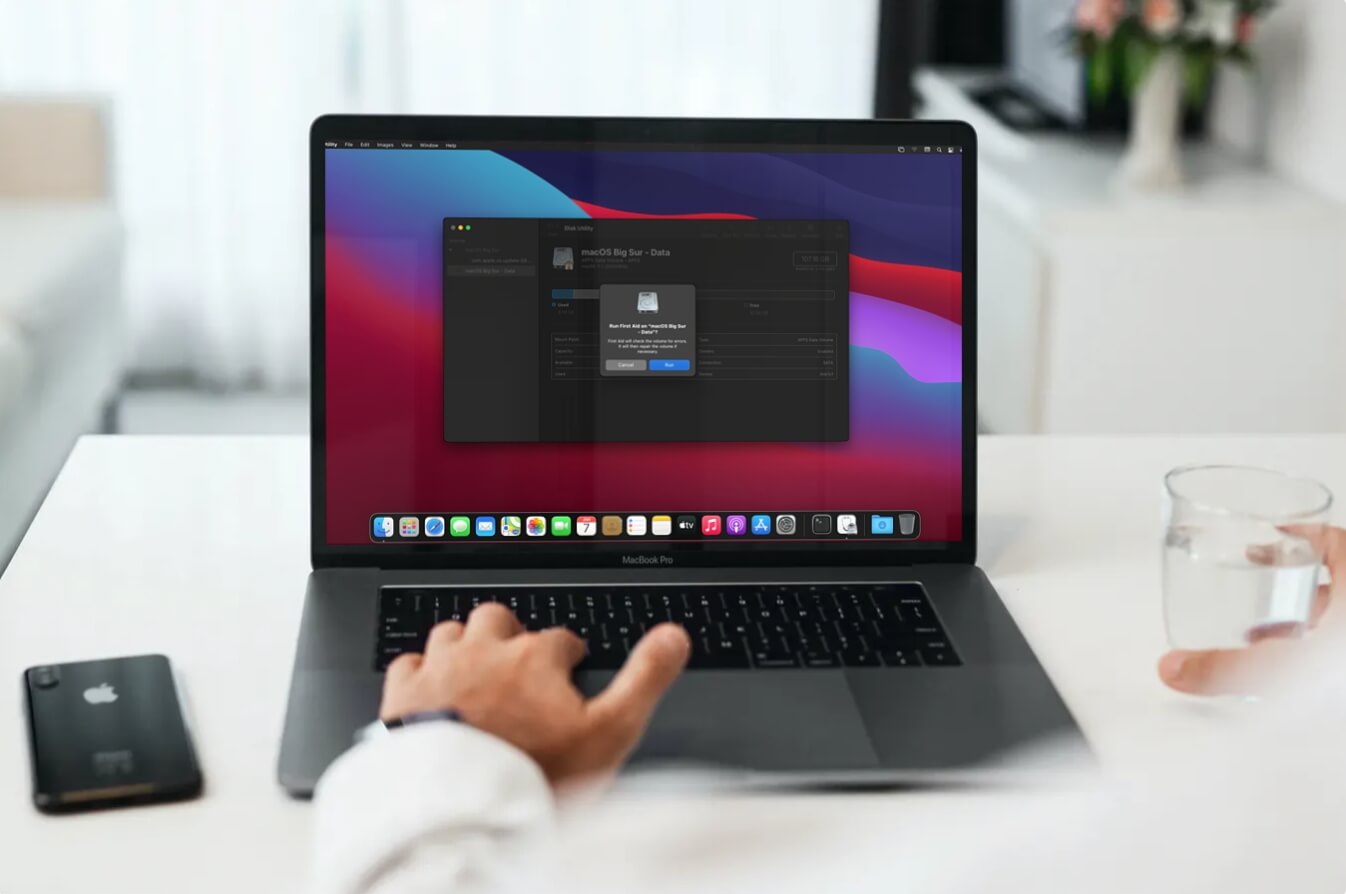
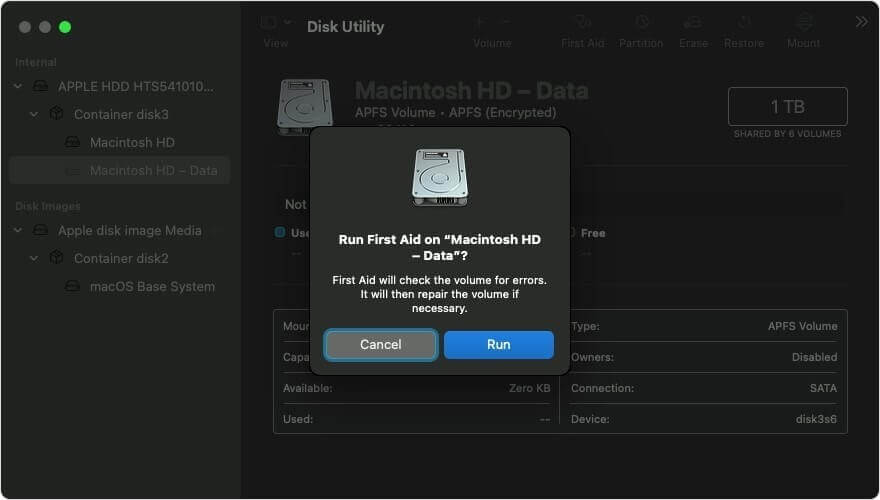
Step 4. If you are fortunate, the startup disk will appear. So, select it and click on the First Aid button and then on the Run. First Aid will measure the volume for errors and try to repair them.
2. Show Up Startup Disk in Disk Utility
In many cases, the startup disk won’t show up in Disk Utility, even in the Recovery Mode. If you are also not able to see a full disk or any containers and volumes of the disk, use these steps to make the startup disk appear in Disk Utility:
Step 1. Turn off your Mac and disconnect all peripherals that are attached to your device.
Step 2. If you have installed MacOS on an external drive, ensure that it is connected to your device. Just turn off and then turn on the drive.
Step 3. Follow the steps already discussed to open Disk Utility in the Recovery Mode and fix your no startup disk on Mac.
3. Reset NVRAM on Your MacOS Device
A flashing question mark sign while booting up your Mac from the startup disk indicates that your startup disk is no longer available or doesn’t support a working Mac OS. If this issue keeps on bugging you every time you startup disk with Disk Utility in Recovery Mode, you have to reset NVRAM on your Mac.
NVRAM (nonvolatile random-access memory) stores settings for the startup disk. Thus, making tweaks to it can fix the no startup disk problem for you. Here’s how to reset NVRAM:
Step 1. Turn off your Mac. Turn it on by pressing and holding the following keys together — Option + Command + P + R.
Step 2. Once your Mac booted up, ensure that your preferred startup disk is selected in Startup Disk preferences.
4. Change Your Startup Disk
There are chances that your current startup disk has failed, and you can not recognize your MacOS any longer. In that case, switching to another Startup Disk might fix the problem for you. If you can access a CD/DVD, network volume or other physical disks, try it to ensure that your current startup disk is not in working condition anymore.
First, change a startup disk as follows:
Step 1. Turn off your computer and press and hold the power button to turn it on. If you are using Apple Silicon, press and hold the power button until the Loading startup options appear on your screen.
Step 2. Click on the Continue button on Mac with Apple Silicon and click on the Up arrow on other Mac devices. Select the new startup disk when you see all the startup disks.
After that, change a startup disk for every startup:
Step 1. Turn on your Mac and go to the Apple menu > System Preferences > Startup Disk.
Step 2. Select the startup disk by clicking the icon and Restart your device.
5. Use the Terminal Command
If you are unable to fix no startup disk on Mac from Disk Utility, you can try the Terminal method. Indeed, this approach is a bit technical and challenging. But if you closely follow these steps, you can fix the problem:
Step 1. Take your Mac to Recovery Mode.
Step 2. From the menu, go to Utilities > Terminal from the list.
Step 3. Enter the diskutil list and check the Volume Identifier.
Step 4. The command will list all the available volumes. You should check for the Volume Identifier from the table.
Step 5. Enter this command to repair the disk volume—
diskutil repairvolume /disk
6. Run the FSCK command
FSCK command is a tool to check the hard drive consistency and repair disk errors. Here’s how to use FSCK:
Step 1. Before the Apple logo appears, restart your Mac and hold Command and S keys to boot your system into Single User Mode.
Step 2. Enter this command—
/sbin/fsck -fy
Step 3. If it says that “File system was modified”, again type the command until you see “The volume [name] appears to be OK.”
Step 4. Type this command to restart your Mac—
reboot
7. Erase Your Mac HD
If none of the above methods worked, as a last resort, you can factory reset the Mac HD and reinstall MacOS. As you have guessed by now, this method will erase all the data stored on your Macintosh HD. Thus, only use these steps when no other option is left:
Step 1. Get your Mac to the Recovery Mode and select Disk Utility.
Step 2. Click on the unmountable Macintosh HD and then click on the Erase from the top.
Step 3. Add the required information like Name, Format or Scheme to reformat the disk and click on the Done to finish the process.
Step 4. Go back to the Disk Utility screen and select the Reinstall MacOS.
Pro Tip: If you are worried about data loss, you can use the EaseUS Data Recovery Wizard for Mac to safely backup your data.
Parting Remarks
As you can see, fixing no startup disk on Mac is easy except for the resetting method, where you will lose all your data. But if you have a backup tool like EaseUS Data Recovery Wizard, you have nothing to worry about.
In addition, if nothing makes your Mac boot, call your repair guy and get your device checked thoroughly.
If you find this post helpful, please see our other posts for more information.
Popular Post


Recent Post
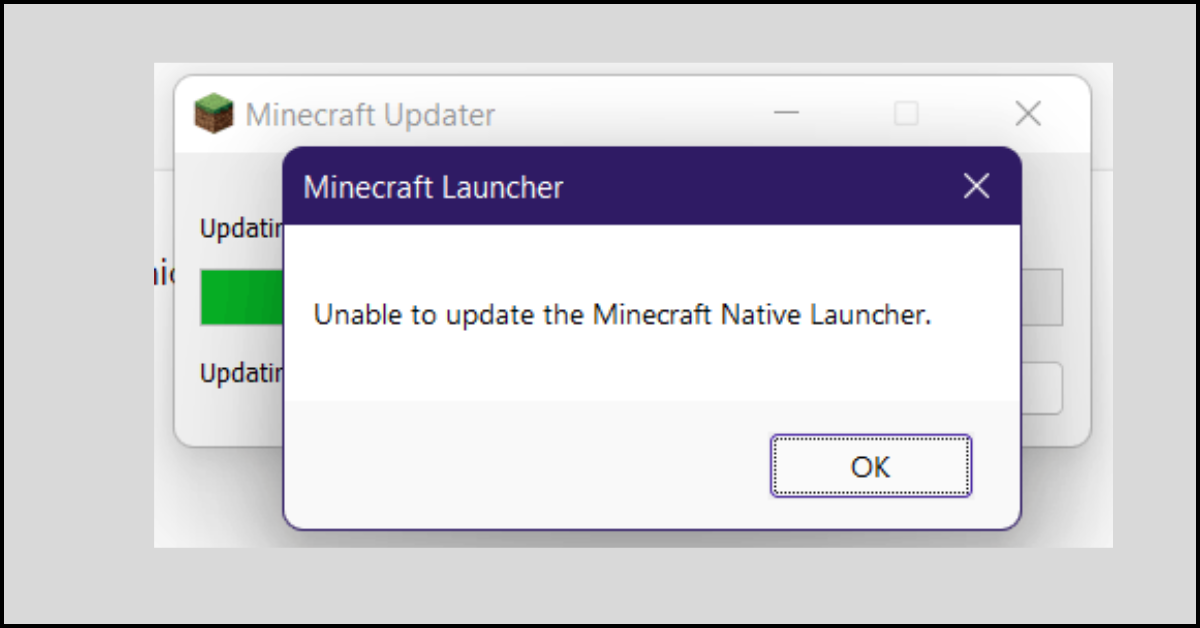
How to Fix Unable to update the Minecraft Native Launcher Windows 11
The “Unable to update the Minecraft Native Launcher” issue can be frustrating. However, there are many ways to fix it. Here, we will discuss some effective ways to fix this problem.

Troubleshooting Guide: How To Fix Copy And Paste Not Working On Windows 10/11
Fix the copy and paste not working issue on Windows 10/11 hassle-free with this comprehensive guide. Here you’ll find effective tried and tested methods that can troubleshoot and permanently resolve the problem.
How to Force Quit on Windows 11 and Windows 10
Encountering unresponsive programs or frozen applications on our Windows devices can be a frustrating experience. When a program hangs or stops responding, it can disrupt our workflow and hinder productivity. This is where the ability to force quit a program comes in handy. Here, we will explore different methods to force quit on Windows 11 […]
How to Enable Secure Boot Windows 11 and Windows 10
One of the key features that can significantly enhance the security of your Windows operating system is Secure Boot. By enabling Secure Boot on your Windows 11 or Windows 10 system, you can protect your device against malware and unauthorized operating systems. Benefits of Enabling Secure Boot in Windows 11 And 10 1. Protection Against […]

How to Change Administrator on Windows 10 and Windows 11
In Windows operating systems, the administrator account holds the highest level of privileges and control over the system. Sometimes, you may need to change the administrator account for various reasons such as security, ownership transfer, or simply to give someone else access to the system. Here, we will explore different methods to change the administrator […]

How to Open BIOS Windows 11 and Windows 10
Here are the best ways to Open BIOS Windows 11 and Windows 10. These steps are very easy.

How to Convert HEIC to JPG on Windows 11 and Windows 10
Learn the best ways to convert HEIC to JPG on Windows and Windows 10 computers.

How to Fix Valorant not uninstalling Windows 11 – Remove Valorant Completely
Online gaming has become increasingly popular, with many gamers enjoying multiplayer games. One such game that has gained a significant following is Valorant. However, like any software, Valorant is not immune to technical issues, and one common problem that players encounter is the difficulty in uninstalling the game, particularly on the Windows 11 operating system. […]
Your Organization’s Data Cannot Be Pasted Here: 7 Ways to Fix It
Encountering the “Your organization’s data cannot be pasted here” error can be frustrating, but armed with the right knowledge and troubleshooting steps, you can quickly overcome this hurdle.
Tenorshare Reiboot Review 2024 [Fully Unbiased]
Read The Complete Unbiased Review of Tenorshare Reiboot

