How to Fix Steam Error Code 51 in Windows 10
If you are getting the ‘Steam error code 51’ error on your Windows 10/11 computer when attempting to launch a game installed through the Steam game engine, you have come to the right place. You will be guided through simple steps to resolve the issue here. So let us begin the discussion.
‘Steam Client’: Steam is Valve’s video game digital distribution service. This service is available for devices running Microsoft Windows, MacOS, Linux, Android, and iOS.
It offers services such as digital rights management, server hosting, video streaming, and social networking. It also supports game installation and automatic updates. Community features include friend lists and groups, cloud storage, and in-game voice and chat.
So, if Steam error code 51 is annoying you a lot and ruining your gameplays, we have 10 easy solutions to fix the error code. So, let’s fix Steam error code 51 in Windows 10 now.
What Causes the Steam Error Code 51 in Windows 10?
Before we fix Steam error code 51 in Windows 10, let’s understand the triggers that cause the error. Some of the main reasons behind the Steam error are:
- Your computer is not supporting the game’s minimum requirements, and you are using the administrative version of Steam.
- Another program in the background is interfering with the game.
- You are using an untested driver version.
- The game’s graphics settings are incorrect.
- Malware and viruses are present.
- The .NET framework and operating system have not been updated to the most recent versions.
- The DirectX version is out of date.
- Overclocking.
- Misconfigured or corrupt game installation files also cause the problem.
- The game and PC are incompatible with the Microsoft C++ redistributable files.
10 Solutions to Fix Steam Error Code 51 in Windows 10
Are you a hardcore Steam player? Then, you must learn these solutions to fix Steam error code 51 in Windows 10:
Solution 1. Check Your Game File Integrity
The first step is to check your game files’ integrity. In some cases, the game you are attempting to launch has either incomplete installation files or some of the files are corrupt. In this case, the game will not undertake, resulting in Error code 51.
Steam downloads the game servers and compares the details of all the files when we verify the integrity of game files. It is immediately replaced if a file is discovered to be missing or altered. Therefore, you must check the game’s integrity, causing the problem.
The following are the steps you must take to fix Steam error code 51 in Windows 10:
Step 1. Open the Steam app and select Games from the top bar. Next, select your game, let’s say L. A. Noire, from the left column, right-click, and choose Properties.
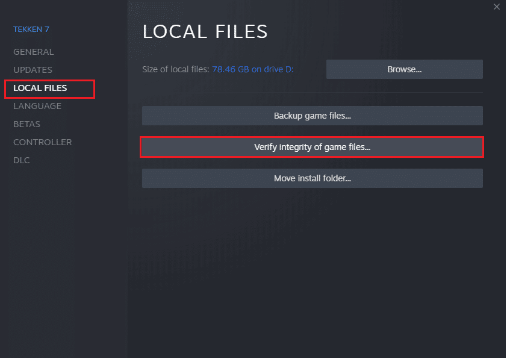
Step 2. Once in Properties, navigate to the Local Files tab and select Verify Integrity of Game Files.
Step 3. Wait until the process is finished. After the verification is complete, restart your computer and relaunch L.A. Noire. Then, check to see if the game starts normally.
Solution 2. Modify Steam Games Priority Settings
The preference of an app or procedure tells the computer how important it is and whether it should be prioritized over others when allocating resources. Except for system processes, the priority of each application is normal. For example, if Steam does not have enough resources, it may generate error codes.
Here’s how you can change priority for the Steam games:
Step 1. After right-clicking on the Taskbar, select Task Manager.
Step 2. Now, look for the Steam process.
Step 3. Then, set the priority to High Priority and see if it works.
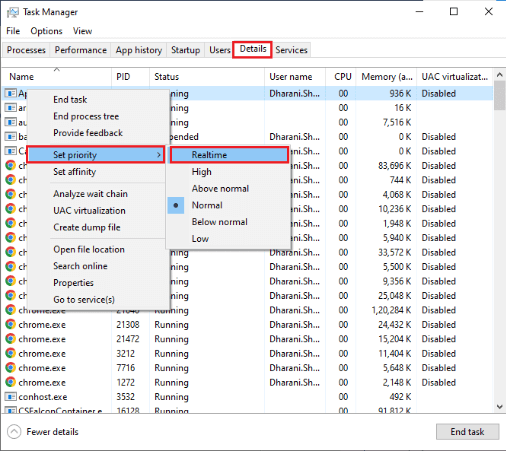
Step 4. Close Task Manager and restart your computer to see if the discussed issue has been resolved.
Solution 3. Give High-performance to Games
You can also optimize your game by setting your high-performance power plan settings. These power plans were created to manage the power settings on mobile devices. To use high-performance power plan settings on your computer, follow the steps outlined below:
Step 1. To open Windows Settings, press the Windows + I keys together.
Step 2. Scroll down and choose the System settings.
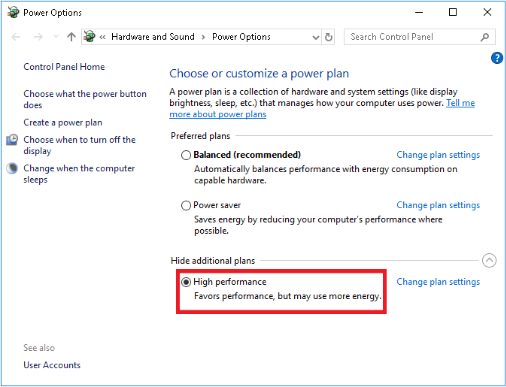
Step 3. Now, select Power & sleep under Related settings and click on Additional power settings.
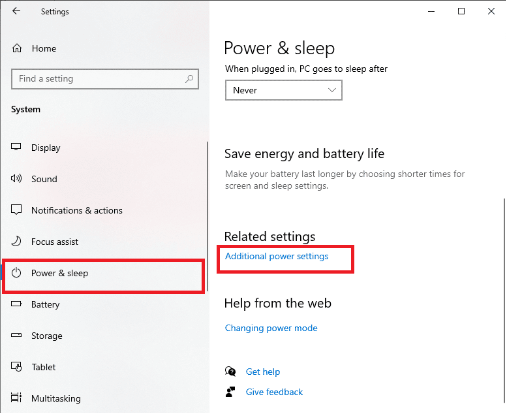
Step 4. Now, select the High-performance option from the High additional plans.
Solution 4. Update Your Gaming Apps
Ensure your game is always running at the latest version to avoid conflicts. You cannot connect to the game servers until your game is updated. To update your game, follow the steps outlined below:
Step 1. First, navigate to LIBRARY in the Steam app.
Step 2. Now, go to HOME and look for your game.

Step 3. Then, right-click on the game and choose Properties…
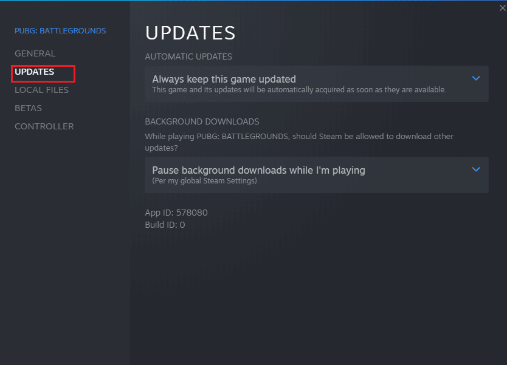
Step 4. Move to the UPDATES tab to check if there are any pending updates in action. If this is the case, follow the on-screen instructions to download the most recent updates.
Solution 5. Disable Full Screen for Steam Games
A few users have reported that disabling full-screen optimizations on their PC helped to fix Steam error code 51 on Windows 10. Do as instructed:
Step 1. Launch Steam and select LIBRARY.
Step 2. Right-click any Steam game and select Properties.
Step 3. Head over to the GENERAL tab. There select the SET LAUNCH OPTIONS…
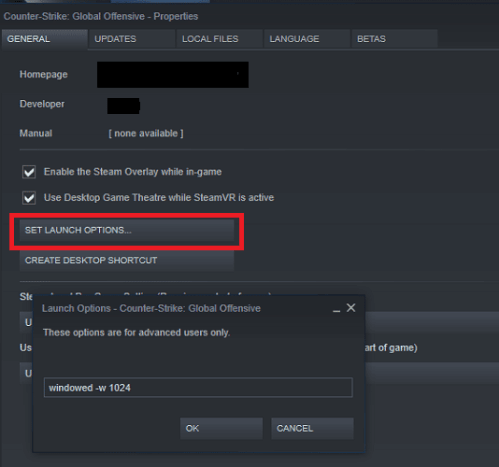
Step 4. A new window with an advanced user warning will now be opened. Enter the -windowed parameter to launch the game in windowed mode.
Step 5. Now, click on the OK button and exit the Properties window.
Step 6. Relaunch the game and check to see if it runs in windowed mode. Otherwise, go to SET LAUNCH OPTIONS… Replace the last parameter with the following parameters.
–windowed -w 1024
Step 7. Click the OK button.
Solution 6. Run Steam as an Administrator
A few users have suggested that running Steam as an administrator can resolve Steam error code 51. So, here’s how to run Steam as an administrator:
Step 1. Right-click on the Steam shortcut on the Desktop and select Properties.
Step 2. Now, select Properties.
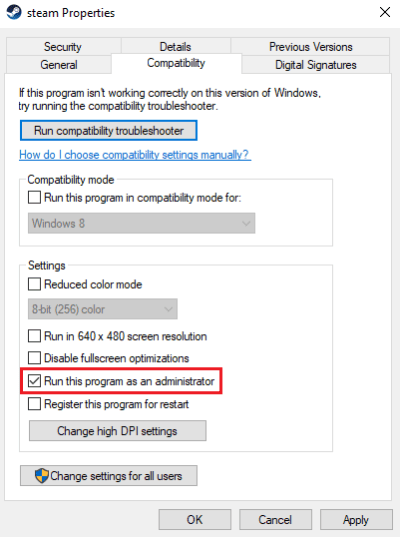
Step 3. Go to the Compatibility tab under the Properties window.
Step 4. Check the box that says Run this program as an administrator.
Step 5. Finally, to save the changes, click Apply > OK.
Solution 7. Use Steam Flushing
You can try Steam flushing to fix Steam error code 51 in Windows 10. You can perform this method by following these steps:
Step 1. First, exit the Steam client entirely.
Step 2. Press the Windows + R keys simultaneously.
Step 3. Enter steam:/flushconfig and press OK.
Step 4. To confirm, click OK in the quick menu.
Step 5. Restart the computer.
Step 6. Then, open the file explorer by pressing the Windows + E keys simultaneously.
Step 7. Navigate to the following location path.
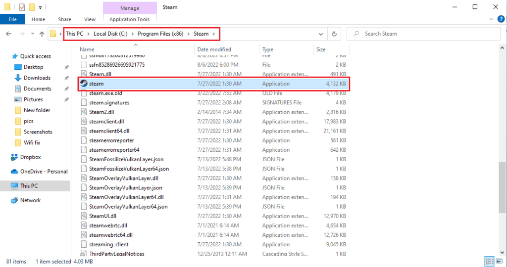
C:\program files (x86)\Steam
Step 8. Locate the Steam or Steam.exe file and restart the program by logging in again.
Solution 8. Update Your Steam App
You cannot play any games if you use an outdated Steam application. As a result, always use an updated version of Steam and Steam games before launching them.
Step 1. Press the Windows key, type Steam, and then press the Open button.
Step 2. Now, select Steam from the left pane, followed by Check for Steam Client Updates…
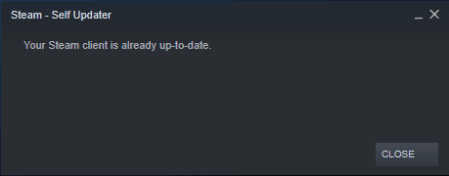
Step 3. Install any available new updates and ensure your Steam client is up to date.
Restart Steam now.
Solution 9. Update .NET Framework
The .NET framework in Windows 10 is required to continuously operate modern apps and games. Therefore, many games include an auto-update feature for the.NET framework, which will update automatically whenever a new version becomes available. If an update prompt appears on your PC, you can manually install the most recent version. NET framework, as discussed below, to resolve Steam error code 51 on your Windows 10 PC:
Step 1. Check the official Microsoft website for new updates to the .NET framework.
Step 2. If any updates are available, click the corresponding/recommended link and select the Download .NET Framework 4.8 Runtime option.
Step 3. Go to My Downloads, double-click the setup file to run it, and then follow the on-screen installation instructions.
Solution 10. Disable Windows Defender Firewall (Not Recommended)
You may also encounter a Steam error code 51 game failed to launch if your Windows 10 computer has an overly reactive or overly protective antivirus suite. This breaks the link between the game launcher and the server. To resolve this issue, whitelist Steam in your Firewall settings or temporarily disable the problem.
Here you can even set new rules for Windows Defender Firewall:
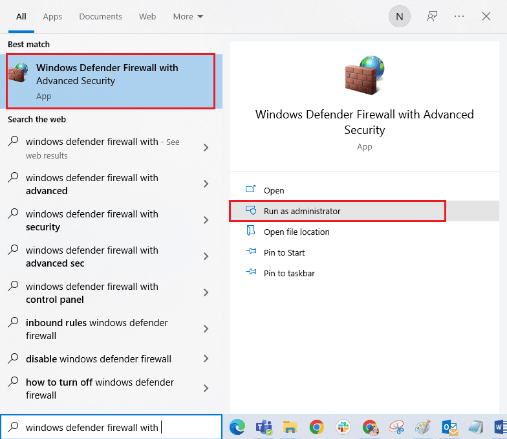
Step 1. Press the Windows key, type Windows Defender Firewall with Advanced Security, and then press the Open button.
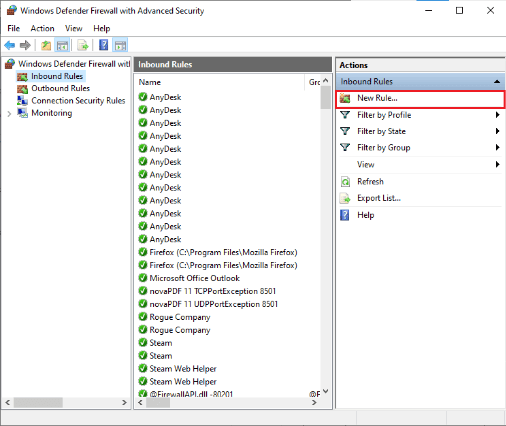
Step 2. Now, in the left pane, select Inbound Rules as shown.
Step 3. Then, as shown, in the right pane, click on New rule…
Step 4. Now, under What type of rule would you like to create, make sure you select the Program option. Menu and select Next.
Step 5. Then, for this program path, click the Browse… button.
Step 6. Then, go to C: Program Files (x86) Steam and double-click on the setup file.
Step 7. Then, press the Open button.
Step 8. Then, in the New Inbound Rule Wizard window, click Next.
Step 9. Now, select the radio button next to Allow the connection and click Next.
Step 10. Next, ensure the Domain, Private, and Public boxes are checked, then click Next.
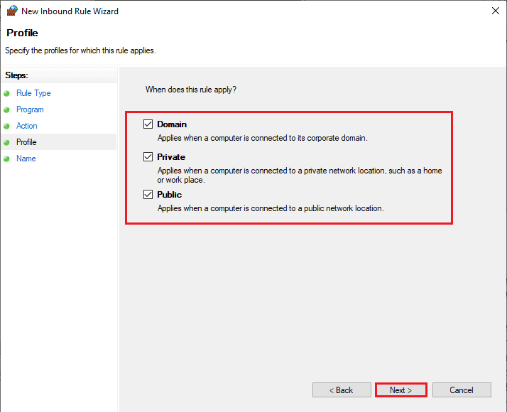
Step 11. Now, give your new rule a name and click Finish.
Everything is finished! Check to see if you have fixed error code 51 on Steam.
Let’s Fix Steam Error
There you have it, Steam users. You can now easily fix Steam error code 51 in Windows 10.
Some discussed solutions are a bit tricky. So, follow the instructions properly, and you will be fine. We hope you find this post helpful. For more articles like this, keep on following us
Recommended Reads
How To Clean Junk Files On Windows 11/10
Popular Post
Recent Post

Advanced SystemCare: Tool To Clean Your PC
Your computer slows down over time. Files pile up, junk builds inside the system, and things start to feel sluggish. You open a browser, and it takes forever. Programs crash without warning. This is a sign that your PC needs a good cleanup. Many users ignore these signs. They think buying a new computer is […]

Top 10 PC Cleaning and Optimization Tools For Windows 11/10
Discover the best PC cleaning and optimization tools for Windows 11 and 10. Remove junk files, improve speed, and keep your PC healthy with trusted cleaners.

Clear Microsoft Teams Cache On Windows PC [Complete Guide]
Learn how to clear Teams cache on Windows PC with 3 easy methods. Fix slowdowns, glitches, and errors fast. A simple guide for every Windows 11 user.

How To Clear Browsing History on PC: Chrome, Edge, Firefox, Opera
Learn how to clear browsing history on PC across Chrome, Edge, Firefox, and Opera with easy steps, tips, pros, and FAQs.

Clear Cache and Cookies: Complete Guide For Windows 11/10
Learn how to clear cache and cookies on Windows 10 and 11. This complete guide covers Chrome, Edge, and Firefox with simple, step-by-step instructions for every user.

How To Clean PC Trackpad/Touchpad Without Damaging It
Learn how to clean PC trackpad and clean PC touchpad safely with simple steps. Improve performance, remove dirt, and keep your laptop surface smooth and responsive.

How To Clean Your GPU/Graphics Card [Complete Guide]
Introduction A graphics card is one of the most important parts of a computer. It handles visuals, gaming, video editing, and design work. Over time, dust builds up inside it. This dust blocks airflow and traps heat. When heat increases, performance drops. In some cases, the system may even crash. That is why learning how […]

How To Clean PC Power Supply Unit Safely Without Damaging
Follow simple, safe steps to clean your computer’s power supply unit. Improve cooling, reduce overheating, and protect your PC’s performance.

How To Clean a CPU Without Damaging It [Complete Guide]
Learn how to clean a CPU safely without damage. Follow simple steps, precautions, and methods to improve cooling, boost performance, and extend your computer’s life.

How To Clear Browser Cache On Windows 11/10 [Chrome, FireFox, Edge]
Learn how to clear browser cache on Windows 11 and 10. Follow simple steps to clean browser cache, fix slow browsing, and improve performance easily.
