How to Fix iPhone Call Forwarding Not Working

Last updated on April 6th, 2024 at 6:12 am
In case incoming calls are challenging to come through on their iPhone device, users can activate the call forwarding feature. You can select another phone number as the new recipient for calls or voicemail.
However, people notice the call forwarding iPhone not working error in some cases. Fortunately, there are methods available for troubleshooting the problem on iPhone, whether you use iPhone 8 or 11.
We have gone through different solutions, tested them, and then compiled the best fixes. But first, let us understand what causes the error.
Scenarios of iPhone Call Forwarding Not Working
Several situations are common causes for this error. Primarily, disorders between the settings and the system result in iPhone call forwarding not working issue.
- No incoming calls– Here, the calls do get forwarded, but into the voicemail instead of the set number. This case is harmful in case you have any urgent calls incoming.
- Software bug glitch- A glitch in the iOS coding can cause an error in the call forwarding function on iPhones. This scenario occurs in case of malware or virus in new applications you download.
- Cannot forward any types of calls– None of the incoming calls are coming through after activating call forwarding. The reason can be due to hardware issues.
Best Ways to Fix the Call Forwarding Not Working Error on iPhones
The following are the most suitable solutions you can try out to fix the iPhone call forwarding not working on your device.
Fix 1: Download EaseUs to Troubleshoot Software and Recover Data
In some cases, the call forwarding function does not occur due to bug issues inside the device system. You should use a troubleshooting application for iPhones to repair the OS system. To avoid losing any data, you should download a reliable data and phone system recovery software, EaseUs MobiSaver.
The MobiSaver data iPhone recovery tool is compatible with iPhone 11/11 Pro/XS/XS Max/XR and iOS 13. You can recover a lot of data in case of system defects that cause data loss, like SMSes, call history, contacts, WhatsApp messages, photos, videos, memos, browser history, and notes.
The following are the steps to use the tool.
Step 1: Install the EaseUs MobiSaver software from the official site and launch it.
Step 2: Connect the iPhone device to your PC. Select the “Recovery Mode” option.
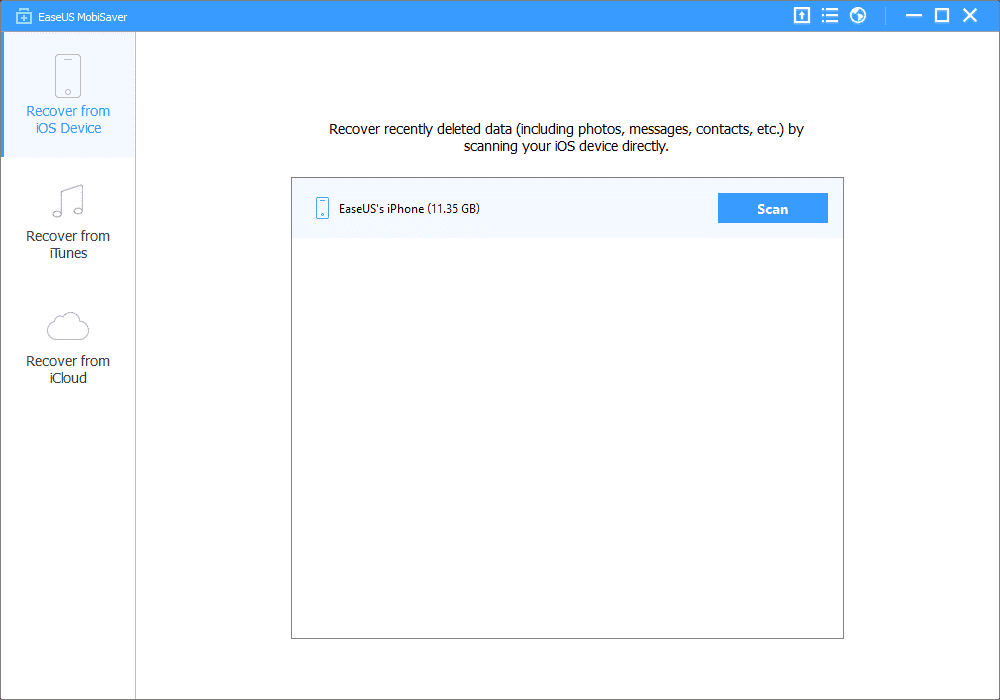
Step 3: The software would scan your iPhone for the lost data.

Step 4: Filter out the scanned results that the software pulls up. Preview the data and then select the “Recover” option.

The following methods are suitable in case a software error is not the leading cause.
Fix 2: Change the Settings
One of the common reasons for the call forwarding feature to stop working on iPhone devices is Settings error. Here, you should switch off your Call Forwarding function and turn it on again. This easy step can do a total refresh.
Step 1: Access the Settings option. Scroll downwards and choose the option Phone.
Step 2: Select the Call Forwarding option with a tap. Turn the switch beside Call Forwarding towards “OFF”.
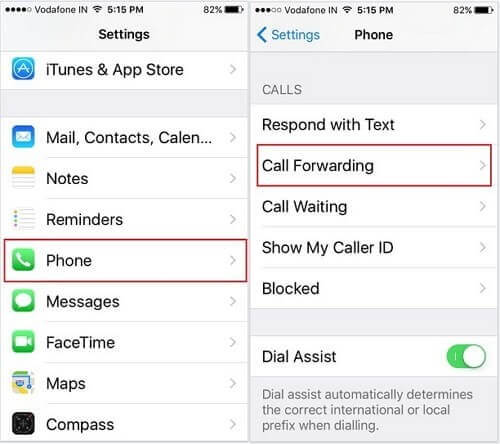
Step 3: Wait for some seconds. Then, turn the switch towards “ON”.
Step 4: After the “Forward to” option appears, add the number and confirm it.
Fix 3: Repair the iOS system
At times, the main reason for the call forwarding function not working on iPhone is a system error. After users carry out iOS updates, some may notice a problem in different system functions, like call forwarding.
You should repair the phone iOS system directly. However, you cannot do this using a system setting. Instead, use a third-party iOS system repair tool. That would detect the error, find the issue, and repair the overall system to get rid of the problem.
Here, we would cover iMyFone Fixppo as an option.
Step 1: Download the application on your device and then launch after installation completes.
Step 2: You will see the Standard Mode option in the main window. Click your cursor on the option to repair fundamental iPhone issues with no data loss.
Step 3: Link your iPhone into the desktop device you have the software in via USB cable. The program would take some time to detect and connect. For iOS 12 or previous versions, you have to unlock the phone device first.
Click on “Next”.
Step 4: In case the program cannot find the iPhone device, enable the DFU/recovery mode on your device.

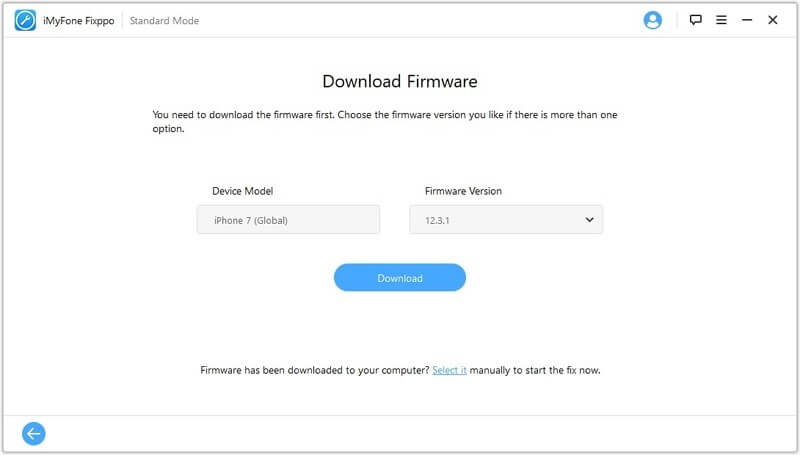
Step 5: The program would find the model of the device and offer options for the version. Select the firmware you want to work with and select “Download”.
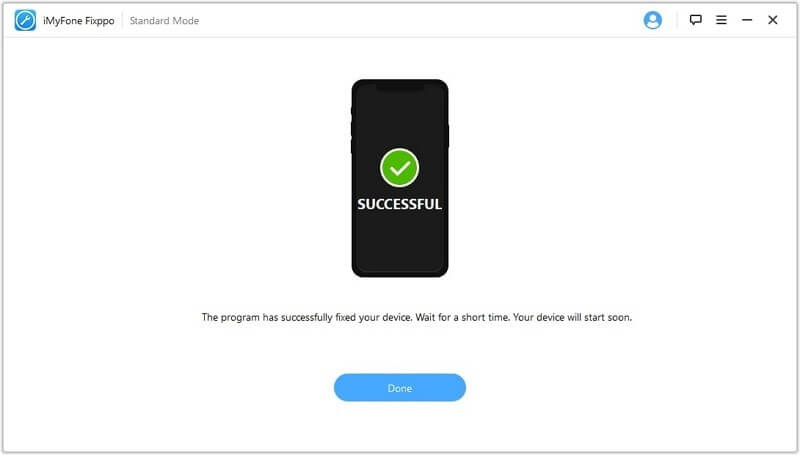
Step 6: The software will start repairing the device immediately. After some minutes, restart the iPhone.
Fix 4: Switch Off LTE
Another possible reason for iPhone Call Forwarding function not working is when you see the spinning wheel beside the call forward option. Here, the wheel keeps rotating, but the next screen does not appear. Error in the iOS system of settings causes this issue as well.
The steps to fix the problem cover:
Step 1: Access the Settings option.
Step 2: Opt for Cellular > Cellular Data Options.
Step 3: Check for the “Enable LTE” option and turn it off.
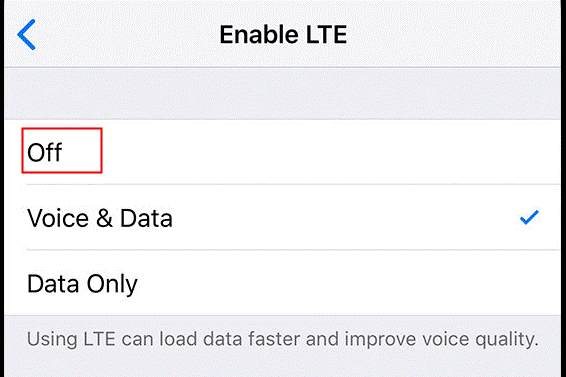
Step 4: Following this, restart the phone device. You would notice the call forward option switched off by default. Now, the function should work better.
Fix 5: Call Apple Support
If all of the solutions you tried out did not work, the issue can be more advanced. The cause can be internal or because of hardware-centric problems. Here, using different techniques to fix the system OS would not work.
Furthermore, trying to fix the device on your own can cause more problems in the device hardware and cause damage. You can directly contact the software support technicians at AppleCare or Apple Support. Alternatively, you can reach a service center at your locality for repair.
Fix 6: Call ATT Support
Another possible issue for call forwarding error can be because of problems with your carrier. This stands mainly in the case of the spinning wheel condition when you try to use the Call Forward option. Directly contact your AT & T carrier via 611 or visit their support page.
Conclusion
Overall, depending on the type of defect in your system or Settings, the Call Forwarding function would show an error. Try to find the leading cause of the issue and find the relevant solution for your situation. Please go through our other posts if you found this helpful.
Popular Post


Recent Post
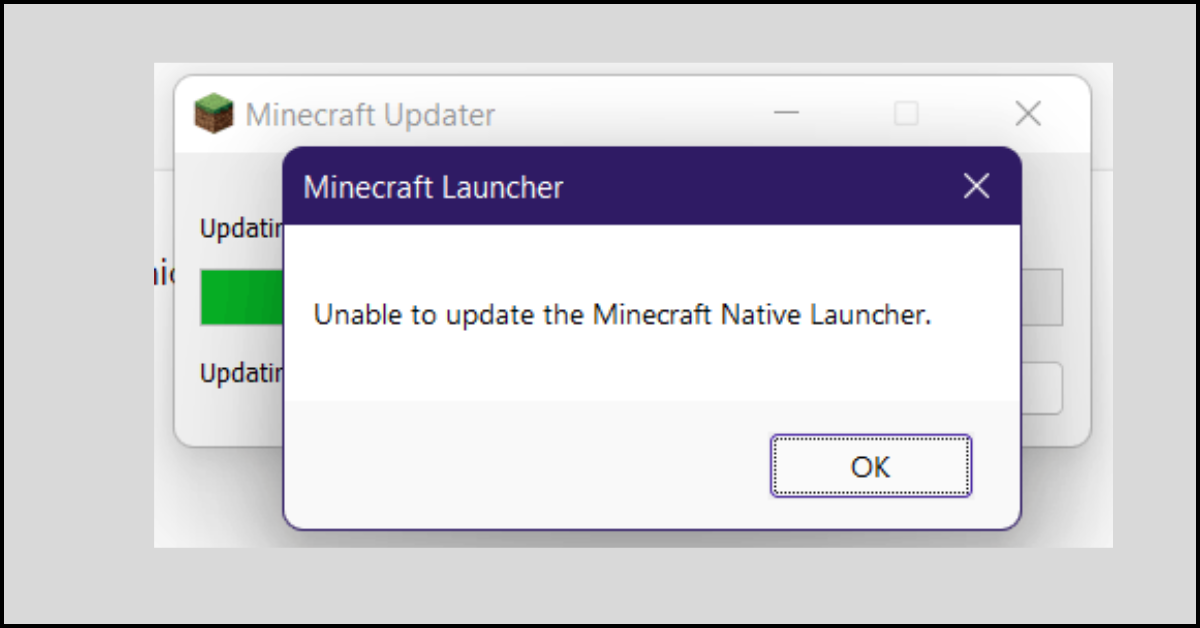
How to Fix Unable to update the Minecraft Native Launcher Windows 11
The “Unable to update the Minecraft Native Launcher” issue can be frustrating. However, there are many ways to fix it. Here, we will discuss some effective ways to fix this problem.

Troubleshooting Guide: How To Fix Copy And Paste Not Working On Windows 10/11
Fix the copy and paste not working issue on Windows 10/11 hassle-free with this comprehensive guide. Here you’ll find effective tried and tested methods that can troubleshoot and permanently resolve the problem.
How to Force Quit on Windows 11 and Windows 10
Encountering unresponsive programs or frozen applications on our Windows devices can be a frustrating experience. When a program hangs or stops responding, it can disrupt our workflow and hinder productivity. This is where the ability to force quit a program comes in handy. Here, we will explore different methods to force quit on Windows 11 […]

How to Enable Secure Boot Windows 11 and Windows 10
One of the key features that can significantly enhance the security of your Windows operating system is Secure Boot. By enabling Secure Boot on your Windows 11 or Windows 10 system, you can protect your device against malware and unauthorized operating systems. Benefits of Enabling Secure Boot in Windows 11 And 10 1. Protection Against […]

How to Change Administrator on Windows 10 and Windows 11
In Windows operating systems, the administrator account holds the highest level of privileges and control over the system. Sometimes, you may need to change the administrator account for various reasons such as security, ownership transfer, or simply to give someone else access to the system. Here, we will explore different methods to change the administrator […]

How to Open BIOS Windows 11 and Windows 10
Here are the best ways to Open BIOS Windows 11 and Windows 10. These steps are very easy.
How to Convert HEIC to JPG on Windows 11 and Windows 10
Learn the best ways to convert HEIC to JPG on Windows and Windows 10 computers.

How to Fix Valorant not uninstalling Windows 11 – Remove Valorant Completely
Online gaming has become increasingly popular, with many gamers enjoying multiplayer games. One such game that has gained a significant following is Valorant. However, like any software, Valorant is not immune to technical issues, and one common problem that players encounter is the difficulty in uninstalling the game, particularly on the Windows 11 operating system. […]
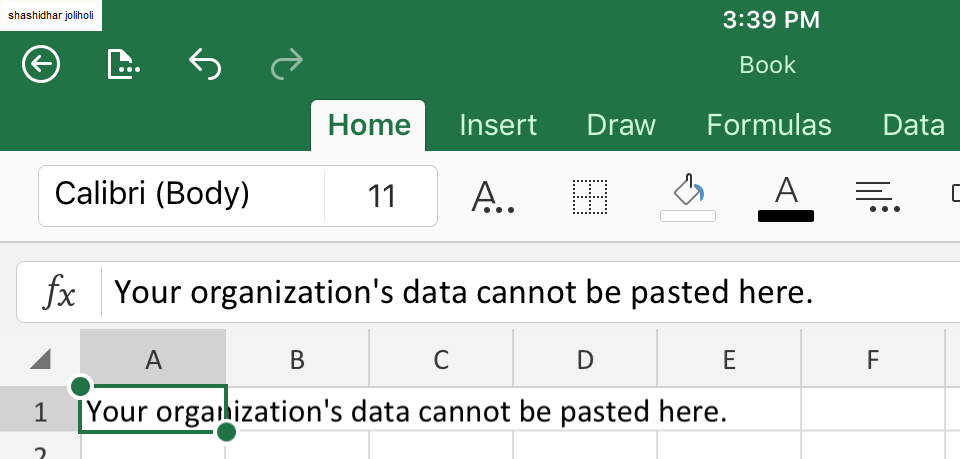
Your Organization’s Data Cannot Be Pasted Here: 7 Ways to Fix It
Encountering the “Your organization’s data cannot be pasted here” error can be frustrating, but armed with the right knowledge and troubleshooting steps, you can quickly overcome this hurdle.
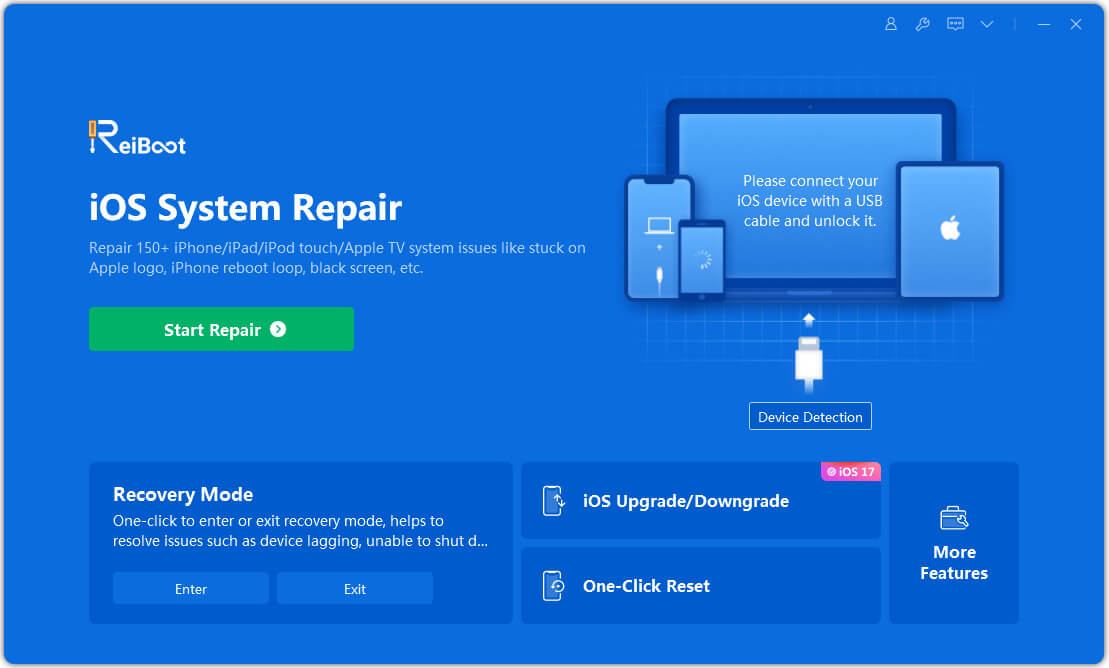
Tenorshare Reiboot Review 2024 [Fully Unbiased]
Read The Complete Unbiased Review of Tenorshare Reiboot

