3 Ways to Downgrade macOS Ventura Beta to macOS Monterey
Apple has recently introduced the latest MacOS Venture beta at the WWDC meet. This new MacOS version has excellent features like Spotlight, Storage Manager, schedule emails, quick actions, and more.
However, MacOS Venture is still in the beta version. So, it is not free from bugs. Thus, the bugs can impact your device if you create the developer preview on your primary device.
Moreover, third-party apps will need some time to support the new MacOS version. So, you can downgrade the MacOS Venture beta to MacOS Monterey to run your operations smoothly.
It is pretty easy to downgrade the MacOS Venture beta to MacOS Monterey. Let’s explore the process in detail.
Why Do You Need to Downgrade macOS Ventura Beta to macOS Monterey?
Some apps, such as the Magnet app and Dropbox, are yet to be optimized for Ventura. Of course, this is a matter of time, but if you’re missing some critical functionality, downgrading the MacOS Venture beta to MacOS Monterey is the best solution.
macOS 13 Ventura is not the only Apple operating system to contain bugs. Some users report that after upgrading MacBooks had become extremely slow. But don’t blame it all on macOS Ventura. With a bit of tweaking and cleaning, you can improve the performance on your own.
Examine Your Mac Before Downgrading
Do you need to downgrade? A downgrading Ventura takes at least an hour to complete. In addition, if something goes wrong, you may have to repeat the process twice. So, before you leave, perform a final checkup on your Mac and try to eliminate any issues with your current Ventura setup.
A single broken plugin can sometimes slow down your entire Mac. Consequently, you should search your Mac for hidden items such as app leftovers, shadow apps, system junk, etc.
Download the free version of CleanMyMac X. It is a popular Mac problem-solving program. It’s a paid app, but it includes many free tools for determining what’s wrong with your Ventura-powered Mac.
When you launch the free CleanMyMac X:
Step 1. Go to the Maintenance tab > check Maintenance scripts.
Step 2, Check the Optimization tab > Launch Agents as well.
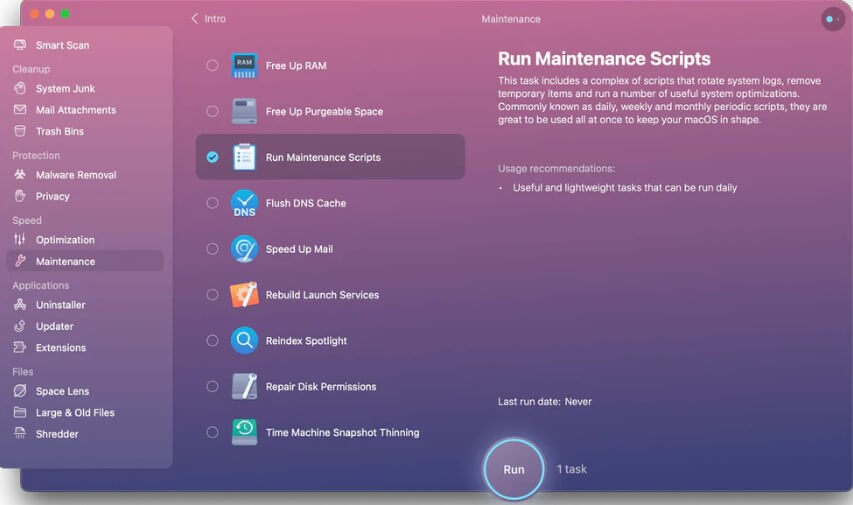
Step 3. Launch Agents tool allows you to disable all of the invisible plugins that can cause problems on your Mac.
Prerequisites Before Downgrading macOS Ventura Beta to macOS Monterey
Here are a few points that you must consider to downgrade your MacOS:
- You require a working internet connection that is reasonably fast.
- You should create a backup of your current data because all of your data will be permanently lost if you downgrade macOS Ventura to macOS Monterey. Here use Time Machine to back up your data and restore it.
- Create a bootable drive that can run the macOS Monterey installation. This is a must-do step if you own a Mac with a Silicon-based processor.
- You must keep your Mac turned on when downgrading from macOS Ventura to macOS Monetary.
How to Downgrade macOS Ventura Beta to macOS Monterey?
Before starting the downgrading process, check your Mac device. You must follow slightly different steps to downgrade MacOS depending on your device type. Follow these steps to check your device:
Step 1. Go to the Apple Menu > About this Mac > More info.
Step 2. Here, look for Intel or Apple M1 mentions.
Once you know your device, you have three options to downgrade Venture MacOSX. Let’s discuss all methods in detail:
Way 1. Downgrade macOS Ventura Beta to macOS Monterey Using Time Machine
We have mentioned taking a backup before installing the macOS Ventura beta in our guide on downloading and installing it. So, if you have a backup, this is your method. You can also try the other way listed below.
Step 1. Connect the Time Machine hard drive to your Mac.
Step 2. Select Restart from the Apple Icon.
Step 3. Go to the boot selection screen now:
For Apple Silicon Mac: Hold down the power button until the startup screen appears, then select Options > Continue.
For Macs with Intel processors: When you see the Apple logo or hear the startup chime, press and hold Command + R.
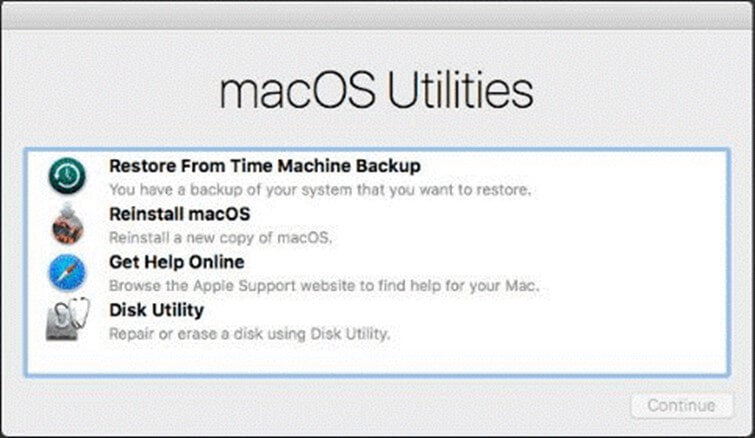
Step 4. Select Restore from Time Machine Backup > Continue.
Step 5. Continue after reading through the process (optional).
Step 6. Select the Backup source and click Continue once more.
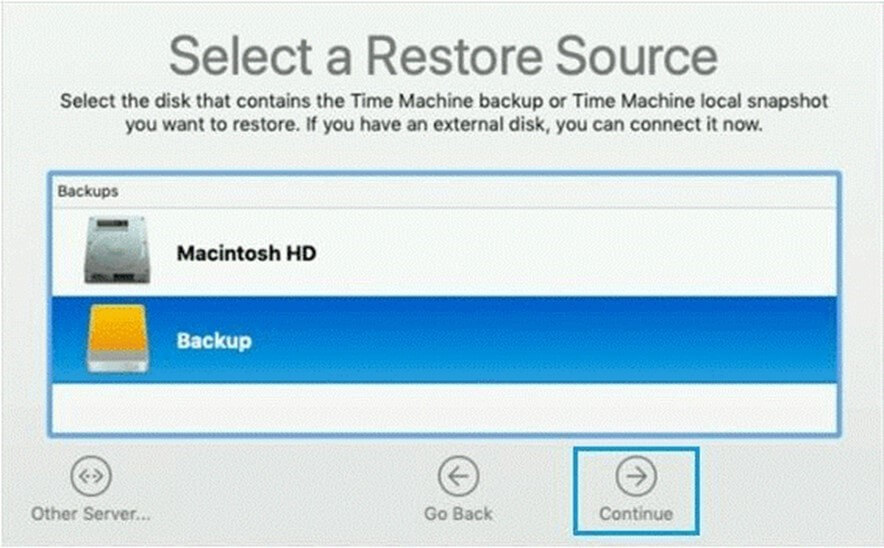
Step 7. Select the most recent macOS Monterey backup and press the Continue button. It may take some time, so relax, grab a coffee, or take a power nap.
Please remember that your Mac’s current data is completely erased when you restore from a backup. Therefore, take a backup of those files if you don’t want to lose them.
Way 2. Downgrade macOS Ventura Beta to macOS Monterey Using MacOS Recovery
If you don’t have a Time Machine backup or the backup isn’t working while restoring, use the macOS recovery method to switch from macOS Ventura to macOS Monterey.
You must have a stable internet connection and a wired keyboard to use this method (or use the built-in keyboard).
Step 1. Shut down your Mac.
Step 2. Switch on your computer and quickly press and hold one of the following keyboard combinations until the Apple logo appears:
Command + R keys to reinstall your Mac’s most recent macOS version.
Upgrade to the most recent macOS version compatible with your device by pressing Option + Command + R.
Shift + Option + Command + R to reinstall the macOS that came with your Mac or the latest version.
Step 3. Enter your password and then press the Continue button.
Step 4. Next, select Reinstall macOS, and then click Continue.
Step 5. Follow the on-screen prompts to select the disc to flash. If you are prompted to enter your Mac’s password, do so.
Remember, it is going to take some time to complete the process. Your computer might turn off and on during the process several times. Don’t turn off your computer till the entire process is complete. Once you see the regular login screen, the process is done. You can start your Mac the usual way and now access MacOS Monterey on your device.
Way 3. Downgrade macOS Ventura Beta to macOS Monterey Using a Bootable Installer
The steps for installing macOS Monterey via a Bootable installer will vary depending on your Mac. This is because the T2 chip in some Intel Macs prevents the installation of external drives:
I. On Intel-based Macs
Apple included the T2 security chip in their Intel Macs to add extra security. Unfortunately, it will also prevent you from installing macOS Monterey via the bootable installer method. So, if you have an Apple Silicon Mac, proceed to the steps for Apple Silicon Macs.
Step 1. While your computer restarts, hold down the Option key.
Step 2. When the boot selection screen appears, let go of the key and press Command + R to enter recovery mode.
Step 3. Once in recovery mode, navigate to Utilities and select Startup Security Utility.
Step 4. Enter your Mac’s password here.
Step 5. Allow booting is selected here.
On your Intel Mac, you have now disabled external boot protection. Let’s use the Bootable installer to install macOS Monterey on your Mac. As follows:
Step 1. Hold the Option while restarting your Mac until you reach the boot selection screen.
Step 2. Boot to the Monterey USB installer.
Step 3. Allow the external disc to be verified.
Step 4. Then, click Disk utility to continue.
Step 5. Under internal, select Macintosh HD (hard drive) and Erase.
Step 6. Now, select Erase Volume Group from the menu.
Step 7. Once your process wraps, click on Done.
Step 8. Select Quit Disk Utility from the Disk Utility menu.
Step 9. Install macOS Monterey and then proceed.
Step 10. Accept the windows and select Macintosh HD before clicking Continue.
That’s all! Wait until the process is finished. After that, you will be greeted with the standard macOS Monterey setup screen.
II. On Apple Silicon Macs
Step 1. Shut down your Mac.
Step 2. Hold down the Power button. Release the hold when you see the loading startup options.
Step 3. Continue by clicking the USB installer.
Step 4. Now, select Quit installs macOS and click Install macOS Monterey.
Step 5. Then, click Disk utility to continue.
Step 6. Click Macintosh HD (hard drive) and then Erase under internal.
Step 7. Then, click Erase once more to confirm.
Step 8. Click on Done once the process is complete.
Step 9. Next, select Quit Disk Utility from the Disk Utility menu.
Step 10. Activate the Mac and then select Exit to Recovery.
Step 11. Accept the windows and select Macintosh HD before clicking Continue.
Step 12. Select the Startup Disk and press the Restart button.
Parting Remarks: Downgrade macOS Ventura Beta to macOS Monterey
There you go, people! The MacOS Venture is a great operating system with many new features. But if it is not something you want right now, you can switch to MacOS Monterey.
That’s it for now! Keep on following the TC for more MacOS news and guides.
Popular Post


Recent Post
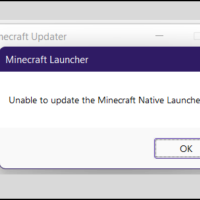
How to Fix Unable to update the Minecraft Native Launcher Windows 11
The “Unable to update the Minecraft Native Launcher” issue can be frustrating. However, there are many ways to fix it. Here, we will discuss some effective ways to fix this problem.

Troubleshooting Guide: How To Fix Copy And Paste Not Working On Windows 10/11
Fix the copy and paste not working issue on Windows 10/11 hassle-free with this comprehensive guide. Here you’ll find effective tried and tested methods that can troubleshoot and permanently resolve the problem.

How to Force Quit on Windows 11 and Windows 10
Encountering unresponsive programs or frozen applications on our Windows devices can be a frustrating experience. When a program hangs or stops responding, it can disrupt our workflow and hinder productivity. This is where the ability to force quit a program comes in handy. Here, we will explore different methods to force quit on Windows 11 […]

How to Enable Secure Boot Windows 11 and Windows 10
One of the key features that can significantly enhance the security of your Windows operating system is Secure Boot. By enabling Secure Boot on your Windows 11 or Windows 10 system, you can protect your device against malware and unauthorized operating systems. Benefits of Enabling Secure Boot in Windows 11 And 10 1. Protection Against […]
How to Change Administrator on Windows 10 and Windows 11
In Windows operating systems, the administrator account holds the highest level of privileges and control over the system. Sometimes, you may need to change the administrator account for various reasons such as security, ownership transfer, or simply to give someone else access to the system. Here, we will explore different methods to change the administrator […]

How to Open BIOS Windows 11 and Windows 10
Here are the best ways to Open BIOS Windows 11 and Windows 10. These steps are very easy.

How to Convert HEIC to JPG on Windows 11 and Windows 10
Learn the best ways to convert HEIC to JPG on Windows and Windows 10 computers.

How to Fix Valorant not uninstalling Windows 11 – Remove Valorant Completely
Online gaming has become increasingly popular, with many gamers enjoying multiplayer games. One such game that has gained a significant following is Valorant. However, like any software, Valorant is not immune to technical issues, and one common problem that players encounter is the difficulty in uninstalling the game, particularly on the Windows 11 operating system. […]
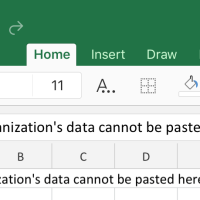
Your Organization’s Data Cannot Be Pasted Here: 7 Ways to Fix It
Encountering the “Your organization’s data cannot be pasted here” error can be frustrating, but armed with the right knowledge and troubleshooting steps, you can quickly overcome this hurdle.
Tenorshare Reiboot Review 2024 [Fully Unbiased]
Read The Complete Unbiased Review of Tenorshare Reiboot

