How To Clean a Computer Motherboard [Mainboard] Without Damage

Last updated on February 16th, 2026 at 10:01 am
Abstract: This page provides complete details on how to clean a motherboard without damaging it and also tips for expanding its lifespan.
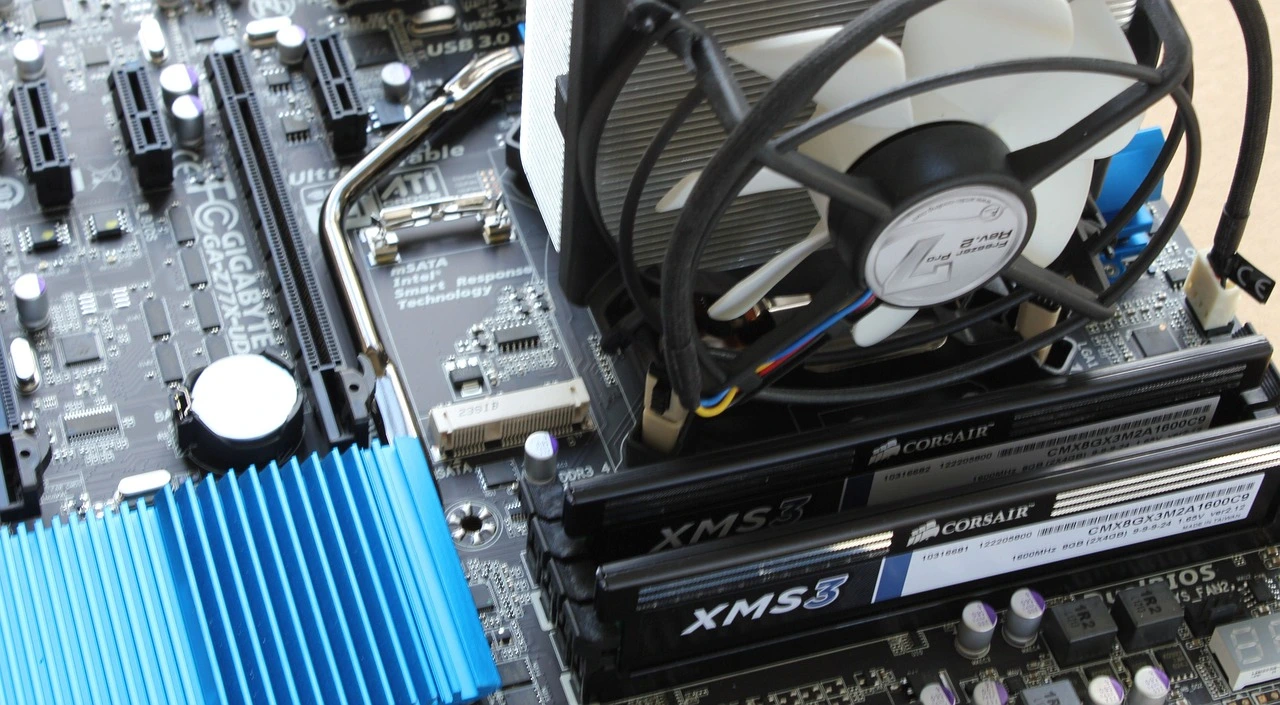
The motherboard is one of the most important parts of your computer. Cleaning and maintaining it regularly is extremely crucial to ensure that it functions properly and delivers optimal performance. However, a major challenge is that it is slightly fragile. Therefore, you need to be extra careful while handling the motherboard.
If you want to clean the motherboard, do it carefully to prevent the risk of permanent damage. Right from removing the components to cleaning and eventually arranging them back, make sure to handle every component carefully. This blog guides you through a detailed procedure on how to clean the computer motherboard without damaging it.
Part 1: Why Clean Computer Motherboards?
You must clean the motherboard to maintain optimal system performance. Dust accumulation on the motherboard can lead to component failure, overheating, and short circuits. Regularly cleaning the motherboard is crucial to avoid these issues.
You need to clean your system once every six months, but this doesn’t mean that you should not clean it at all during this month. Regular dusting is advisable during this time to prevent accumulation and eventual short circuit. Dust accumulation can also heat the system.
Part 2: Equipment Needed for Motherboard Cleaning
When cleaning a motherboard, you need simple tools only, some of which include:
- Head screwdriver
- Blower bulb
- Cotton swabs or balls
- Cleaning brush
- Thermal brush
- Isopropyl alcohol (99%)
- Canned air duster
- Anti-static may
- Anti-static wrist strap
- Anti-static plastic sheet

Part 3: Steps to Clean a Computer Motherboard
You need to follow a step-wise procedure for cleaning the motherboard carefully. Whether it is dismantling everything or using isopropyl alcohol, you must be mindful. You should wash your motherboard regularly, dusting and brushing it once or twice a month. Keeping the system motherboard in best condition is crucial to ensure a long-lasting, exceptional performance.
Referring to your motherboard manual can be of great help for faster cleaning. Here’s a detailed procedure on how to clean a system motherboard without damaging it:
Step 1: Removing the Motherboard
Wear the anti-static wrist wrap and then start unplugging the components from the back of the PC. Make sure that you’re unplugging them somewhere spacious for better cleaning.
Open the side panel and remove power to the graphics card. After that, unscrew the graphics cards and push the latch that is locking your graphics card. After that, you must lift the graphics card from one end. It is recommended to use both hands while removing the graphics card. Once you’re done removing the graphics card, you can unlatch and then remove the RAM sticks.
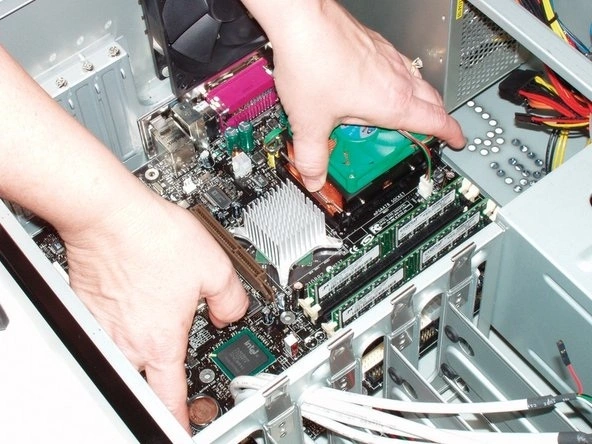
Click a picture of all the motherboard connectors and then unplug them. These connectors are usually plugged with the texts in the opposite direction of the motherboard. If you are going to apply the thermal paste, it is recommended to remove the CPU cooler.
Unscrew the CPU cooler from the processor following a cross pattern. For easy removal, loosen every corner so that it can be taken out easily. Always twist the cooler back and forth for easy removal rather than putting extra force to pull it off. After removing everything, unscrew your motherboard and place it on an anti-static mat.
Step 2: Dusting the Motherboard
Use a light brush for dusting the motherboard. You must clean the VRM heat sink area too. However, it is advisable that you brush lightly and not with additional force as it can rip the wires. After that, you may use a blower bulb or compressed air for removing any loose dust that may be there on the system.

Compressed air is often an ideal choice if there’s excessive dust accumulation. However, if there are stubborn dust particles, you must use cotton swabs. You may use a good-quality contact cleaner too and then wipe the area using a cotton cloth.
Step 3: Thermal Paste Application
You must apply the thermal paste if you have removed the CPU. After applying the thermal paste, you must also remove it from the cooler or CPU using a cotton ball soaked in 99% isopropyl alcohol. Rub the damp ball over the stain in circular motions.
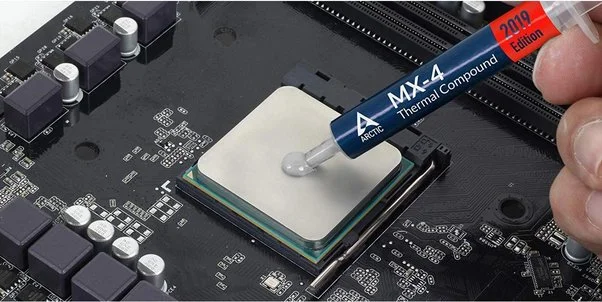
After cleaning, if alcohol streaks are still left, wash them using an alcohol ball. You must use only a small amount of thermal paste on your CPU. After that, you can arrange the cooler properly before pressing it to prevent uneven spreading. Next, screw every corner properly in a cross position and align the placement to avoid the risk of uneven spreading.
Step 4: Arranging it Again
After you’re done with everything, you will have to arrange it back again. It will take some time, especially the screwing process, so make sure that you’re doing it properly. You must screw the front header panels and refer to the photographs you took earlier for reference.
You can refer to your motherboard manual to understand how to attach it back. However, if the manual is not present, you can extract the information online as well using your motherboard’s model number.

You should be extra careful while putting back the RAM, graphics card and CPU cooler. After that, you must plug the power connectors to your graphics card and motherboard. Finally, you must focus on the smallest connectors. It is recommended to check for fan connectors as well and not miss out on any important detail.
Part 4: Things to Avoid While Motherboard Cleaning
While cleaning the motherboard, there are specific things you must be mindful of. If you do these, you’ll be causing irreparable damage. Some of the key things to avoid are as follows:
- Never pour any type of liquid on your motherboard directly. Even if your system isn’t plugged in, you should avoid pouring liquid as it can seep into tight spots and it will evaporate.
- For cleaning the motherboard, you must not use anything apart from contact cleaner, isopropyl alcohol, and distilled water. You must use solvents that can easily evaporate so you can put back the components together after cleaning.
- You must not use a vacuum ever for cleaning the motherboard. Vacuums can lead to static charge, which will potentially damage the motherboard when it is not plugged. Instead of vacuums, you may use blowers.
- Do not use hard brushes as it may rip off the wiring damaging the entire motherboard.

Part 5: How to Expand Motherboard Lifespan?
Follow the tips below to expand the lifespan of the motherboard:
- Keep the motherboard clean: A clean motherboard isn’t prone to overheating and ensures proper power supply. Dust and dirt accumulation prevent communication across all components, thereby having a negative impact on power supply.
- Maintain the cool: Even if the motherboard is extremely clean, it can be prone to overheating issues due to lack of ventilation. It is recommended to keep the system cool and keep it away from any heat sources like a radiator or heating vent.
- Use a surge protector: You must use a surge protector to maintain the system motherboard. Sudden electricity surges or lightning can damage the motherboard.
- Keep an eye on the power supply: Always check the power supply as unstable voltage can damage your system. You should keep an eye out for PSU failure, like abrupt shutdowns or noise coming from the unit. In this case, you must change the unit immediately to avoid the risk of power failure.
Conclusion
If you are not planning to upgrade your system, especially the motherboard, it is advisable to clean it regularly. A clean motherboard is less prone to errors. However, if you have a dirty motherboard, it can destroy the entire system. A motherboard plays a crucial role in improving the performance of your system. You must adhere to the dos and don’ts of cleaning the motherboard to prevent the risk of permanent damage.
FAQs
- How to clean the motherboard without damaging it?
When cleaning the motherboard, it is advisable to be extra cautious. You must use short bursts of compressed air to remove dust.
- Can I use thinner to clean a motherboard?
No, you must never use a thinner for cleaning the motherboard. These thinners can damage electronic components. Instead, you must use solvents that do not cause harm to the motherboard.
- What is the best cleaner for a motherboard?
A regular dry toothbrush works the best for cleaning a motherboard. However, it is still advisable that you’re extra careful with it.
Popular Post
Recent Post
How To Clear Cache Memory On Windows 11/10 [2026]
Learn how to clear cache memory on Windows 11/10 using safe built-in methods to improve speed, free space, and maintain smooth system performance.
Windows Installer Cleanup Utility: Complete Review And Alternatives
Detailed review of Windows Installer Cleanup Utility, reasons for removal, risks, and safer modern alternatives explained clearly.
How To Clean Junk Files On Windows 11/10
Learn how to clean junk files on Windows 11 and 10 using safe, simple steps to boost speed and free storage space effectively.

Clearing App Cache Data on Windows 11/10: Complete Guide
Learn how to safely clear app cache on Windows 11 and 10 to fix slow apps, free disk space, and improve overall system performance.
How To Clean Up System Files On Windows 11/10: Complete Guide
Explore a step-by-step guide explaining how Windows users can safely remove unnecessary system data using built-in tools.
How To Clean a Laptop Fan Without Opening [2026 Guide]
Learn how to clean a laptop fan without opening the device using safe steps, simple tools, and easy methods for better cooling.
How to Clear the Queue in the Printer Automatically in 2026
Learn how to clear the queue in the printer with simple steps. This easy guide explains why print jobs get stuck and how to fix them safely for smooth printing.
How To Clear Delivery Optimization Cache In Windows
Learn how to clear Delivery Optimization Cache in Windows safely and easily. This guide explains steps, precautions, benefits, and FAQs to free space and avoid update issues.
How To Clear Cache in Edge [Windows 11/10]: Latest Guide
Learn how to clear cache in Edge on Windows 11 and Windows 10. Step by step guide with precautions, FAQs, and tips to fix slow pages and errors.
Top 15 Questions About PC Cleaning and Their Answers
Learn safe and simple ways to clean your PC. This guide answers top questions, covers precautions, and gives advanced tips for better PC health and performance.
