How to Print Double-Sided on a Mac
Last updated on October 23rd, 2025 at 2:28 am
Printing documents has become an integral part of our daily lives, and being able to save paper by printing on both sides not only helps the environment but also reduces printing costs. However, many Mac users may find themselves scratching their heads when it comes to figuring out how to enable double-sided printing on their devices.
Fret not! In this blog post, we will walk you through the step-by-step process to print double sided on Mac, whether you’re using a printer directly connected to your Mac or a wireless printer on your network. By the end of this guide, you’ll be well-equipped to unleash the power of double-sided printing and optimize your printing experience on your Mac.
How to Print Double Sided on a Mac
To make the process more streamlined, we have divided our post into three different parts. Follow these steps based on your needs and preferences.
Part 1: Print Double Sided on Mac When Using the Notes App
The Notes app on your Mac offers a convenient and user-friendly way to jot down important information, create to-do lists, and even store longer documents. But what if you want to print these notes and save paper by printing them on both sides? Don’t worry, we’ve got you covered.
In this section, we’ll guide you through the process of printing double-sided pages when using the Notes app on your Mac.
Step 1: Open the Notes App
Launch the Notes app on your Mac by clicking on its icon in the Dock or by searching for it using Spotlight. Once the app is open, locate the note you wish to print and ensure it’s ready for printing.
Step 2: Access the Print Dialog Box
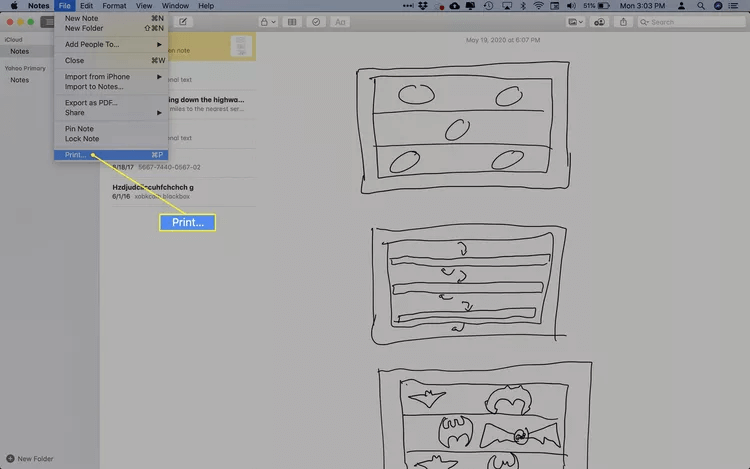
To access the Print dialog box, go to the menu bar at the top of your screen and click on “File.” From the dropdown menu, select “Print” or simply use the keyboard shortcut Command + P.
Step 3: Customize Print Settings
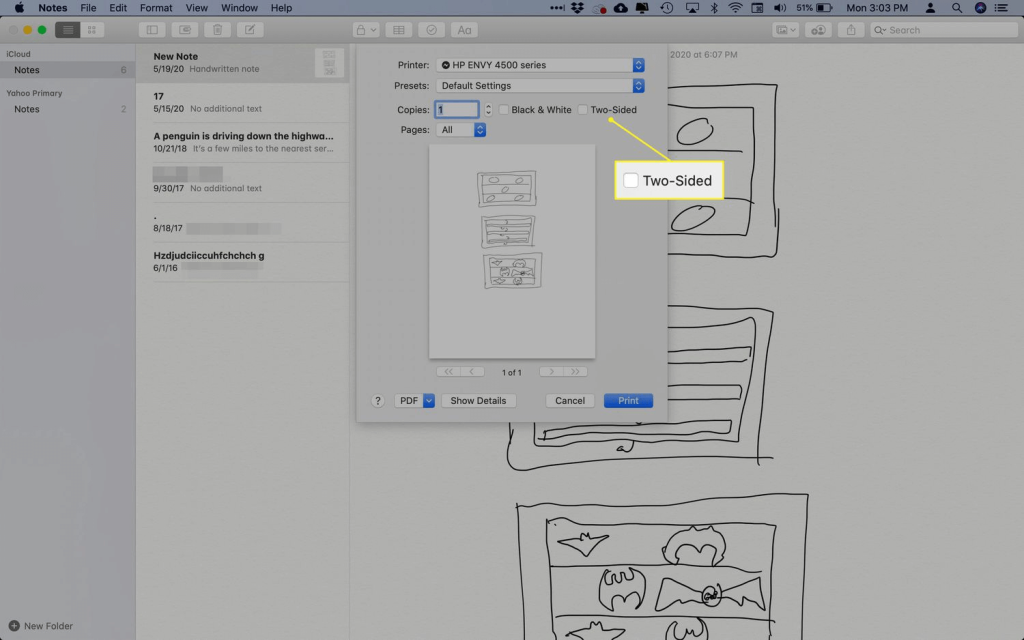
In the Print dialog box, you’ll see various settings and options to customize your print job. Look for the “Two-Sided” or “Duplex” option and make sure it’s enabled. This setting instructs your printer to print on both sides of the paper.
Step 4: Preview and Adjust
Before hitting the Print button, take a moment to preview your document. This will give you an idea of how the pages will be arranged and ensure that everything appears as expected. If needed, you can make additional adjustments to the print settings to suit your preferences.
Step 5: Print Your Double-Sided Document
Once you’re satisfied with the preview and settings, click the Print button to initiate the printing process. Your Mac will communicate with your printer and send the print job accordingly.
Sit back, relax, and let your Mac and printer work their magic to produce your double-sided document.
Part 2: Print Double Sided on Mac Using the Word App
Microsoft Word is a popular word-processing application widely used for creating professional documents, reports, and manuscripts. If you’re a Mac user who frequently works with Word documents and wants to print them double-sided, you’re in the right place. In this section, we’ll walk you through the process to print both sides Mac using the Word app:
- Open the Word app and locate the document you want to print.
- Go to “File” in the menu bar and select “Print” or use Command + P.
- In the Print dialog box, find the “Layout” or “Duplex” options.
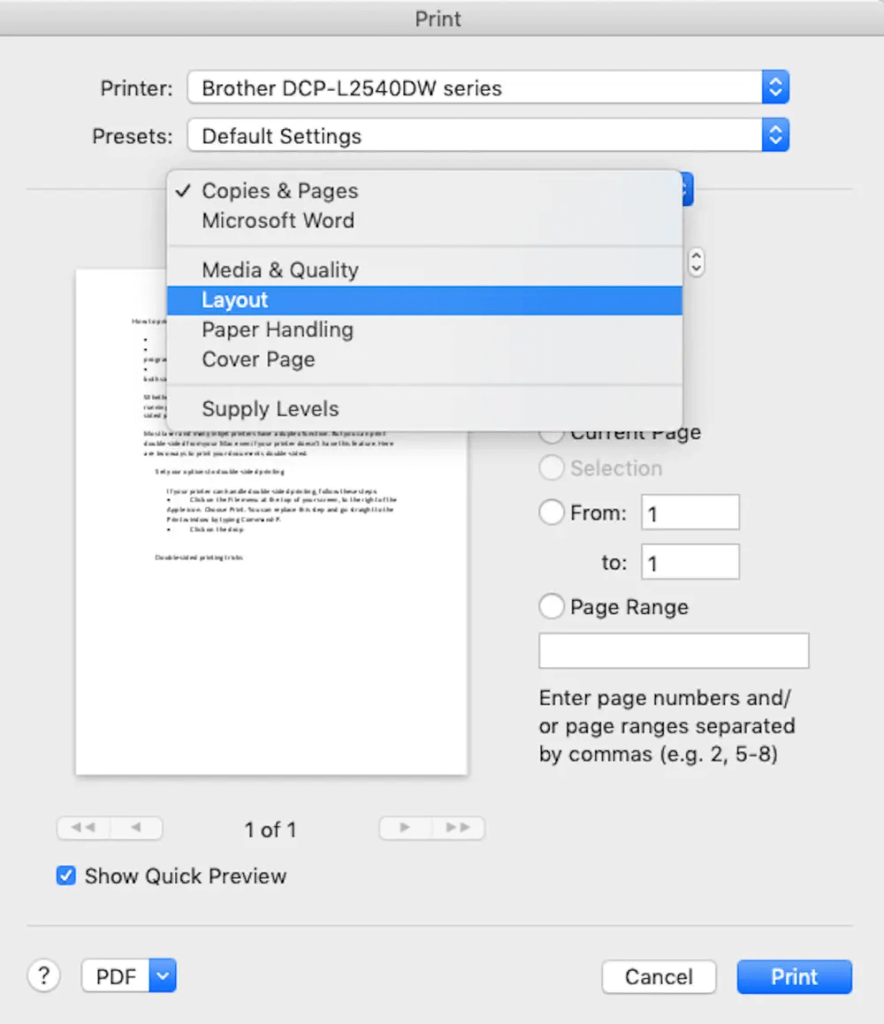
- Choose the appropriate double-sided printing setting, such as “Long Edge Binding” or “Short Edge Binding.”
- Preview the document and make any necessary adjustments.
- Click the Print button to start the printing process.
By following these steps, you can easily print your Word documents double-sided on your Mac, reducing paper usage and promoting a more eco-friendly printing experience.
Part 3: Print Double Sided on Mac When Online
Printing double-sided doesn’t have to be limited to specific applications on your Mac. In this section, we’ll guide you through the process of printing double-sided pages when working with online content, such as web pages or PDFs, on your Mac. Here’s what you need to do to print both sides Mac:
- Start by opening the webpage or PDF document you want to print. This could be a website article, an online form, or any other online content you wish to print double-sided.
- To access the Print dialog box, go to the menu bar at the top of your screen and click on “File.” From the dropdown menu, select “Print”.
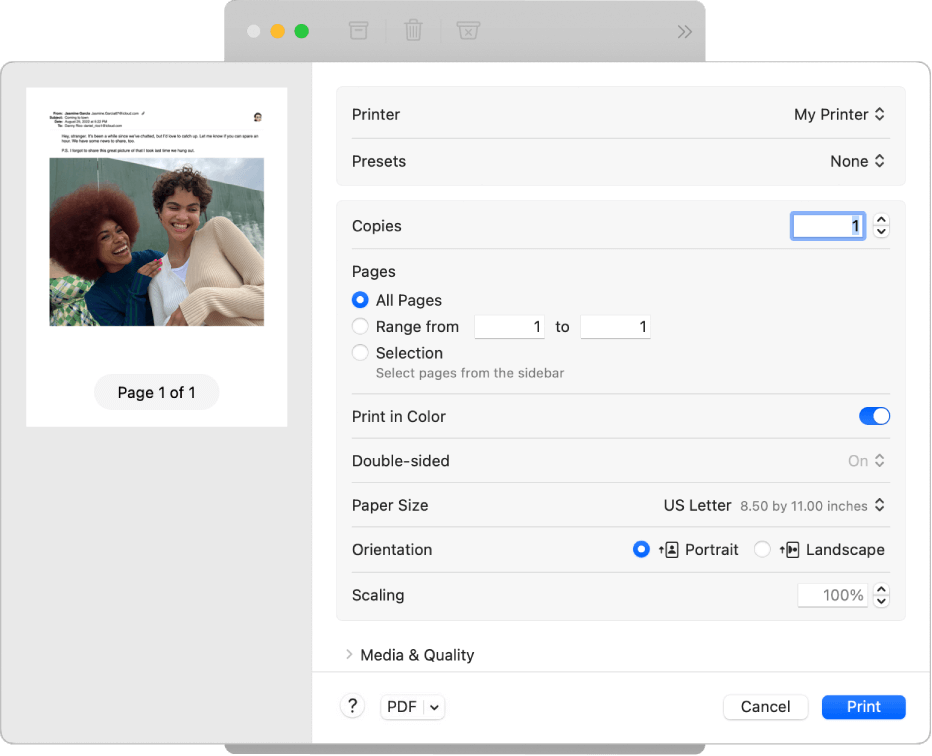
- Once the Print window appears on the screen, select “Print Using System Dialogue”.

- Check on the “Two-Sided” option placed next to “Copies”.
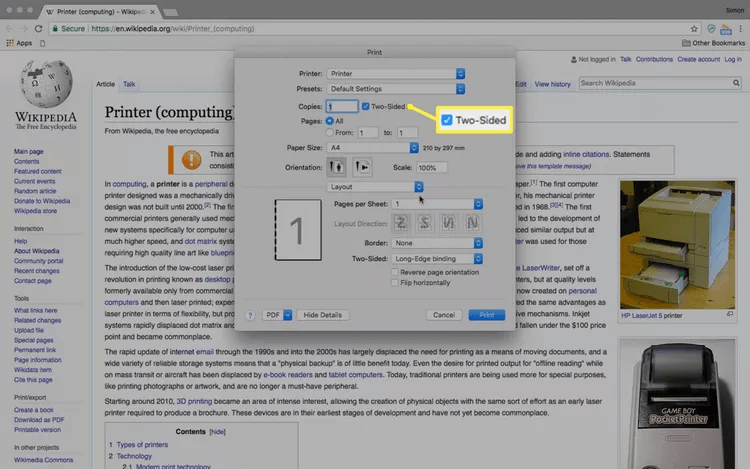
- And finally, click on the “Print” button to get started.
By following these steps, you can print online content double-sided on your Mac, regardless of whether it’s a webpage or a PDF document.
Conclusion
Printing double-sided on a Mac is a simple yet impactful way to save paper, reduce costs, and contribute to a greener environment. Whether you’re using the Notes app, or Word app, or printing online content, following the provided steps will empower you to effortlessly make the best of double-sided printing. By implementing this practice, you can make a positive change in your printing habits and play your part in creating a more sustainable future.
Popular Post
Recent Post
How to Clear the Queue in the Printer: A Step-by-Step Guide
Learn how to clear the queue in the printer with simple steps. This easy guide explains why print jobs get stuck and how to fix them safely for smooth printing.
How To Clear Delivery Optimization Cache In Windows
Learn how to clear Delivery Optimization Cache in Windows safely and easily. This guide explains steps, precautions, benefits, and FAQs to free space and avoid update issues.
How To Clear Cache in Edge [Windows 11/10]: Latest Guide
Learn how to clear cache in Edge on Windows 11 and Windows 10. Step by step guide with precautions, FAQs, and tips to fix slow pages and errors.

Top 15 Questions About PC Cleaning and Their Answers
Learn safe and simple ways to clean your PC. This guide answers top questions, covers precautions, and gives advanced tips for better PC health and performance.

11 Mistakes To Avoid While Cleaning a PC
Cleaning a PC is important because dust and dirt can slow the system and heat up the parts. A clean computer also lasts longer and works with fewer sudden issues. Many users clean their PCs only when they notice noise or overheating. This delay can make the job harder and sometimes cause more trouble. A […]
How To Clean a Gaming PC: Complete Guide
A clear and expanded guide that shows how to clean your gaming computer, maintain airflow, protect hardware, and keep performance smooth with simple methods for all user levels.

How to Clean Your Windows Registry (Safe Methods)
Learn safe ways to clean Windows registry entries using built-in tools, backups, and trusted cleaners. Follow simple steps, avoid risks, and keep your system fast and stable.
How to Clean a Laptop Webcam Lens Without Damage
Learn how to clean a Laptop Webcam Lens with simple steps, safety tips, and advanced methods to keep your webcam clear, sharp, and ready for video calls or recordings.

How To Clean the Speakers of Your PC or Laptop
A clear and simple guide on how to clean speakers of a PC or laptop with safe steps, precautions, and advanced care tips that help restore bright and steady sound.
PC Cleaning Tips For Beginners and Advanced Users
A complete guide that explains simple cleaning methods, safety steps, airflow care, and advanced maintenance habits for beginners and skilled users.
