6 Ways to Check If a USB Drive Is Bootable in Windows
Have you booted a USB drive? And now wondering whether it is optimized properly or not? In that case, you don’t have to restart your PC to check your USB drive. Instead, there are ways to check if a USB drive is bootable in Windows without rebooting your device.
If you have the ISO and a spacious pen drive, Windows can allow you to boot a USB drive quickly. However, there is no built-in tool to create a bootable USB drive.
Usually, bootable drives work perfectly fine in Windows. But unfortunately, in some cases, bootable drives don’t work properly. So, to rule that out, you have to check if your USB drive is bootable in Windows or not.
This quick and easy guide can help you examine whether your USB drive is bootable or not.
How to Check If a USB Drive Is Bootable in Windows?
There are several ways in Windows to determine if a USB drive is bootable. Here are a few easy ways to check a USB drive on Windows:
Way 1. Disk Management Tool
Bootable USB drives are visible in Disk Management. So, you can open Disk Management properties on your computer to easily check if a USB drive is bootable on your Windows device or not. Here’s how to do it:
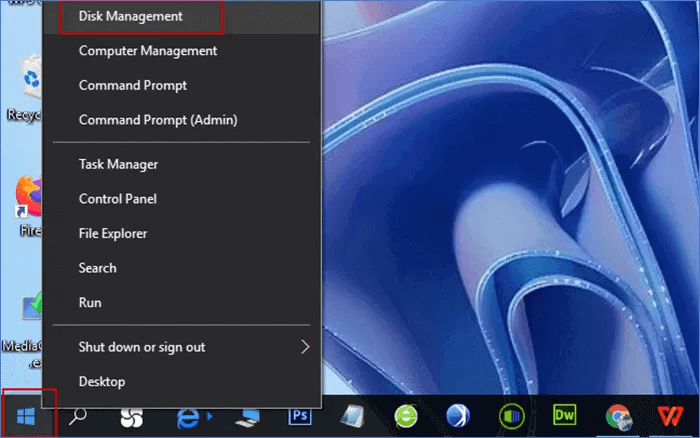
Step 1. Right-click on the Start menu and select Disk Management.
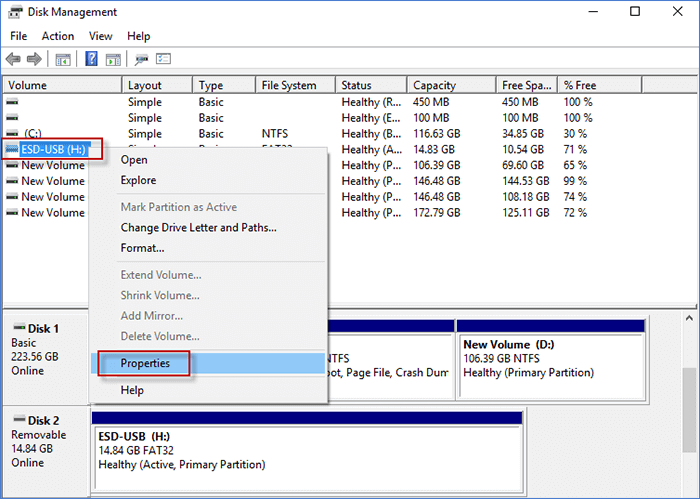
Step 2. Look for your plugged-in USB drive, right-click on it and select Properties.
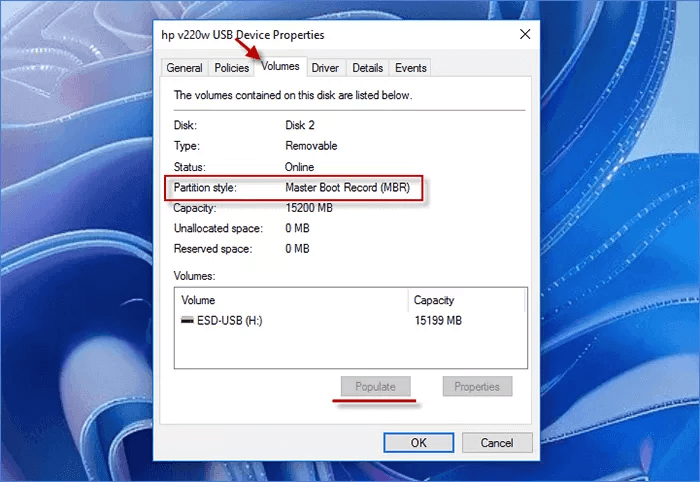
Step 3. On the Properties window, click on the Hardware tab and select your USB drive. Afterward, click on Properties.
Step 4. Enter the Volume section if your Partition style is GUID Partition Table or Master Boot Record. Besides this, you will see a no volume status without unallocated status. You can click on the Populate if your device information is not visible.
Way 2. Booting Test
Do you want to check for a bootable USB drive on Windows 10? Then, the easiest way is to boot your computer from a USB. If you can boot your computer from a USB without a hitch, it ensures your drive is bootable. Before trying this method, ensure your computer is running and the USB drive is connected. Then, follow these steps:
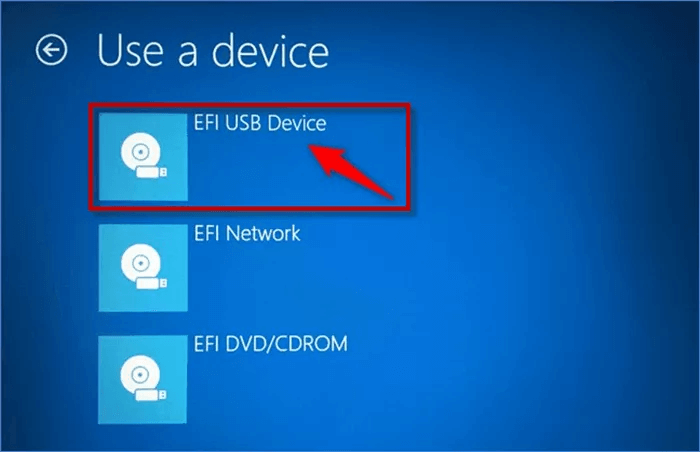
Step 1. From the Power menu, click on Restart while holding Shift. Then, select Use a device to boot Windows.
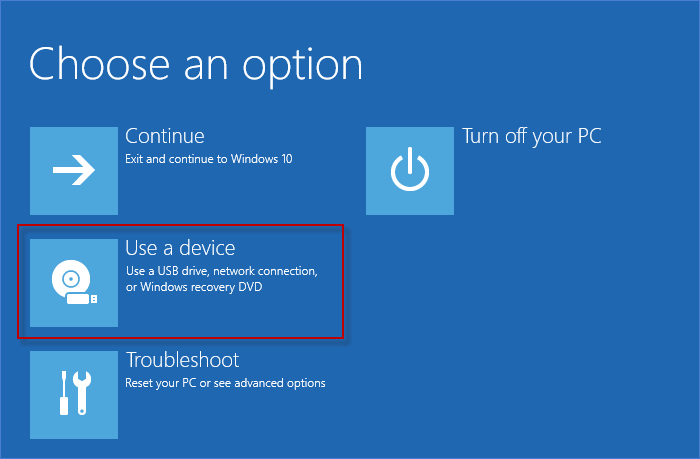
Step 2. Select the USB drive plugged into your device and see if the PC can boot from it.
Remember, if your drive is FAT32 format, it has an EFI/boot library or a bootia32.efi /bootx64.efi file. However, your booting test can fail due to incompatible formats. In that case, you have to try other methods to check if a USB drive is bootable in Windows.
Way 3. Use the Command Line Program
You can also use the Command Prompt to ensure your USB drive is bootable. Entering the right command, you can view the disk properties. Follow these steps to do so:
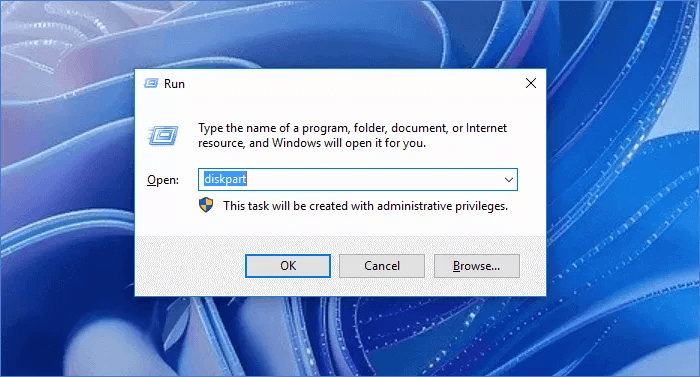
Step 1. Press Windows + R keys to open the Run command box. Then, type diskpart and press the Enter button.
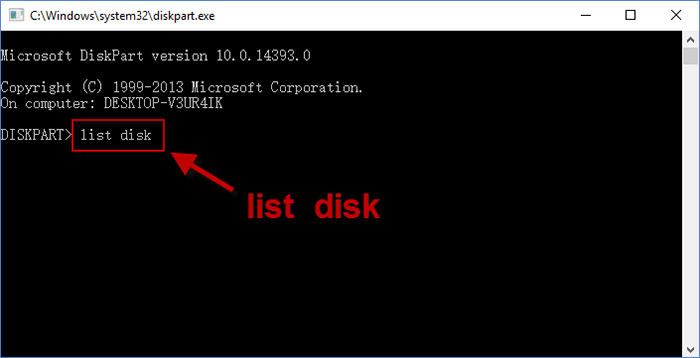
Step 2. On the Command Prompt window, type list disk and hit the Enter button.
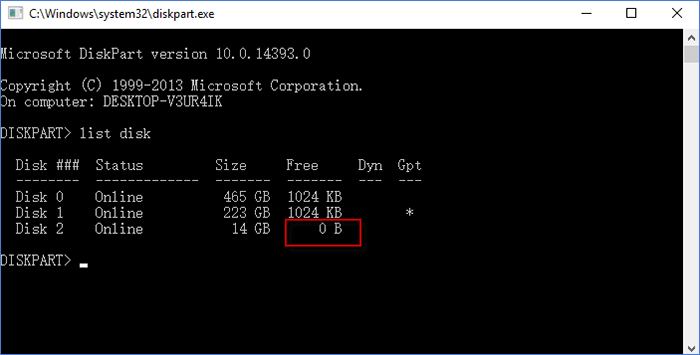
Step 3. Now, all the disk information will be listed on your screen. It is bootable if your portable pen drive shows no or very little volume.
Way 4. Check Using the PowerShell Command
Another command-line way to check the USB drive is PowerShell. This can work as follows:
Step 1. From the Taskbar, search for PowerShell.
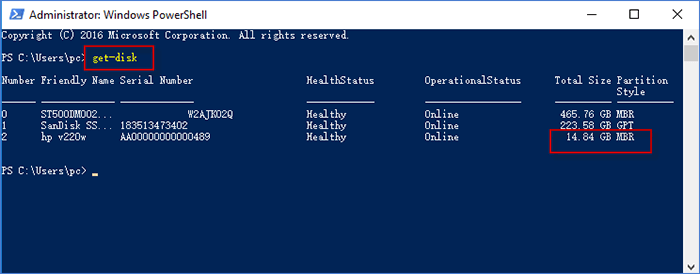
Step 2. Once on the PowerShell window, enter get-disk, and you will get your disk information. The USB drive is bootable if the device status is healthy and the partition style is GPT or MAR.
Way 5. Get MobaLiveCD
MobaLiveCD is a third-party tool that you can use to check your disk information. It is a free virtualization program for Windows. It can allow you to virtually run an operating system from a USB drive without rebooting your PC or installing OS on your system. Here’s how you can work with MobaLiveCD:
Step 1. Download MobaLiveCD on your computer. Then, right-click on the MobaLiveCD file and select Run as administrator.
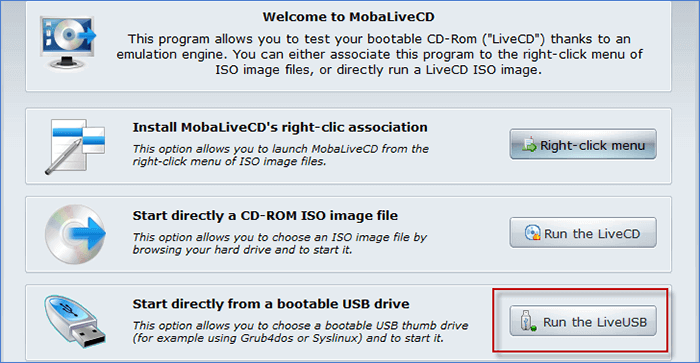
Step 2. Click on the Run the LiveUSB next to the Start directly from a bootable USB drive.
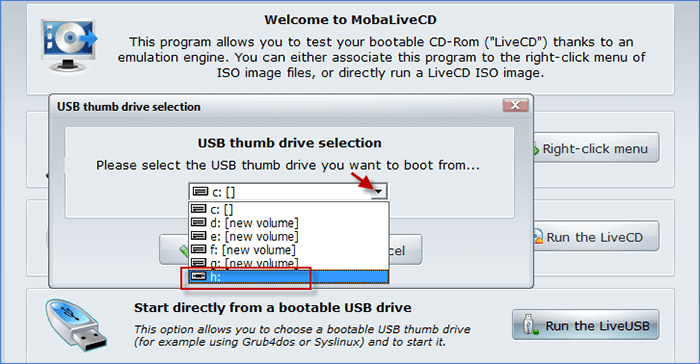
Step 3. When a popup window appears, select your USB drive from the dropdown menu. And then click on OK to continue.
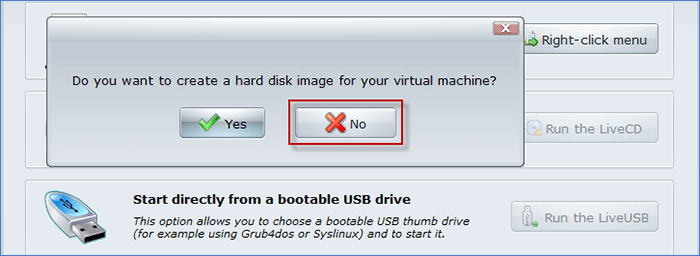
Step 4. Select the No option if you are asked to create a hard disk image for your machine.
Step 5. Now the QEMU window will appear with the booting command prompt. It means MobaLiveCD is trying to boot the system from the USB drive. Wait until the Windows logo appears on your screen and confirm that your USB drive is bootable.
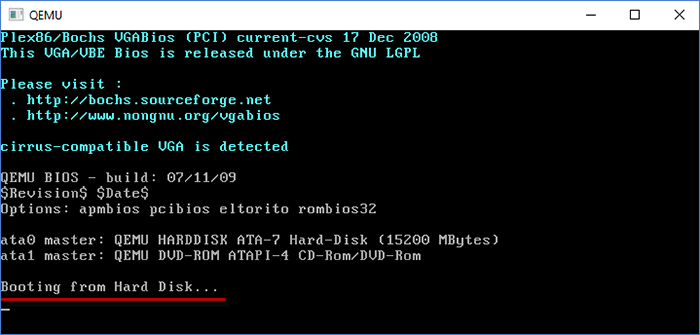
Just one thing, MobaLiveCD only supports Legacy BIOS bootable drives. So in case your bootable drive is created in UEFI mode, you cannot test your USB drive with this tool.
Way 6. Use the Magic ISO Maker
Magic ISO Maker is an old and trusted freeware tool to check if a disk image is bootable or not. This program works best with images. So, you can use Magic ISO Maker to ensure an image is bootable before burning it to a USB drive. Follow these steps to use Magic ISO Maker:
Step 1. Download and install Magic ISO Maker on your Windows computer.
Step 2. After the installation, launch the program and select Open from the File menu.
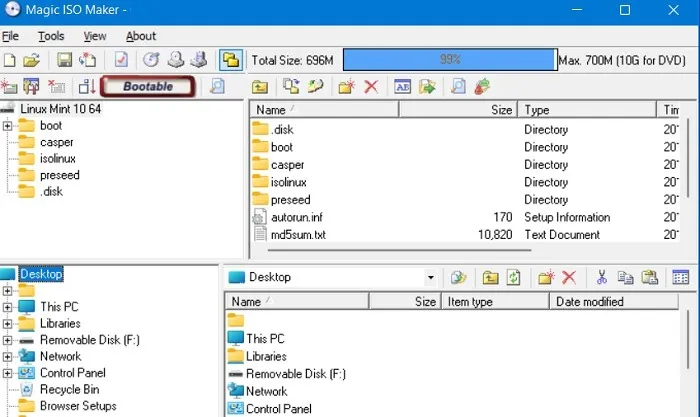
Step 3. Next, select your ISO file from the menu.
Step 4. On the menu bar, if it says Bootable, it means ISO will be bootable once it is burned to your USB drive. If it doesn’t say bootable, it will not create bootable media.
How to Create a Bootable USB Drive?
Now that you know how to check if a USB drive is bootable in Windows, let’s also see how you can create a bootable USB drive. As we already mentioned, Windows has no default tool to boot drives, so you can use these two third-party tools to boot a USB drive:
BalenaEtcher
BalenaEtcher is the fastest and most reliable tool to boot your USB drive. The software can etch any ISO files on the drive. After installing BalenaEtcher on your computer, follow these steps:
Step 1. Launch the application and select your USB drive as the source drive.
Step 2. While working with large ISO files like Raspberry Pi Desktop, there is not always a need to download the ISO separately.
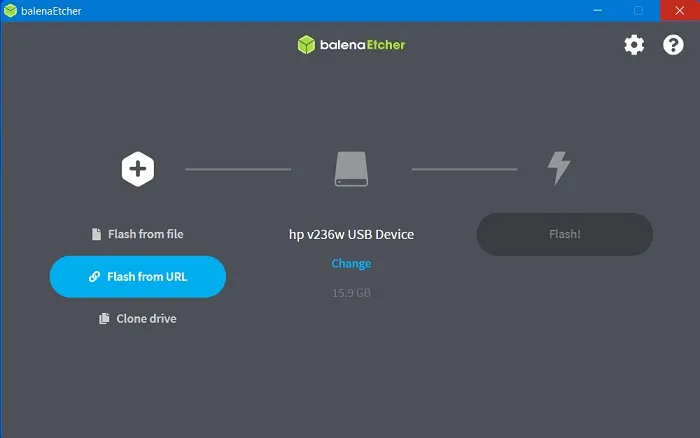
Step 3. You can simply copy-paste the ISO download link, which will etch to your drive.
Step 4. Click on the Flash button when you can see both the source and destination drives.
Step 5. All the existing data on the drive will be removed while bootable media is created. In some cases, the USB drive might decompress first, which can take a while.
Step 6. Wait for the USB drive to start flashing. This will come directly afterward decompression.
Step 7. Once the flashing is done, BalenaEtcher will validate your bootable disk. Again, it will only take a couple of minutes.
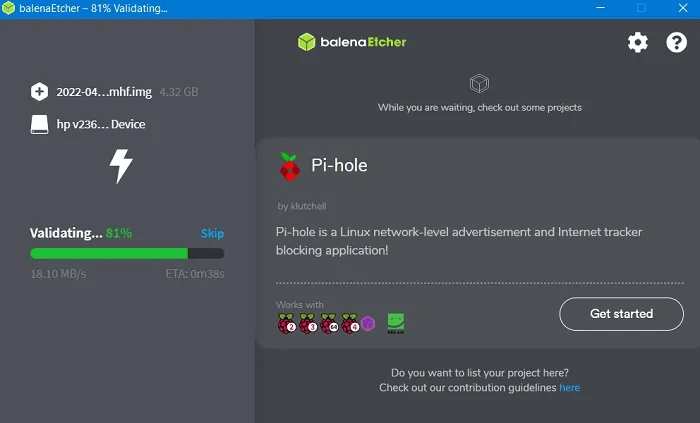
Step 8. Now you will see a Flash Complete message when the USB drive is converted into a bootable disk.
Rufus
Another great tool to create a bootable drive is Rufus. It is an open-source and lightweight program. Plus, you have the option to not install anything else on your system.
Here’s how you can quickly create a bootable drive with Rufus:
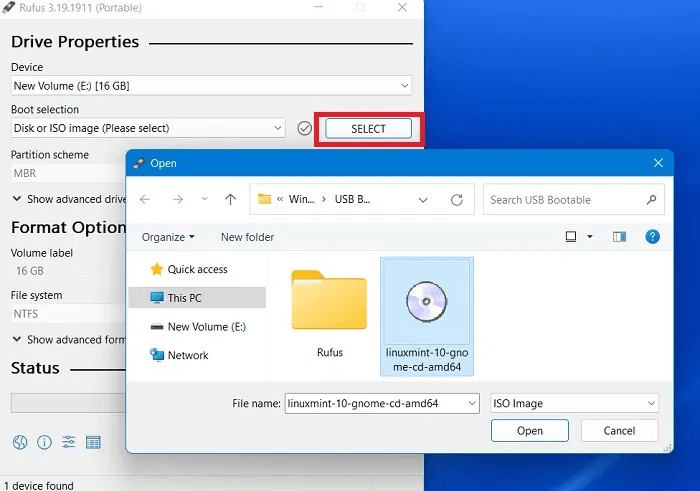
Step 1. Launch the installed or portable Rufus application on your computer.
Step 2. Connect the USB drive to your computer. Rufus will automatically detect it.
Step 3. To set your destination, click on the Select next to Boot Selection and choose your ISO installation file.
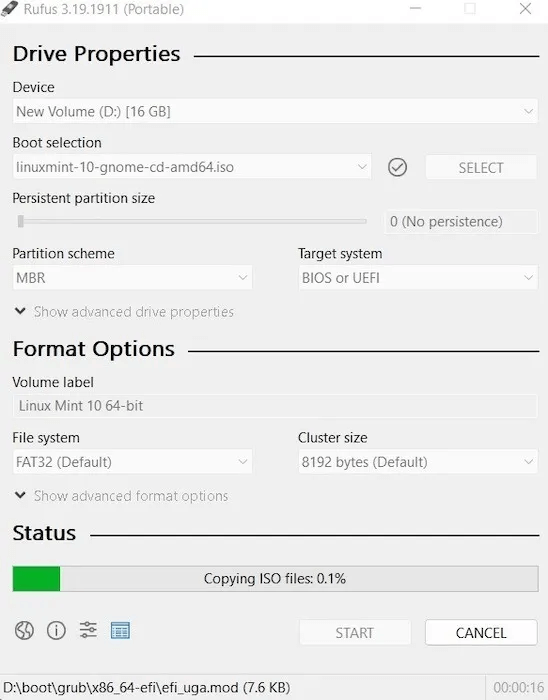
Step 4. There, you can also set advanced drive properties and format options. Ensure your partition scheme in Drive Properties is set as MBR.
Step 5. Under the Format Options tab, select the Volume Label. Give it a desired name.
Step 6. Ensure your File System is set as FAT32, which is a default bootable format for Windows. Doing so will erase all the existing files from the USB drive.
Step 7. You should also check the Create extended label and icon files option. Optionally, you can also examine and check the device for bad blocks.
Step 8. Once you find everything perfect, click on the Start button to create a bootable USB drive.
Parting Note:
There, you can see people; it is possible to check bootable USB drives without restarting your computer. You can use default solutions like Disk Management and Command Prompt. If that doesn’t work, you use a third-party tool like MobaLiveCD.
Now that our wrap. For more informative Windows guides, stay tuned with us.
Popular Post
Recent Post

Advanced SystemCare: Tool To Clean Your PC
Your computer slows down over time. Files pile up, junk builds inside the system, and things start to feel sluggish. You open a browser, and it takes forever. Programs crash without warning. This is a sign that your PC needs a good cleanup. Many users ignore these signs. They think buying a new computer is […]

Top 10 PC Cleaning and Optimization Tools For Windows 11/10
Discover the best PC cleaning and optimization tools for Windows 11 and 10. Remove junk files, improve speed, and keep your PC healthy with trusted cleaners.

Clear Microsoft Teams Cache On Windows PC [Complete Guide]
Learn how to clear Teams cache on Windows PC with 3 easy methods. Fix slowdowns, glitches, and errors fast. A simple guide for every Windows 11 user.

How To Clear Browsing History on PC: Chrome, Edge, Firefox, Opera
Learn how to clear browsing history on PC across Chrome, Edge, Firefox, and Opera with easy steps, tips, pros, and FAQs.

Clear Cache and Cookies: Complete Guide For Windows 11/10
Learn how to clear cache and cookies on Windows 10 and 11. This complete guide covers Chrome, Edge, and Firefox with simple, step-by-step instructions for every user.

How To Clean PC Trackpad/Touchpad Without Damaging It
Learn how to clean PC trackpad and clean PC touchpad safely with simple steps. Improve performance, remove dirt, and keep your laptop surface smooth and responsive.

How To Clean Your GPU/Graphics Card [Complete Guide]
Introduction A graphics card is one of the most important parts of a computer. It handles visuals, gaming, video editing, and design work. Over time, dust builds up inside it. This dust blocks airflow and traps heat. When heat increases, performance drops. In some cases, the system may even crash. That is why learning how […]

How To Clean PC Power Supply Unit Safely Without Damaging
Follow simple, safe steps to clean your computer’s power supply unit. Improve cooling, reduce overheating, and protect your PC’s performance.

How To Clean a CPU Without Damaging It [Complete Guide]
Learn how to clean a CPU safely without damage. Follow simple steps, precautions, and methods to improve cooling, boost performance, and extend your computer’s life.

How To Clear Browser Cache On Windows 11/10 [Chrome, FireFox, Edge]
Learn how to clear browser cache on Windows 11 and 10. Follow simple steps to clean browser cache, fix slow browsing, and improve performance easily.
