8 Ways to Fix Your Windows 10/11 PC Stuck on Restarting
Windows is a dominant operating system. Around 1.4 billion people use Windows 10/11 every day. But, it is not a perfect system. Often people deal with many Windows errors, and the error that we will discuss today is “Windows stuck on restarting.”
Windows 10 stuck on restarting is a common error that freezes your screen on the restarting screen. The error is often spotted after the system updates or corrupted system files. No matter the cause, we have all the solutions listed to fix your Windows stuck on restarting.
Causes Behind Your Windows 10 PC Stuck on Restarting
Several reasons can send your computer to a restart loop, such as:
Boot glitch
A typical boot glitch that appears after the botched installation of a Windows feature update is a common scenario where you will encounter this problem. If this scenario applies to you, resolve the issue by forcing a shutdown or performing a power-cycling procedure.
System file corruption
Corrupted operating system files can also cause this issue. You have several repair options in this case, but they must be carried out without booting into Windows. To remove system corruption, run SFC and DISM scans, then try a startup repair procedure or, if all else fails, a reset procedure.
3rd party interference
In few cases, this issue may be caused by 3rd party interference that prevents your Windows 11 PC from finishing a recently installed feature update. You can completely avoid this problem by booting up in Safe Mode with networking and allowing your PC to finish the update.
Problematic data is retained between restarts
If you’re experiencing the Windows stuck-on restarting issue on a laptop, there’s a good chance that some problematic data is retained between restarts, perpetuating this behavior. However, several affected users experiencing the same problem confirmed that it was resolved after allowing the laptop battery to drain completely.
Boot-related inconsistency
This issue can also be triggered by an inconsistency that affects the boot-related data and causes your PC to freeze on the Restarting screen. To resolve this issue, use the Windows 11 recovery menu to perform a startup repair.
Recent system change
Also, a recently installed app, a feature update, or an antivirus scan may have caused this scenario inadvertently. Because there are numerous suspects to investigate, the quickest way to resolve the problem is to perform a system restoration and return to a healthy state where this problem is not occurring.
Outdated drive
If you’re still using an HDD rather than the new SSD storage option, you may be experiencing this issue as certain sectors of your storage device begin to fail. Unfortunately, you can’t avoid this problem because you’ll have to replace it eventually, but you can extend its life for some time by running a CHKDSK scan.
Wrong Windows update
Another possible cause of this issue is a recent bad update installed on your system. In this case, you can resolve the problem by going to the Recovery menu and uninstalling the most recent quality or feature update (depending on which one got installed last).
Inadequate PSU
One unlikely cause, but once confirmed by Microsoft, is that your current PSU is insufficient to power all the internals and connected peripherals. You can put this theory to the test by disconnecting all non-essential peripherals and seeing if your PC can get past the ‘Restarting…’ screen.
How to Fix Windows 10/11 Stuck on Restarting?
Now that you know what might cause your Windows computer to be stuck on restarting loops. Let’s now see how you can fix it:
Solution 1. Force Shutdown
One of the most common causes of this problem is a typical boot glitch caused by the incorrect Windows update installation. However, as per the Microsoft community, you can resolve the issue by performing a forced shutdown or power-cycling procedure.
If you’re having this problem on a PC, you can force it to restart by pressing the power button until the power is interrupted. After that, unplug the power cord and wait 60 seconds or more to drain the power capacitors.
Suppose you have this problem on a laptop; press and hold the power button for 60 seconds. After a few seconds, your computer should shut down but remain turned on. Wait till the battery is fully drained before removing the device’s battery and let it rest for some time.
Solution 2. Boot Your Computer to the Safe Mode
Because you’re stuck on the restarting screen and can’t access Windows in normal mode, you’ll need to forcefully restart your PC and boot into Safe Mode to troubleshoot the underlying problem. Here’s how you can do it:
Step 1. Hold down the physical power button until your computer shuts down. Wait a few moments before turning your computer back on.
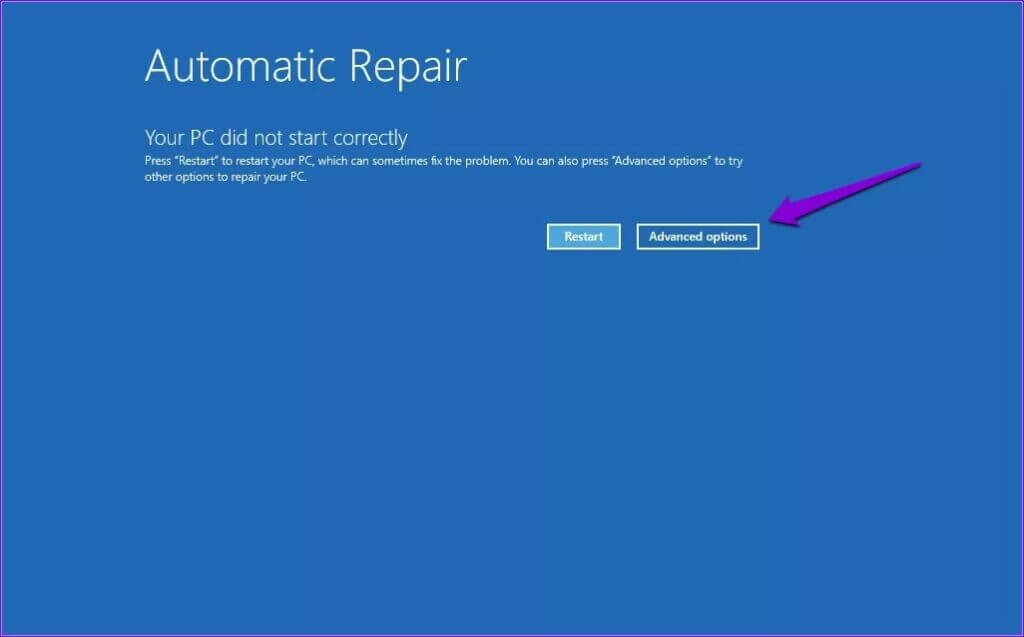
Step 2. As your computer begins to boot, press and hold the power button for a few seconds until it restarts. Repeat the step three times to interrupt the boot process. Step 3. When Windows displays the Automatic Repair screen for the fourth time, select Advanced options.
Step 4. Then, select Troubleshoot.
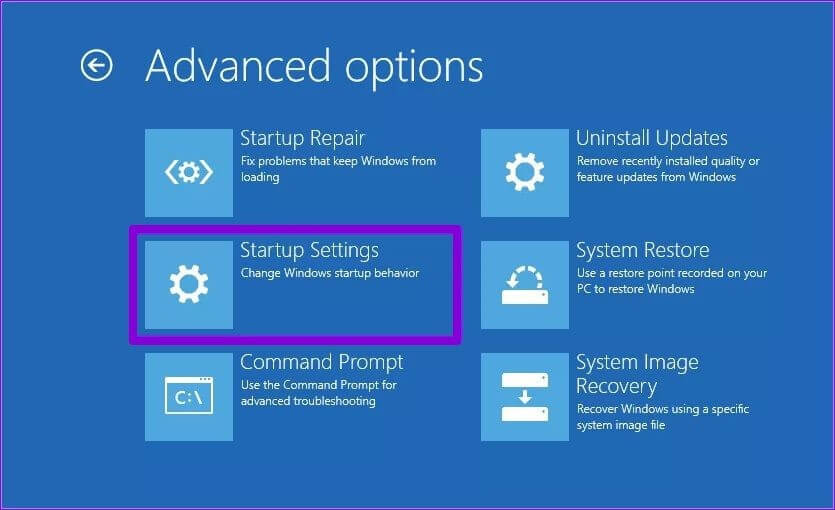
Step 5. Click on Startup Settings on the Advanced Options screen.
Step 6. To access the Startup Settings menu, press the Restart button.
Step 7. Finally, restart your computer in Safe Mode by pressing 4 or F4 on your keyboard.
Solution 3. Uninstall Your Windows Recent Update
Because the problem usually occurs shortly after installing a recent Windows 11 Update, uninstalling it may help. This is how you can do it:
Step 1. Right-click on the Start menu and choose Settings from the menu.
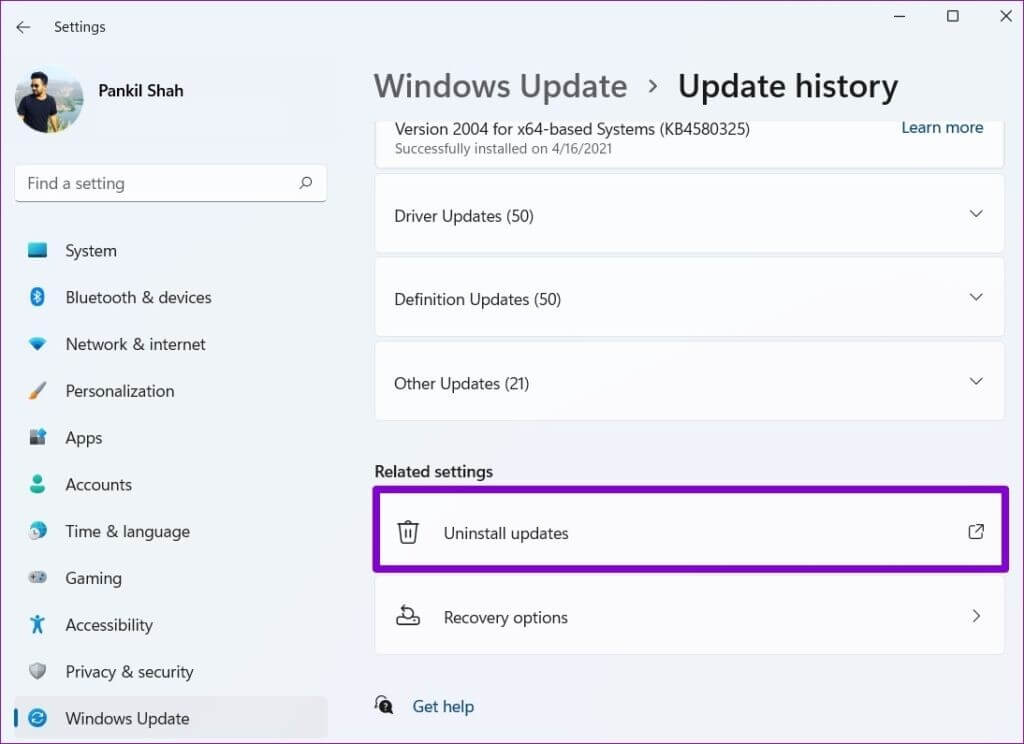
Step 2. Select Update history from the Windows Update tab.
Step 3. Scroll down to the Related settings > Uninstall updates.
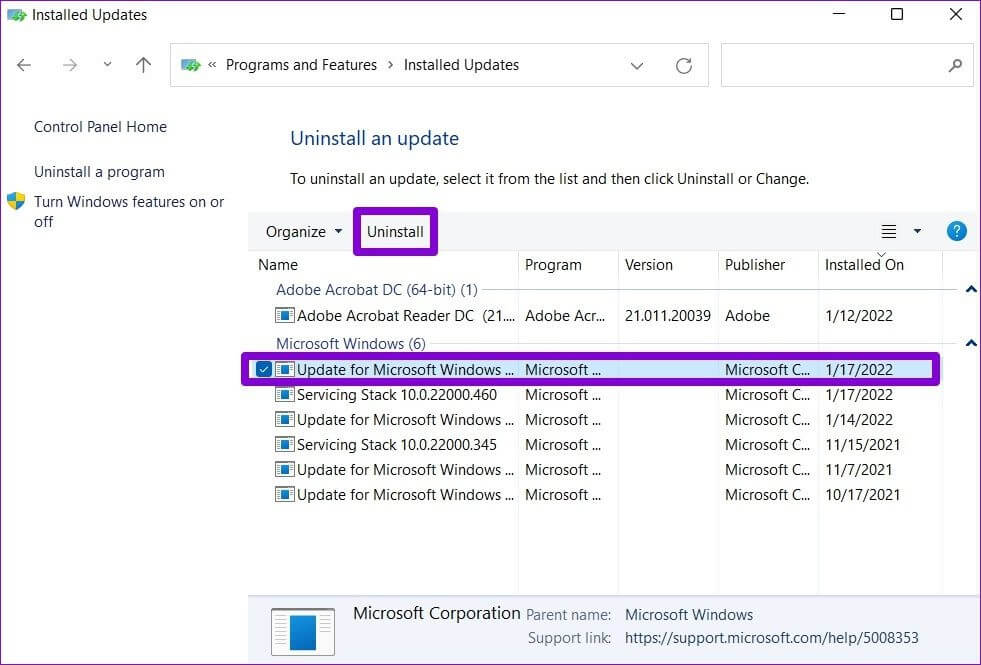
Step 4. Choose the most recently installed update from the list and click the Uninstall button at the top.
Solution 4. Enable Secure Boot
Secure Boot is a crucial security feature that allows your computer to boot only with the Original Equipment Manufacturer (OEM) software. If you disable Secure Boot on your Windows, it may fail to boot properly or become stuck on the restarting screen.
Follow the steps below to check the Secure Boot state in Windows 10/11:
Step 1. Right-click the Start button and select Run from the menu that appears.
Step 2. Type msinfo32 and press Enter.
Step 3. Check the Secure Boot State in the System Information window from the right pane.
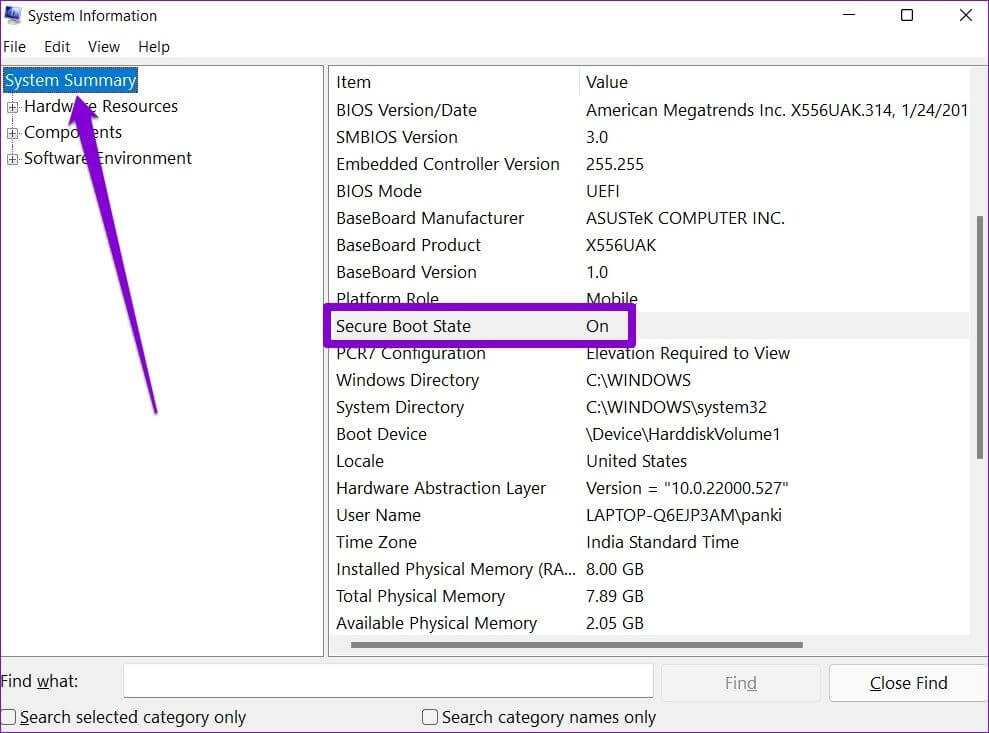
If secure boot is enabled, proceed to the next method. Otherwise, proceed with the steps below to enable secure boot on Windows 11:
Step 1. To launch the Settings app, open the Start menu and select the gear icon.
Step 2. Select Recovery from the System tab.
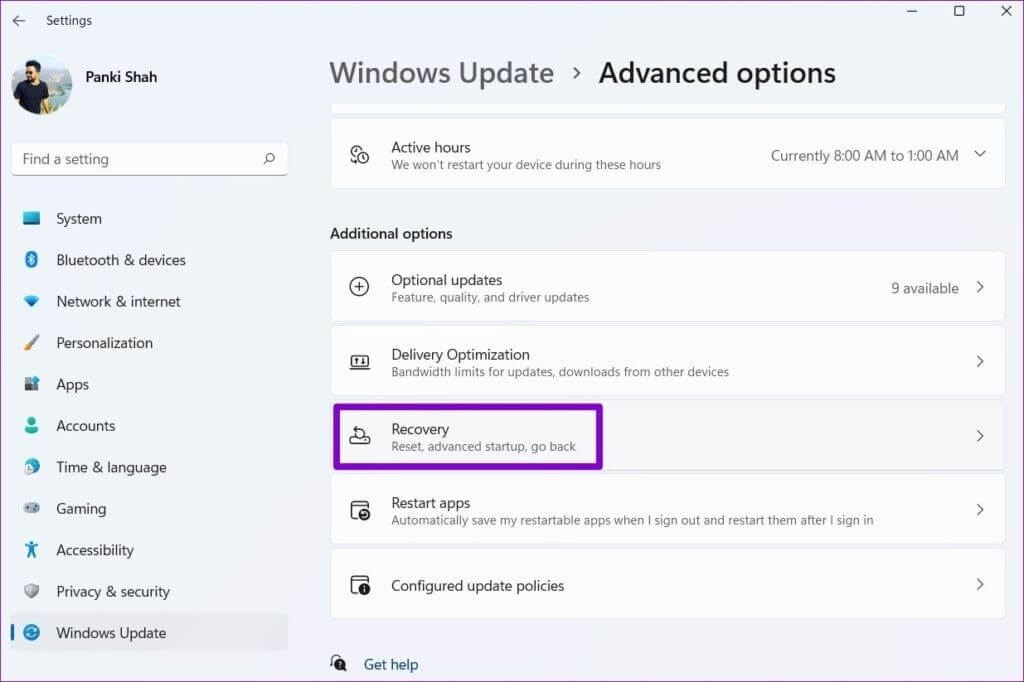
Step 3. Next to Advanced startup, click the Restart now button.
Step 4. Select Troubleshoot.
Step 5. Then, select Advanced Options.
Step 6. Select the UEFI Firmware Settings option from the Advanced Options menu.
Step 7. Select Restart.
Your computer will then enter BIOS mode. It should be noted that the UEFI settings screen will vary depending on the manufacturer and computer model.
Step 8. To enable Secure Boot, navigate to it in the Boot menu and press Enter.
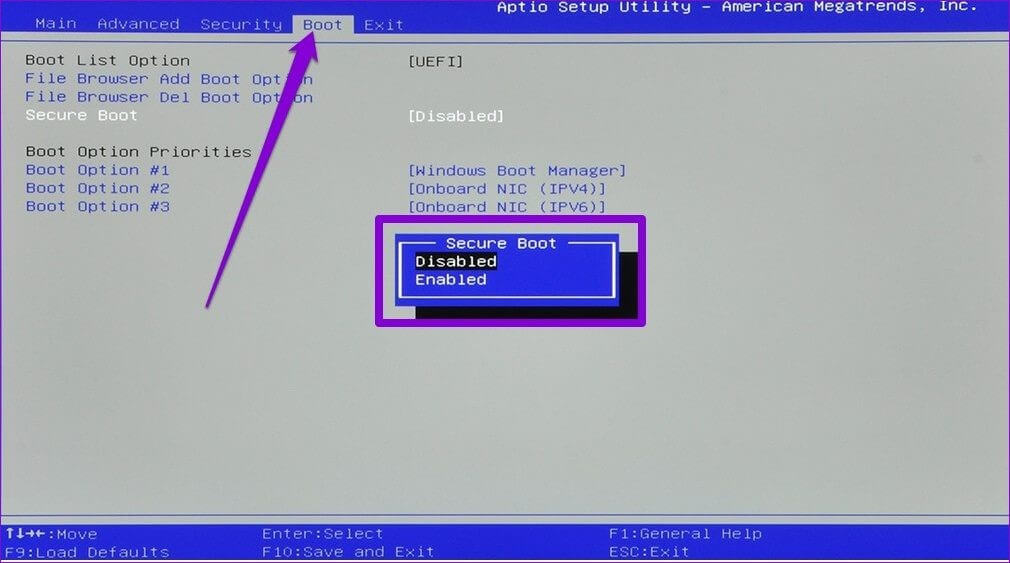
Step 9. Finally, hit the F10 key to save your changes.
Restart your computer to see if it can boot normally.
Solution 5. Run SFC Scan
Corrupted or missing system files can impede the boot process and prevent Windows from shutting down. SFC (System File Checker) scan is a helpful utility that can automatically scan and repair system files. Here’s how you can run an SFC scan:
Step 1. Right-click the Start menu icon from the resulting menu and select Windows Terminal (Admin).
Step 2. Enter the following command after typing it.
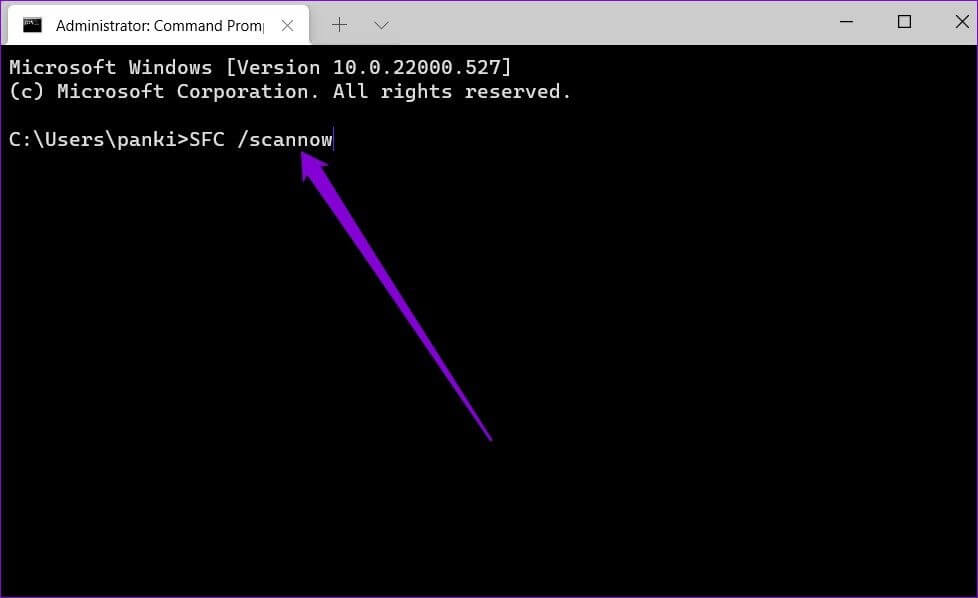
If any files are worth recovering, follow the recovery instructions and restart your computer.
Solution 6. Restart the Updates
The restart taking so long could be an unresponsive process running in the background.
For example, the Windows system attempts to install a new update, but something fails to function properly during the restart process.
If the problem is that an update cannot be applied, you can restart the update process as follows:
Step 1. Press Windows + R to open Run, type cmd, and then press Ctrl + Shift + Enter.
Step 2. In the UAC prompt, select Yes.
Step 3. Enter the following command after typing it:
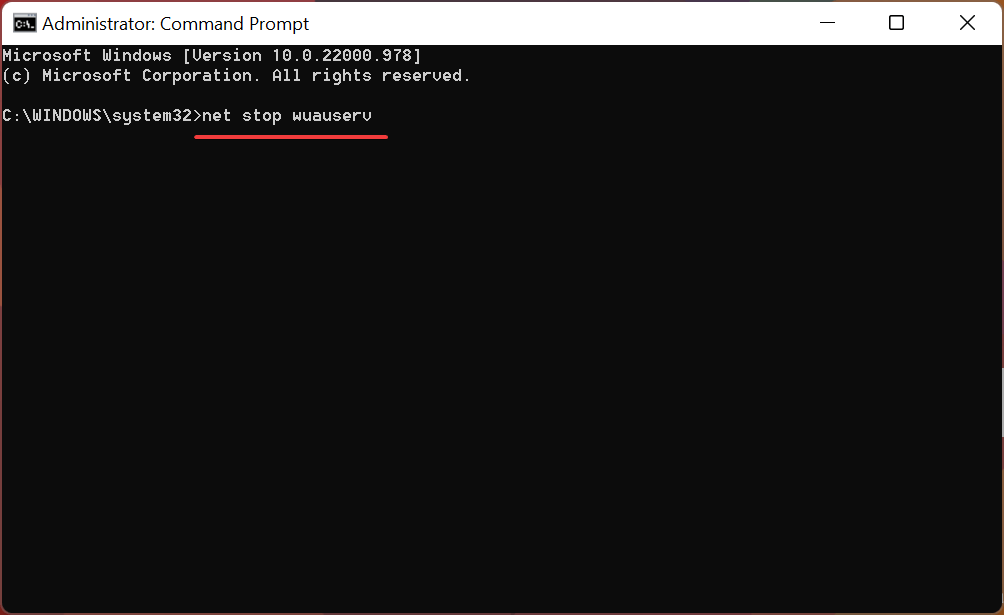
Step 4. Enter the following commands and press Enter after each one:
cd %systemroot%
ren SoftwareDistribution SD.old
net start wuauserv
Step 5. The update procedure will be resumed.
Solution 7. Use Windows Troubleshooter
You can fix the Windows stuck on restarting error using the Windows Troubleshooter as follows:
Step 1. Enter the Control Panel by pressing Windows + R and then clicking OK.
Step 2. On the right, click View by and then Large Icons.
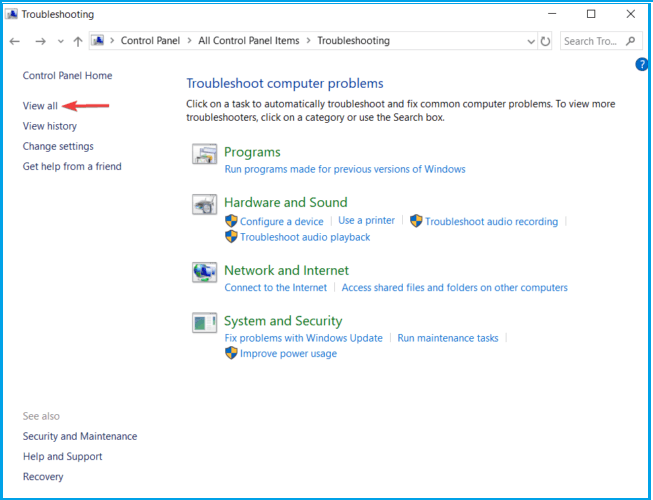
Step 3. Select Troubleshooting.
Step 4. Navigate to the left pane and select View All.
Step 5. Select System Maintenance.
Step 6. Select Automatically apply repairs.
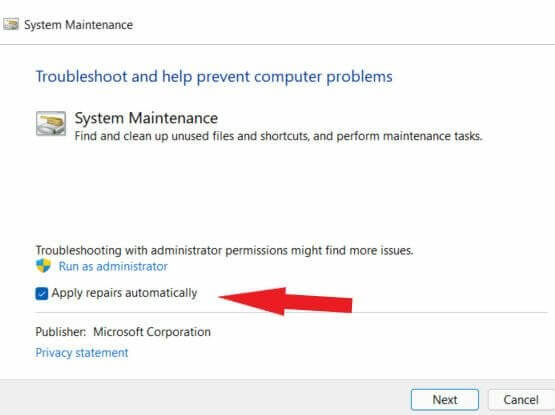
Step 7. Follow on-screen prompts.
Step 8. Restart your computer.
Solution 8. Remove Folders from Software Distribution
Before installing downloaded update files, Windows places them in the SoftwareDistrubution folder. If those files have become inaccessible, you can delete them and reinstall Windows Update. This is how to do it:
Step 1. Right-click on Start and choose Run from the menu that appears.
Step 2. In the text field, type C:WindowsSoftwareDistribution and press Enter.
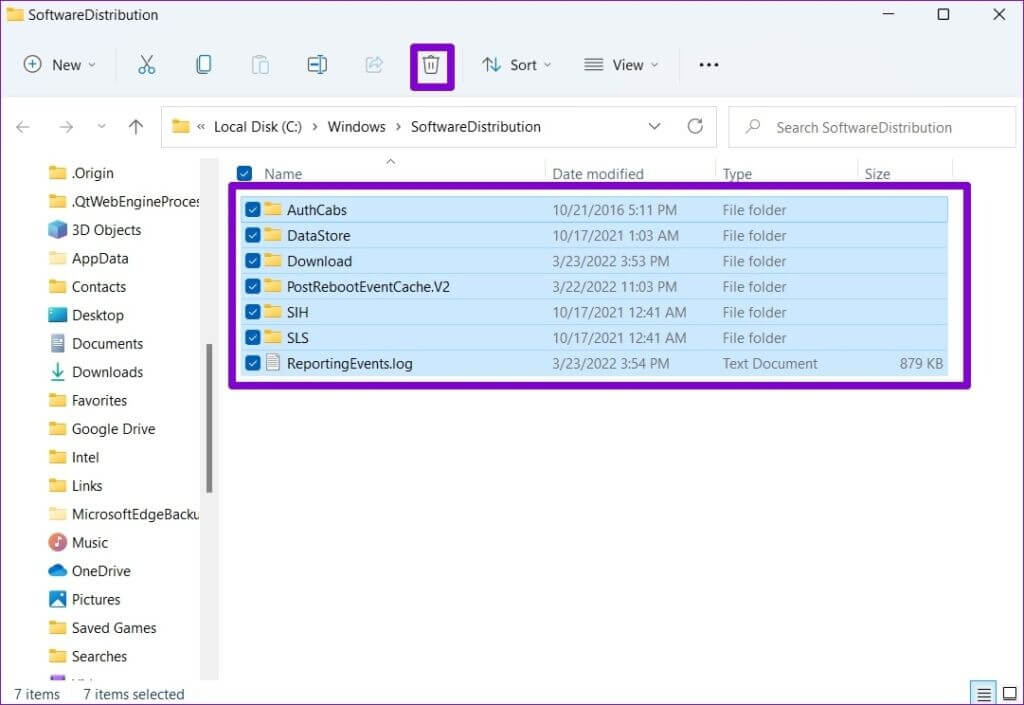
Step 3. To delete all files in the Software Distribution folder, select them and click the trash icon.
Now, you can update your Windows OS as follows:
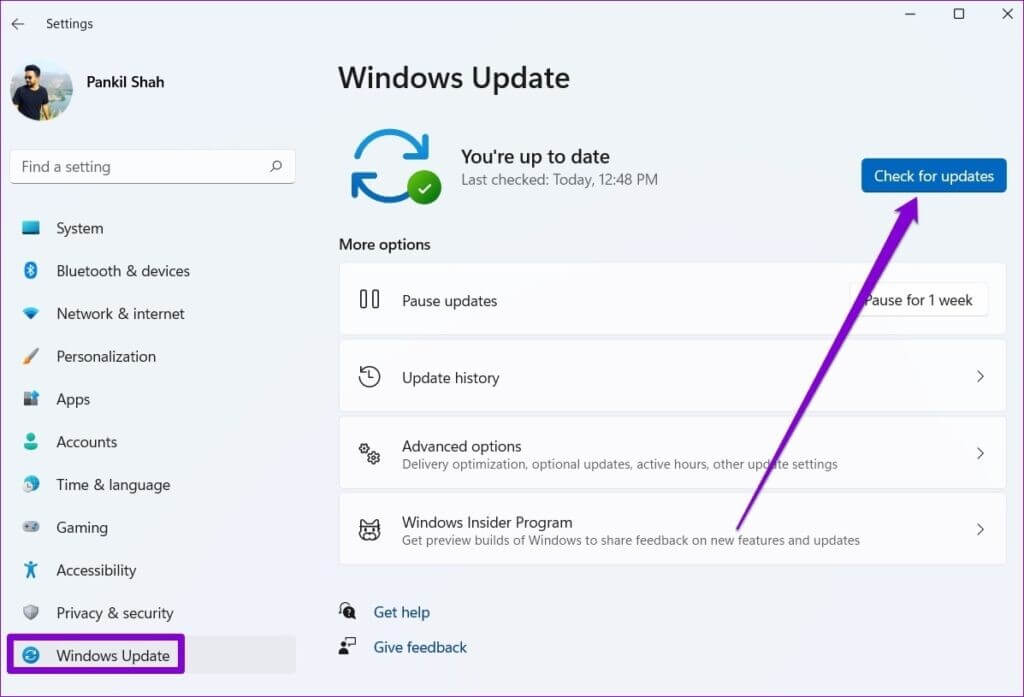
Step 1. Select Settings from the menu that appears after right-clicking on the Start menu.
Step 2. To download and install any pending updates, go to the Windows Update section and click on Check for updates.
Parting Remarks
There you have it! Now, you can fix the Windows stuck on restarting error with ease. First, ensure your system is updated properly and no third-party program is interfering; this can prevent your Windows PC from restarting loop errors.
For more Windows guides, keep on following our website.
Popular Post
Recent Post

Advanced SystemCare: Tool To Clean Your PC
Your computer slows down over time. Files pile up, junk builds inside the system, and things start to feel sluggish. You open a browser, and it takes forever. Programs crash without warning. This is a sign that your PC needs a good cleanup. Many users ignore these signs. They think buying a new computer is […]

Top 10 PC Cleaning and Optimization Tools For Windows 11/10
Discover the best PC cleaning and optimization tools for Windows 11 and 10. Remove junk files, improve speed, and keep your PC healthy with trusted cleaners.

Clear Microsoft Teams Cache On Windows PC [Complete Guide]
Learn how to clear Teams cache on Windows PC with 3 easy methods. Fix slowdowns, glitches, and errors fast. A simple guide for every Windows 11 user.

How To Clear Browsing History on PC: Chrome, Edge, Firefox, Opera
Learn how to clear browsing history on PC across Chrome, Edge, Firefox, and Opera with easy steps, tips, pros, and FAQs.

Clear Cache and Cookies: Complete Guide For Windows 11/10
Learn how to clear cache and cookies on Windows 10 and 11. This complete guide covers Chrome, Edge, and Firefox with simple, step-by-step instructions for every user.

How To Clean PC Trackpad/Touchpad Without Damaging It
Learn how to clean PC trackpad and clean PC touchpad safely with simple steps. Improve performance, remove dirt, and keep your laptop surface smooth and responsive.

How To Clean Your GPU/Graphics Card [Complete Guide]
Introduction A graphics card is one of the most important parts of a computer. It handles visuals, gaming, video editing, and design work. Over time, dust builds up inside it. This dust blocks airflow and traps heat. When heat increases, performance drops. In some cases, the system may even crash. That is why learning how […]

How To Clean PC Power Supply Unit Safely Without Damaging
Follow simple, safe steps to clean your computer’s power supply unit. Improve cooling, reduce overheating, and protect your PC’s performance.

How To Clean a CPU Without Damaging It [Complete Guide]
Learn how to clean a CPU safely without damage. Follow simple steps, precautions, and methods to improve cooling, boost performance, and extend your computer’s life.

How To Clear Browser Cache On Windows 11/10 [Chrome, FireFox, Edge]
Learn how to clear browser cache on Windows 11 and 10. Follow simple steps to clean browser cache, fix slow browsing, and improve performance easily.
