How to Disable Fast Startup on Windows 10?

Last updated on February 19th, 2026 at 9:21 am
Windows 10 users get to use a lot of features aiming to improve user experience with different computer-based functions. The Fast Startup feature is an upgrade from the Windows 8 Fast Boot function. The new version assures a speedier boot-up process but is slightly complex.
Users sometimes find functional defects in the Fast Startup process, which is why it is necessary to disable Fast Startup on Windows 10 when using a new device. In this post, learn how to deactivate this feature with a detailed step-by-step breakdown.
What is the Fast Startup function in Windows 10?
Before learning the steps to disable Fast Startup, knowing what the feature is useful for is necessary. This default Windows 10 feature allows the PC to start up after the shutdown phase, similar to the hibernation mode.
While the PC is in the shutdown stage, the operating system stores some system information on the disk. Upon switching the computer on, the Windows operating system resumes functionality through the saved system data in the disk instead of restarting the computer fully.
Therefore, the startup time of the system is faster.
Why Deactivate Fast Startup in Windows 10?
For specific reasons, users have to disable Fast Boot Windows 10, more commonly known as “Fast Startup” in the latest version.
- Allow Windows update installation– The Fast Startup feature can block the steady installation process for new Windows updates. This is because updating a system needs a full OS shutdown to activate. However, during the Fast Startup function, the PC hibernates somewhat. Therefore, the update cannot occur.
- Allow BIOS/UEFI Settings Access- In some cases, users need to disable Fast Boot Windows 10 or the Fast Startup feature since keeping it active blocks the BIOS/UEFI functioning. So, you need to deactivate this feature to enter the BIOS and make your chances as you need.
- Manage encrypted disk images better– In case managing the encrypted disk images is proving difficult, you should deactivate this feature on the PC.
- Dual PC boot up– Some users operate the dual booting function for the PC. To access the available Windows drive on one section while operating on the second, turning on Fast Startup is necessary first.
Sometimes, like checking and updating Windows updates, you can use third-party software like IoBit Software Updater. You should still know how to disable the Fast Startup function when needed. Later, it is possible to reactivate the feature on Windows 10.
Process of Deactivating Fast Startup Feature on Windows
The Fast Startup feature is a default setting in the Windows 10 settings. So, users have to manually configure some settings to disable Fast Startup, albeit with few steps. Besides the procedure for disabling this feature, you should also know how to force-stop it if needed.
Situation 1: Deactivate the Fast Startup Features on Windows 10
After testing out the Fast Startup process directly to see how it works, you will know the right steps for the disabling process from first-hand experience. Here is the main breakdown of the deactivation process.
How to do this?
Step 1: Click the Windows icon on the main toolbar and choose the Search button.
Step 2: Then, search for the Control Panel option in the text field and hit Enter.
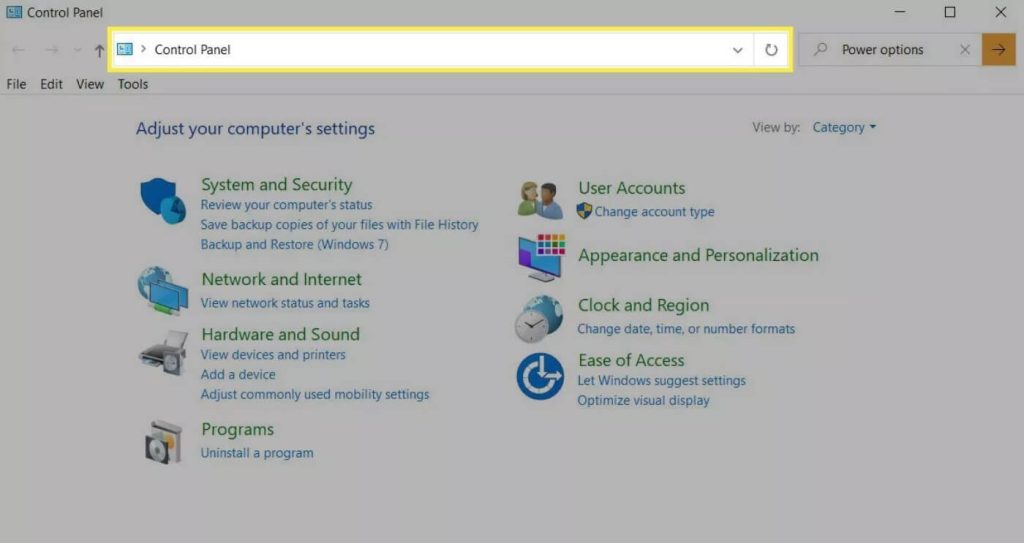
Step 3: Then, under the Control Panel window, search for Power Options and click on it.
To avoid the previous steps, you can use the shortcut process of right-clicking on the Start menu and selecting Power Options.
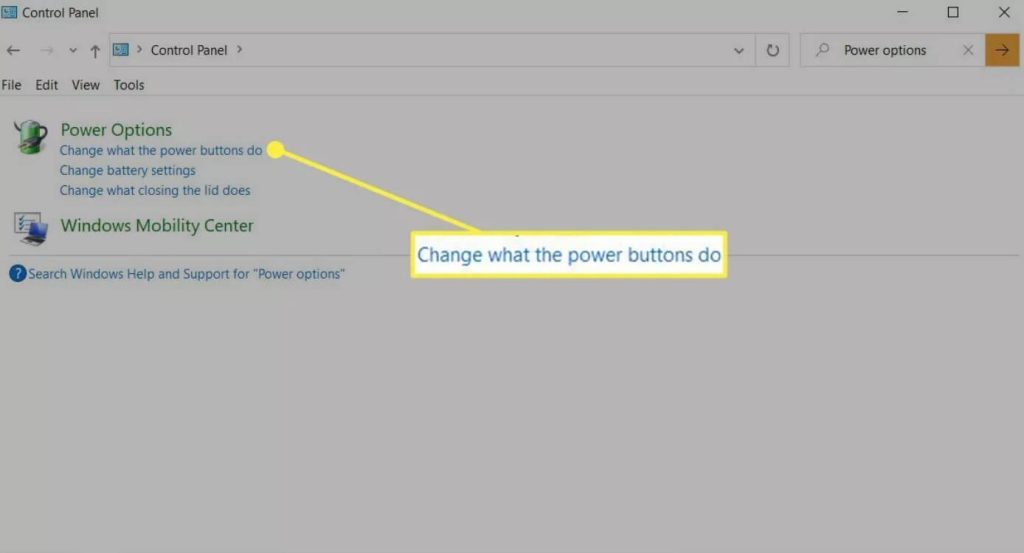
Step 4: On the next page, choose the option under the aforementioned Power Options category asking you to set the function of the power buttons.
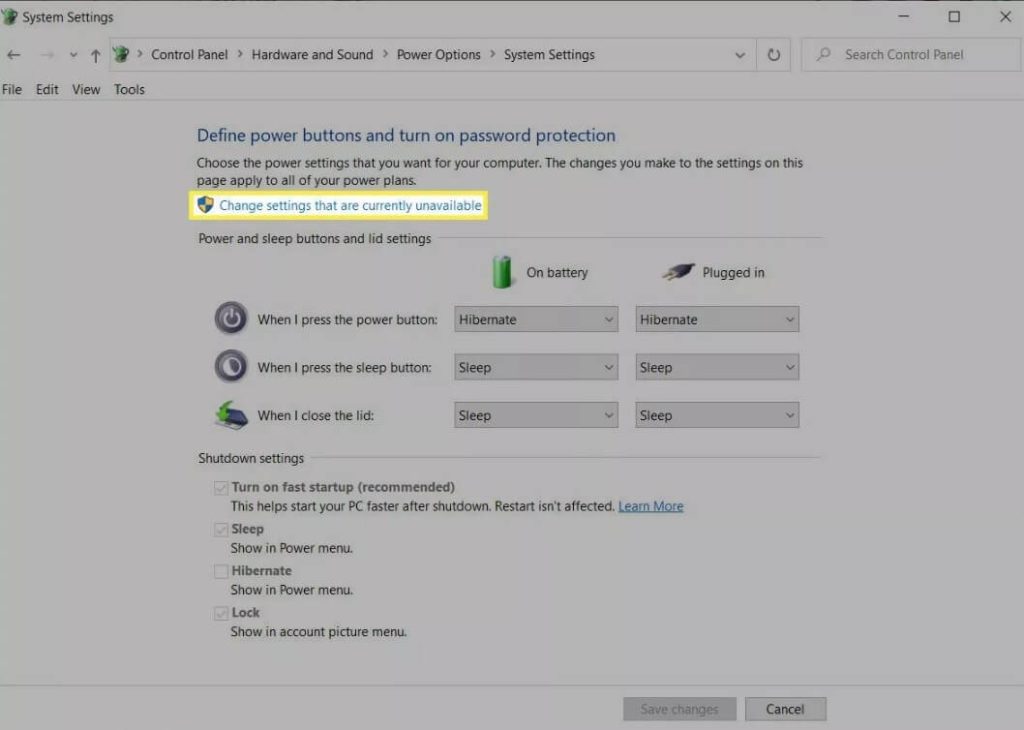
Step 5: Click the link mentioning “Change settings…” on the next page.
Step 6: Scroll down to the Shutdown Settings category on this same page, you must click on the tickbox beside “Turn on Fast Startup (recommended)” to disable Fast Startup.
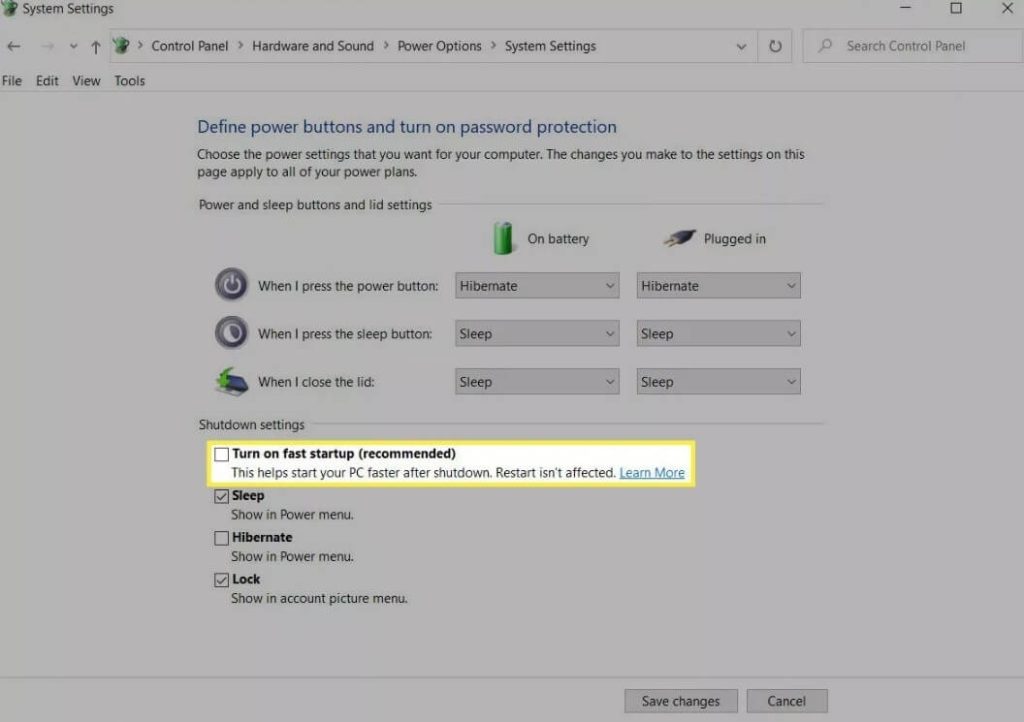
Step 7: Tap the Save Changes option on the screen.
Step 8: Leave the Power Options section to check if the Fast Startup function is still working. For this, shut the PC off and reboot it.
Situation 2: Re-Enable Fast Startup on Windows 10
After deactivating the Fast Startup feature, you can activate it again on your PC anytime. The process does not cause any functional defect in devices if you follow along correctly. Also, keep in mind that the process of enabling and disabling this Fast Startup feature is not that different. Users have to access the Power Options section.
The steps to reach the Power Options window can differ depending on your preferred route or the computer model. Try out all of the sequences mentioned here to know which method of opening this section works best for you.
How to proceed?
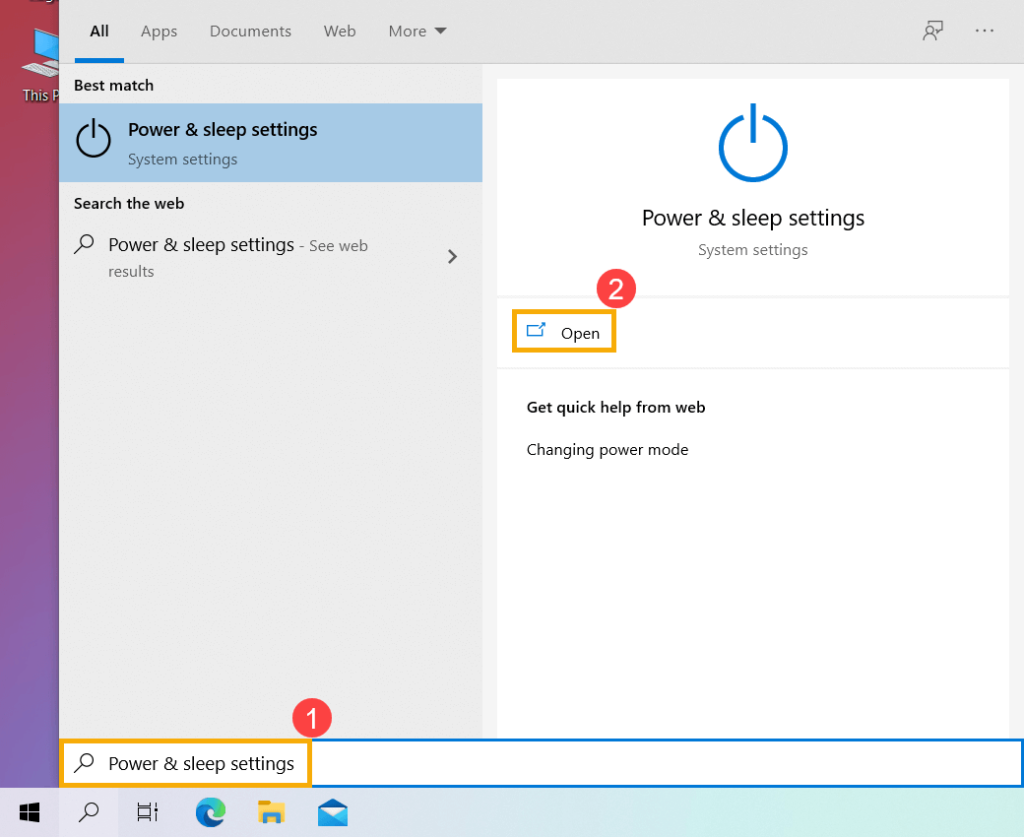
Step 1: Click on the Search button with the Windows icon and search for Power & Sleep settings > Open.
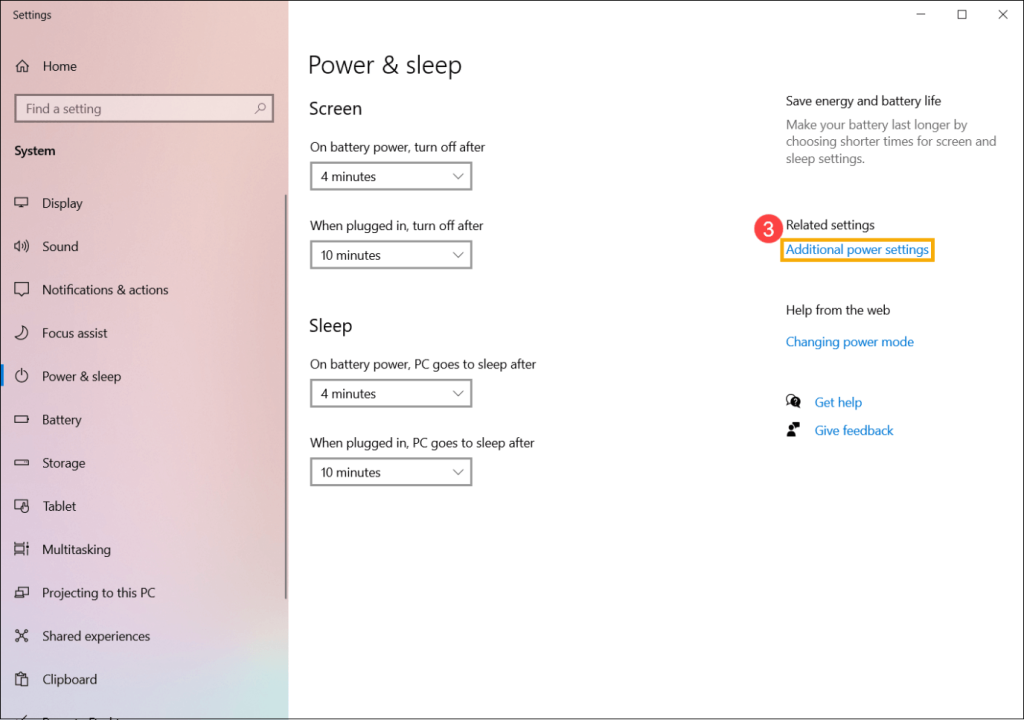
Step 2: Next, tap on the Additional Power Settings option.
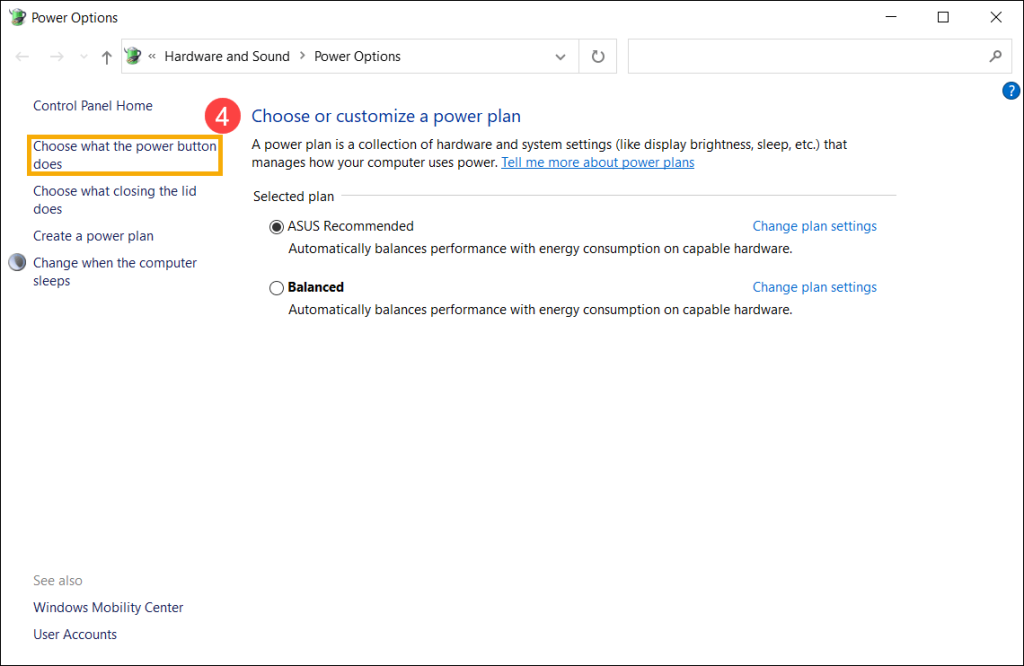
Step 3: In the next window, tap on the hyperlinked option that asks the user to select the function of the power button.
Step 4: Next, choose the hyperlinked option that mentions changing the settings unavailable currently.
Step 5: Tap the option titled “Turn on Fast Startup”, click the tick mark beside it, and then press the Save Changes button.
Situation 3: How to Force-Stop Fast Startup on Windows 10?
In some cases, like a defective system functioning process, you must forcefully turn the feature down. Knowing the steps for this should also help you.
How to do this?
Step 1: Click on your Windows button in the Toolbar.
Step 2: Choose the Shut Down option and press the Shift key simultaneously. This causes the Windows OS to go through a hard system shutdown sequence while the Fast Startup function is still active.
Conclusion
The Fast Startup function was created to boost the booting time in a computer, but it does block certain other functions, like the software updating process. You should use the steps to disable the Fast Startup method, as mentioned, and enable it later if needed. Of course, you should practice the steps a few times to get familiar with the sequence over time.
Popular Post
Recent Post
How To Clear Cache Memory On Windows 11/10 [2026]
Learn how to clear cache memory on Windows 11/10 using safe built-in methods to improve speed, free space, and maintain smooth system performance.

Windows Installer Cleanup Utility: Complete Review And Alternatives
Detailed review of Windows Installer Cleanup Utility, reasons for removal, risks, and safer modern alternatives explained clearly.

How To Clean Junk Files On Windows 11/10
Learn how to clean junk files on Windows 11 and 10 using safe, simple steps to boost speed and free storage space effectively.

Clearing App Cache Data on Windows 11/10: Complete Guide
Learn how to safely clear app cache on Windows 11 and 10 to fix slow apps, free disk space, and improve overall system performance.

How To Clean Up System Files On Windows 11/10: Complete Guide
Explore a step-by-step guide explaining how Windows users can safely remove unnecessary system data using built-in tools.
How To Clean a Laptop Fan Without Opening [2026 Guide]
Learn how to clean a laptop fan without opening the device using safe steps, simple tools, and easy methods for better cooling.

How to Clear the Queue in the Printer Automatically in 2026
Learn how to clear the queue in the printer with simple steps. This easy guide explains why print jobs get stuck and how to fix them safely for smooth printing.

How To Clear Delivery Optimization Cache In Windows
Learn how to clear Delivery Optimization Cache in Windows safely and easily. This guide explains steps, precautions, benefits, and FAQs to free space and avoid update issues.
How To Clear Cache in Edge [Windows 11/10]: Latest Guide
Learn how to clear cache in Edge on Windows 11 and Windows 10. Step by step guide with precautions, FAQs, and tips to fix slow pages and errors.

Top 15 Questions About PC Cleaning and Their Answers
Learn safe and simple ways to clean your PC. This guide answers top questions, covers precautions, and gives advanced tips for better PC health and performance.
