How to Fix WiFi Disappeared in Windows 11? 11 Easy Solutions
It is almost a year into Windows 11, and some users have faced many weird issues with this OS. For instance, no sound output or 100% disk usage after upgrading the system.
And now, many users are complaining that WiFi is not showing up to them, even when Ethernet and drivers are working perfectly fine.
If the WiFi icon has also disappeared on your Windows 11, this guide will help you fix all your network problems. So, let’s get started.
Why Is WiFi Disappeared on Your Windows 11 Desktop?
There are a plethora of reasons behind the WiFi icon not showing on your Windows 11 PC. Some common reasons are:
- Outdated WiFi adapter or driver
- Misconfigured network settings
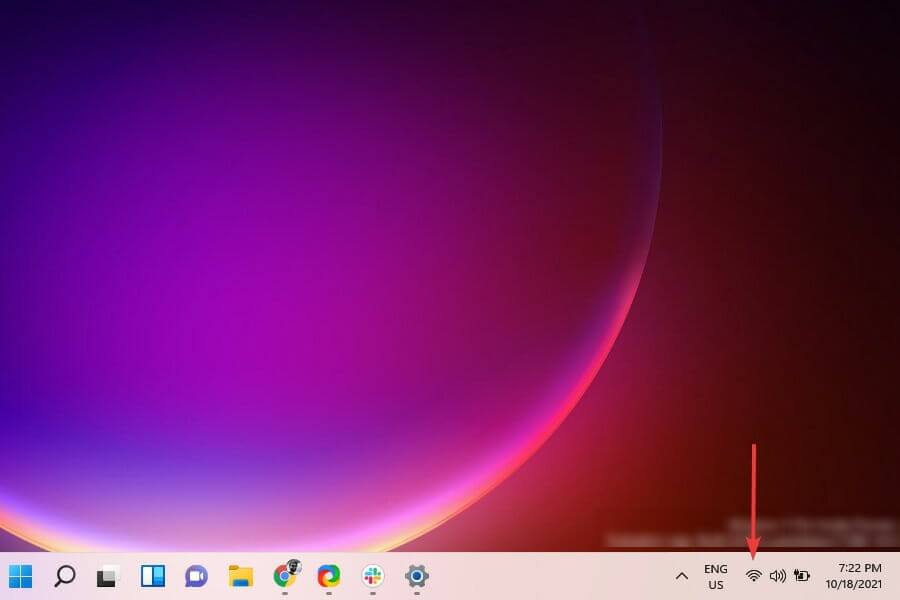
- Hidden WiFi icon
- Problem with Windows 11 current version
- Applications are conflicting with WiFi and so on.
11 Easy Solutions to Fix WiFi Disappeared in Windows 11
The WiFi icon not showing isn’t a big issue. Sometimes wrong settings or basic system errors can trigger WiFi problems. After running different troubleshoots, we will advocate our readers to follow these solutions when WiFi disappears in Windows 11:
Solution 1. Ensure the Physical Switch Is Turned On
Many new computers and laptops have a built-in switch to disable or enable the WiFi. It is either presented on the side or around the keyboard.
So, before trying any other fix, check whether the WiFi is physically enabled. If it is, you can move to other solutions.
Solution 2. Enable the WiFi Adapter
A disabled WiFi adapter could be a reason behind the WiFi icon not showing on your screen. So, you should enable the WiFi adapter as follows to fix the problem:
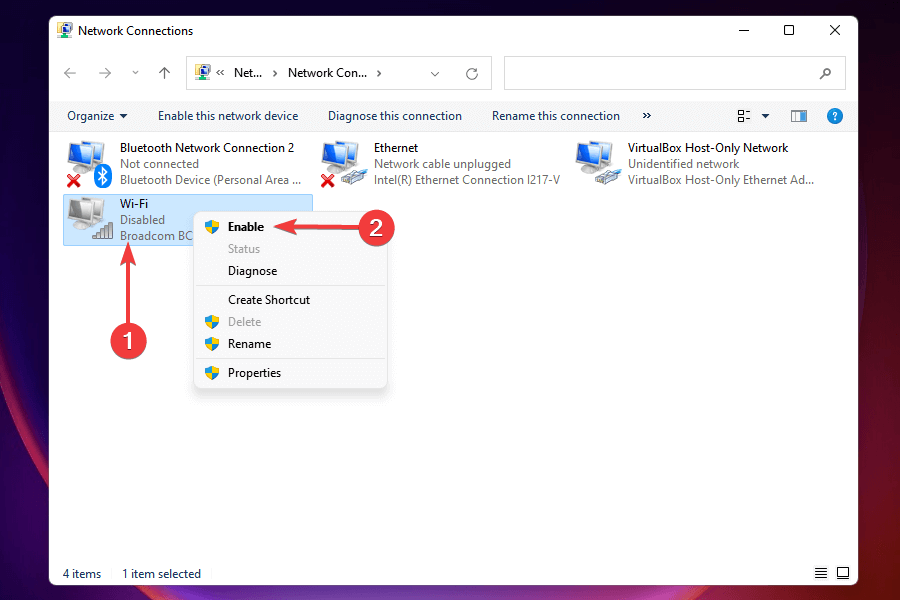
Step 1. Press the Windows and R keys on the keyboard to open a Run window. Type ncpa.cpl and hit Enter to open the Network Connections window.
Step 2. Look for the WiFi adapter and right-click on it to enable the WiFi adapter. If the WiFi adapter is already enabled, try to first disable it and again enable it.
Solution 3. Run the Internet Connection Troubleshooter
Windows 11 built-in troubleshooting feature is the best solution to fix common issues like the WiFi icon not showing. The Internet Connection troubleshooter can scan your entire system for problems and automatically fix them. Here is how you can run the Internet Connection troubleshooter:
Step 1. Press Windows and I keys to open Settings.
Step 2. Open the System tab from the left pane.
Step 3. Scroll down in the right pane and click on Troubleshoot.
Step 4. Click on the Other troubleshooters under Options.
Step 5. Click on the Run button to launch the troubleshooter.
Step 6. Just click on the Troubleshoot my connection to the Internet. Now, the troubleshooter will scan your entire system and suggest potential fixes.
Solution 4. Disable the Airplane Mode
Make sure that the airplane mode is disabled on your computer as it could be a reason behind WiFi disappearing in Windows 11. To do so:
Step 1. Launch the Settings app using Windows and I keys.
Step 2. Choose the Network & Internet from the left side.
Step 3. Look for the Airplane mode toggle and make sure it’s disabled. If the Airplane mode is already disabled, switch the toggle to enable and then disable it.
Solution 5. Restart the PC
So, the simplest WiFi icon not showing in Windows 11 fix is to restart your PC. This can fix all the temporary glitches and cache issues. You can restart your PC as:
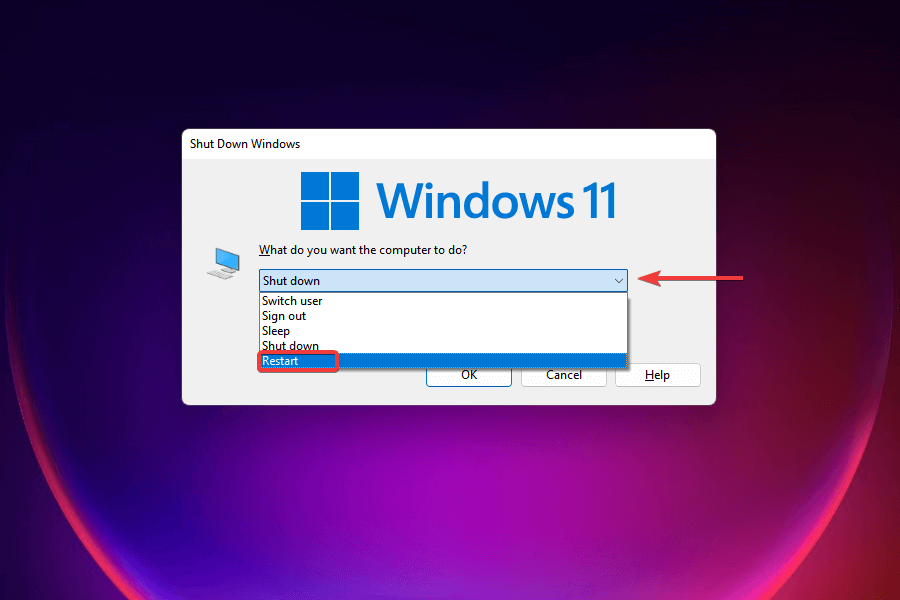
Step 1. Press Alt and F4 keys to open the Shut Down Windows box.
Step 2. From the dropdown menu, select the Restart button from the list.
Step 3. Click on the OK and wait for a few minutes to complete the process.
Solution 6. Update Network Adapter Drivers
If the WiFi disappearing problem has occurred after the Windows system update, outdated network adapter drivers are the root problem here. When the network adapter drivers are not compatible with the Windows 11 version, it can cause the WiFi connection to malfunction. Here is how you can do that:
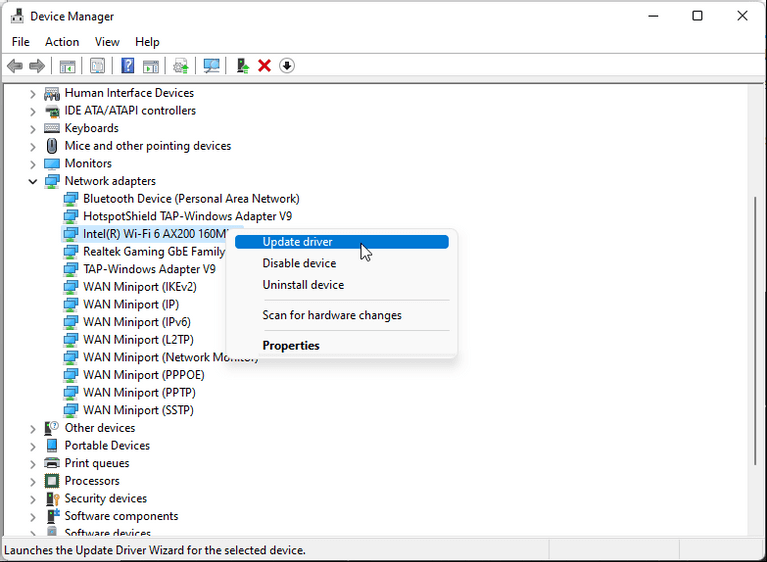
Step 1. Press the Window key to open the Windows search and type device manager.
Step 2. On the Device Manager window, expand the Network adapters section.
Step 3. Right-click on your WiFi device and select the Update driver.
Step 4. Click on the Search automatically for drivers to scan and install the new drivers.
Step 5. Close the Device Manager window and check if the WiFi icon is restored or not.
Solution 7. Reinstall the Network Adapter Device
If you are already using the latest network adapter drivers but still WiFi has disappeared on your device. In that case, you have to first remove and then reinstall the network drivers. That’s because sometimes driver files are not properly installed during the system updates leading to WiFi network issues. To reinstall the network adapter drivers:
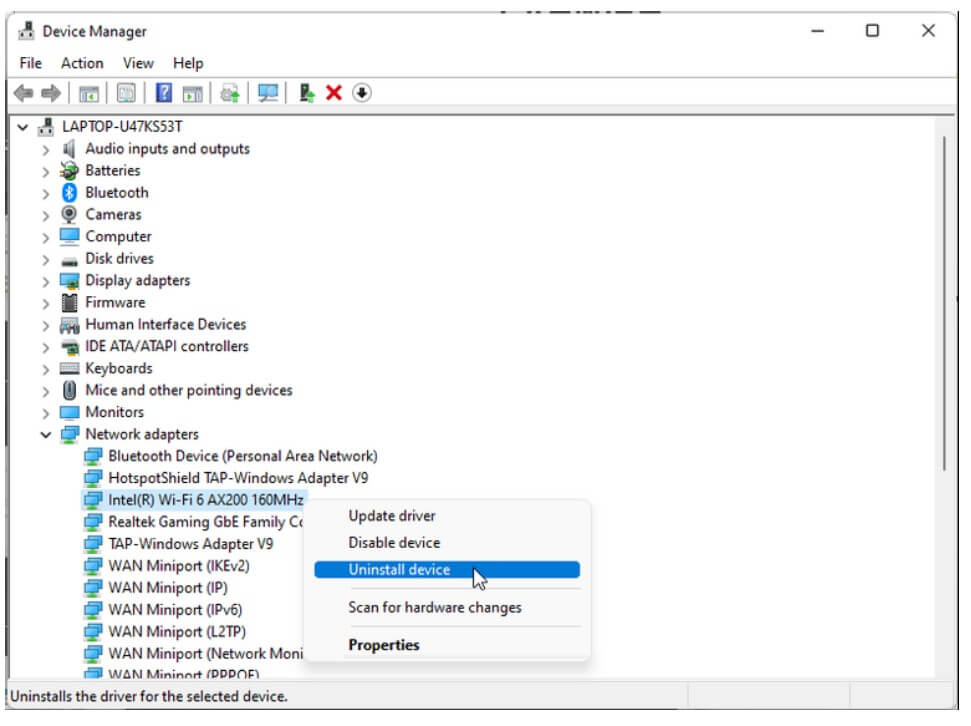
Step 1. Go to Device Manager and expand the Network adapter section.
Step 2. Right-click on your WiFi device and select the Uninstall option.
Step 3. Once the uninstallation process is complete, open the Device Manager and select Scan for hardware changes. Windows 11 will automatically scan for missing drivers and reinstall them.
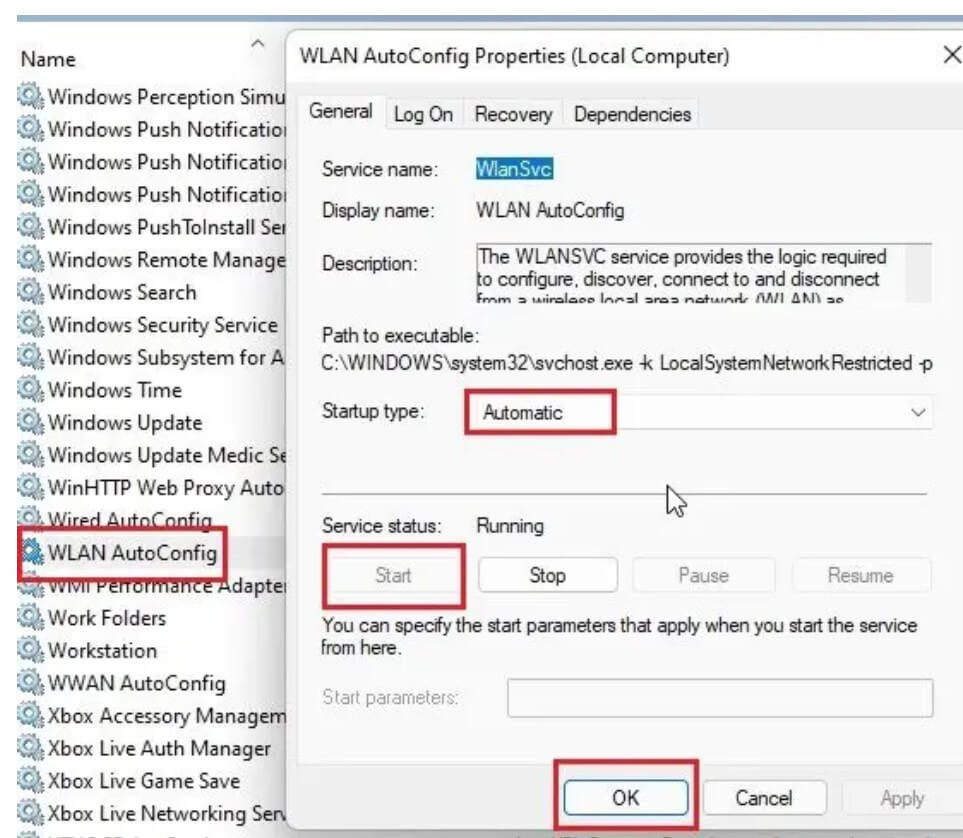
Solution 8. Adjust the WLAN AutoConfig Service
When you boot up your PC, it also starts several services in the background, such as the WLAN AutoConfig service. This service is responsible for all WiFi operations. So, you can fix the WiFi icon not showing up by changing some key settings in the WLAN AutoConfig service. Here’s how to do it:
Step 1. Open the Run window and type in service.msc to open the Services window.
Step 2. Navigate for the WLAN AutoConfig service and double-click to open it.
Step 3. After that, change the Startup type to Automatic and click on Apply > OK. You can restart your computer to see if the WiFi is working or not.
Solution 9. Reset Network Settings
If your WiFi icon is not showing even after updating the network drivers and configuring settings, you can reset the network settings to fix the problem. Follow these steps:
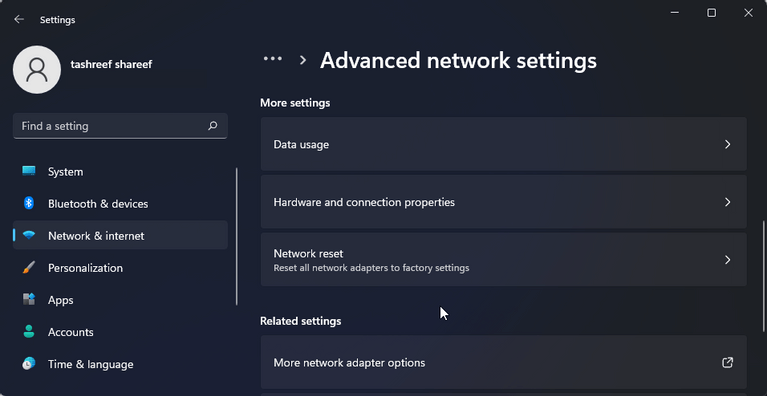
Step 1. Open Settings and click on the Network & Internet section. Scroll down and click on the Advanced network settings.
Step 2. From there, click on the Network reset and then on Reset now. This will reinstall all your network drivers and reconfigure network settings to the factory version. You can restart your PC and check if the WiFi disappeared problem has been fixed or not.
Step 3. If the WiFi is still not working, press on the Window key and enter cmd. Next, click on the Run as administrator to open the Command prompt.
Step 4. In the Command Prompt window, insert the below-mentioned commands and reboot your computer.
netsh winsock reset
ipconfig /release
ipconfig /renew
ipconfig /flushdns
Solution 10. Enable the SSID Broadcasting
If a WiFi icon is showing up on your Windows 11, but a particular WiFi network is not showing, it has something to do with your router. In that case, you can check the router configuration page and enable the SSID broadcasting feature. Here’s how you can do that:
Step 1. Restart the router once to see if the WiFi network appears on your screen. If not, switch to a device connected to the WiFi network or connect the router using the Ethernet cable.
Step 2. Go to your browser and type 192.168.0.1 in the address bar, and hit Enter. It is a standard local IP address to access a router’s configuration page.
Step 3. Log in to your router using the default credentials. It will be jotted on the backside of your router.
Step 4. After logging in, go to Wireless > Basic Settings. Now, look for the SSID broadcast option under the Wireless settings page. From there, enable SSID broadcast and save it. Your router will restart, and the WiFi icon will be discoverable on your Windows 11.
Solution 11. Check for Windows Updates
It is yet another common Windows 11 fix. If you haven’t updated your system in a while, this can cause multiple malfunctions, including WiFi disappeared. So, you should check for the latest software updates, and it will fix all the common bugs. To check for Windows 11 updates:
Step 1. Open Settings and go to the Windows update tab in the left pane.
Step 2. Click on the Check for Updates. It will take a few minutes to check for new updates. If updates are available, download and install them on your PC.
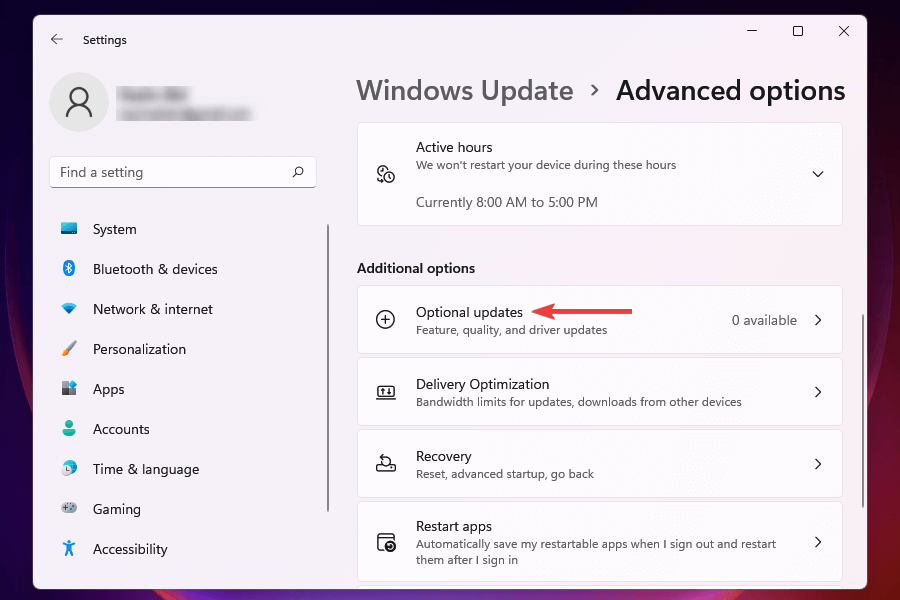
Step 3. After that, click on the Advanced options.
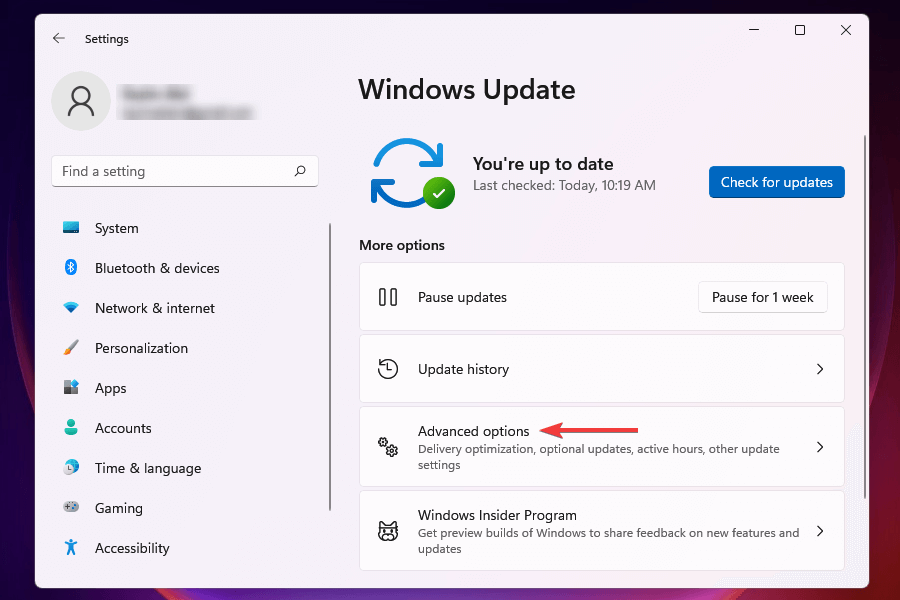
Step 4. Move down to click on the Optional updates. Here you can check for driver updates and some other advance updates.
Let’s Fix Your WiFi!
There you go, Windows 11 users! You can now easily fix the WiFi disappearing problem by following the 11 cool solutions. However, if none of the solutions worked for you, contact your computer manufacturer as the problem might be related to hardware. Or, you can always reach out to the Microsoft support team for help.
If you find this post helpful, do share it with your friends and check out other posts on this site.
Popular Post
Recent Post

Advanced SystemCare: Tool To Clean Your PC
Your computer slows down over time. Files pile up, junk builds inside the system, and things start to feel sluggish. You open a browser, and it takes forever. Programs crash without warning. This is a sign that your PC needs a good cleanup. Many users ignore these signs. They think buying a new computer is […]

Top 10 PC Cleaning and Optimization Tools For Windows 11/10
Discover the best PC cleaning and optimization tools for Windows 11 and 10. Remove junk files, improve speed, and keep your PC healthy with trusted cleaners.

Clear Microsoft Teams Cache On Windows PC [Complete Guide]
Learn how to clear Teams cache on Windows PC with 3 easy methods. Fix slowdowns, glitches, and errors fast. A simple guide for every Windows 11 user.

How To Clear Browsing History on PC: Chrome, Edge, Firefox, Opera
Learn how to clear browsing history on PC across Chrome, Edge, Firefox, and Opera with easy steps, tips, pros, and FAQs.

Clear Cache and Cookies: Complete Guide For Windows 11/10
Learn how to clear cache and cookies on Windows 10 and 11. This complete guide covers Chrome, Edge, and Firefox with simple, step-by-step instructions for every user.

How To Clean PC Trackpad/Touchpad Without Damaging It
Learn how to clean PC trackpad and clean PC touchpad safely with simple steps. Improve performance, remove dirt, and keep your laptop surface smooth and responsive.

How To Clean Your GPU/Graphics Card [Complete Guide]
Introduction A graphics card is one of the most important parts of a computer. It handles visuals, gaming, video editing, and design work. Over time, dust builds up inside it. This dust blocks airflow and traps heat. When heat increases, performance drops. In some cases, the system may even crash. That is why learning how […]

How To Clean PC Power Supply Unit Safely Without Damaging
Follow simple, safe steps to clean your computer’s power supply unit. Improve cooling, reduce overheating, and protect your PC’s performance.

How To Clean a CPU Without Damaging It [Complete Guide]
Learn how to clean a CPU safely without damage. Follow simple steps, precautions, and methods to improve cooling, boost performance, and extend your computer’s life.

How To Clear Browser Cache On Windows 11/10 [Chrome, FireFox, Edge]
Learn how to clear browser cache on Windows 11 and 10. Follow simple steps to clean browser cache, fix slow browsing, and improve performance easily.
