How to Fix Laptop Plugged in not Charging Error in Windows
The laptop plugged in not charging error in Windows is a serious one. It shows that something is not right with your laptop’s battery. And we all know how crucial batteries are for laptops.
However, before concluding that your laptop’s battery is dead, you can run some simple troubleshoots to fix the laptop plugged in, not charging error in Windows. Sometimes there is a problem with the charging cable, port or software rather than the battery.
So, this post will suggest all the possible solutions to fix the laptop plugged-in, not charging error in Windows, which can save you from the hassle of replacing your laptop battery.
Here’s How to Fix the Laptop Plugged in Not Charging Error in Windows
It is not that hard to fix a laptop plugged in but not charging. However, sometimes your laptop undergoes problems due to a lack of sync between the battery and the charger. So, simply resetting the computer or reinserting the battery can fix the error.
Here’s the list of some effective solutions to solve the laptop not charging error in Windows:
Solution 1. Examine All Physical Connections
Before trying any technical solution, you should first check your laptop’s physical cable connections. Next, ensure that you have inserted the charging cable firmly into your laptop’s charging port.
Also, check the wall connection. Try to use another socket in case the current one is not working. If you are connected to a regular socket, try connecting to the power plug or vice versa.
Ensure to check you have attached the charging cable to the right ports. You can remove the charging connection and blow air inside the port. Sometimes, dust deposits in the laptop ports disturb the connections.
Solution 2. Remove the Battery and Connect to Power
After checking your cable connections, determine whether your laptop is fine or not. If possible, remove your laptop’s battery. You can check your laptop’s manual guide to know how to remove the battery from the machine.
Afterward, hold the power button for a few minutes to clear any remaining power in the system. Now, connect your laptop to the charger and turn it on.
If your laptop works fine without the battery, the charging problem is related to the battery. So, you can clean your battery component using a lint-free cloth. Then, reinsert the battery and turn the power on.
If your laptop is plugged in not charging error in Windows continues, and you have to replace your laptop’s battery.
Solution 3. Run Windows Battery Diagnostics
You can use the trusted battery troubleshooter if your laptop’s battery is partially charging. Windows Troubleshooter can fix most glitches automatically. So, you can run Windows battery troubleshoot and fix the laptop not charging properly:

Step 1. Go to Start > Settings > Update & Security > Troubleshoot.
Step 2. Scroll down to the Power and click on it.
Step 3. Click on the Run the troubleshooter. It will take a few minutes to complete the process. Now, you will see all the battery troubles on your screen that you can fix with a click.
Solution 4. Use Another Charger
Your charger can be a culprit behind the laptop plugged in not charging error in Windows. So, first of all, you should ensure that your charger cable or connection is not broken.
If the charger cable is fine, this must be something related to the internal parts of the cable. So, you can use another laptop charging cable and give it a try. If that works, your laptop’s charger is not working properly, so simply replace it.
Solution 5. Remove All External Devices
If you keep external devices attached to your laptop while charging, it will take longer for your laptop to charge up to its full capacity.
Your battery power will divide between all these external devices, like smartphones, printers, or anything else. So, remove all the external devices and try to charge your laptop. This will charge your laptop faster and save you time.
Solution 6. Reinstall the AC Adapter and Battery Driver
If your AC adapter or battery drivers are outdated or corrupted, it can also cause a charging problem. Thus, to fix the laptop plugged in not charging error in Windows, you can uninstall and reinstall the correct AC adapter or battery drivers:
Step 1. Plug the charger into your laptop and press the Windows + R keys to open the Run command box.
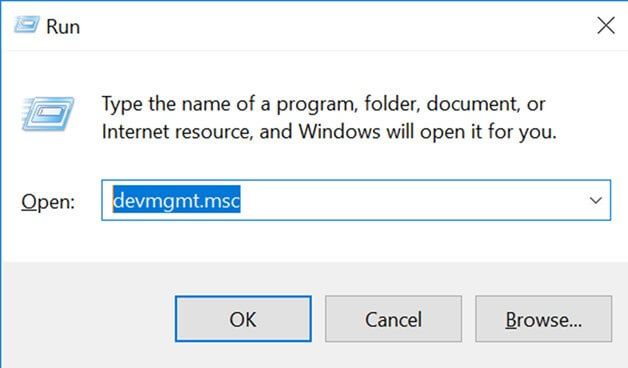
Step 2. Type devmgmt.msc in the search field and hit Enter.
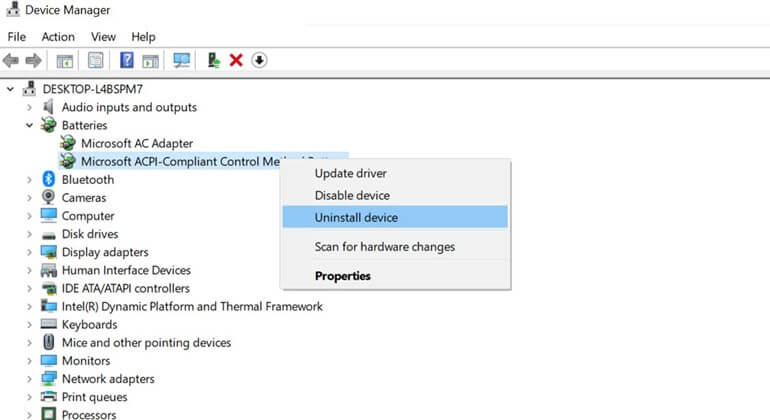
Step 3. On the Device Manager screen, click on Batteries. A menu will expand, and then right-click on Microsoft ACPI Compliant Control Method Battery > Uninstall.
Step 4. Once the uninstallation is complete, wait for a few seconds and then take the battery out of your laptop.
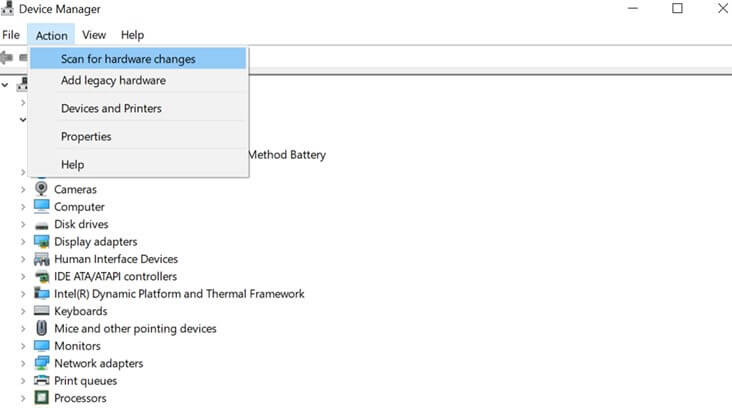
Step 5. After a few minutes, replace the battery and plug in the charger. Then, go to Device Manager again and select Scan for Hardware Changes. This will scan your system and suggest the latest battery drivers.
Step 6. It will take a few minutes to reinstall the drivers. Once the process is complete, try to recharge your laptop.
If this method sounds technical, you can use the Driver Easy software to automatically update battery drivers. It is a free tool that can scan your entire system and detect outdated drivers. Just one click, and you can update all your system drivers.
Solution 7. Check the AC Adapter
When your laptop’s AC adapter is not working, it can lead to the laptop plugged in not charging error in Windows. You can fix this problem by removing the battery or disconnecting the battery cable from the motherboard and plugging in the AC adapter to your laptop. After that, restart your laptop and check if anything is wrong with your adapter.
Solution 8. Check the DC Jack
Often the AC adapter is working fine, but the DC Jack is not. The DC jack is a small power socket present on the side or back of a laptop where you can insert the AC adapter. If the DC Jack is broken or the connection is lost, it can cause charging trouble. So, thoroughly check the DC Jack.
Solution 9. Press and release the Power Button
Some unknown or temporary memory glitches can also prevent the battery from charging. Thus, the best fix is to power down your laptop. Simply hold down the Power button for 15-30 seconds and plug in the AC adapter to start your laptop.
Solution 10. Turn Off Background Apps
The apps running in the background, like antivirus software or Windows native programs, are huge power consumers. There is a possibility that some of your background apps consume a larger power and slow down your laptop’s charging speed.
In that case, you have two options—
Go to Start > Settings > Privacy > Background apps. Switch the toggle off next to the app that might prevent your laptop from charging faster.
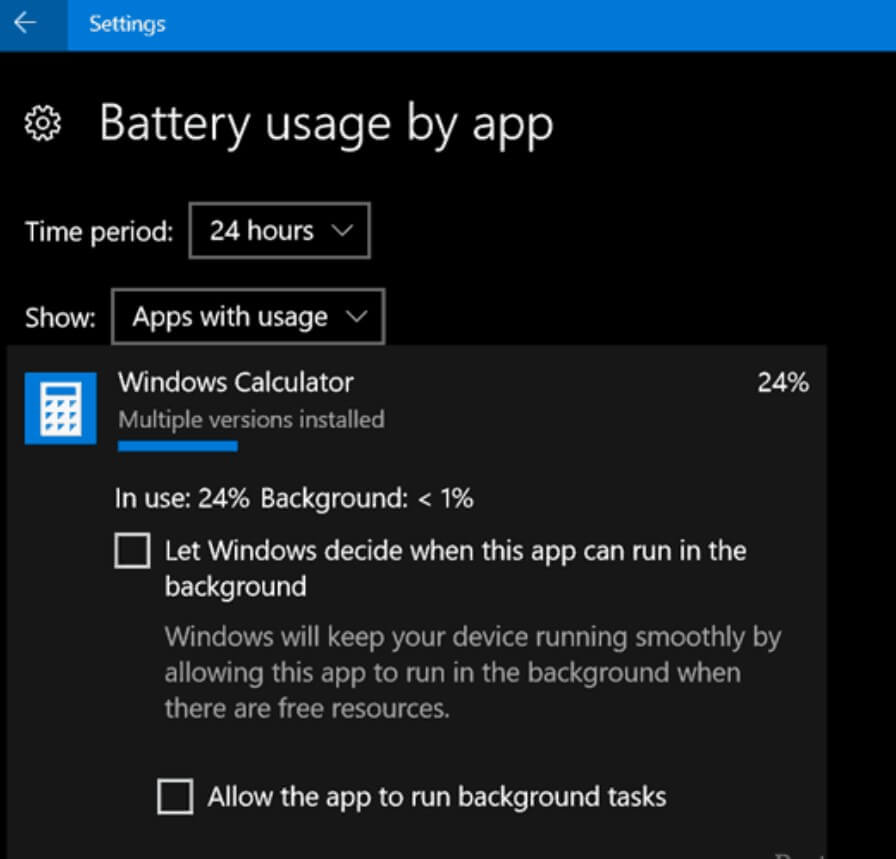
On the other hand, go to Start > Settings > System > Battery > Battery usage by app. This will show you all the apps that are using the most battery so you can turn them off.
Solution 11. Change the Power Management Software Settings
Many latest laptops come with a new charging system that preserves your battery. But sometimes, it can lead to the laptop plugged in not charging error in Windows. Thus, you can go to the Power Management software on your laptop and change settings to the normal mode.
You can also tweak additional power settings on your laptop. Simply go to Settings > System > Power & sleep > Additional power settings.
Click Change plan settings next to the current plan on the new window. Click on the Change advanced power settings if you want. However, select the Restore default settings for this plan.
Some laptop manufacturers offer a battery charge threshold option. For example, Lenovo laptops have a particular app that can stop a battery from charging.
Once that app is opened on your laptop, click on the Hardware Settings panel and scroll down to find Charge Threshold. If the Custom battery charge threshold slider is enabled, select a minimum and maximum battery percentage for charging.
Solution 12. Replace the Battery
If none of the above-mentioned methods fixes the laptop plugged in not charging in Windows, you may have to replace your battery. It is the last resort and an expensive option. Often batteries and chargers are expensive, especially original ones.
However, if your device is old, you can order cheap third-party batteries online. But we never recommend this option. Instead, we always suggest getting the original battery from your laptop manufacturer.
Parting Note
The laptop is plugged in, not charging error in Windows is easily fixable. Small tweaking and cleaning can easily fix this error. However, when nothing works, go visit your laptop manufacturer’s store and get your device checked.
If the problem is persistent, you can get your laptop or its battery replaced.
Now, that’s our wrap. For more informative guides, keep on following this website.
Popular Post
Recent Post

Advanced SystemCare: Tool To Clean Your PC
Your computer slows down over time. Files pile up, junk builds inside the system, and things start to feel sluggish. You open a browser, and it takes forever. Programs crash without warning. This is a sign that your PC needs a good cleanup. Many users ignore these signs. They think buying a new computer is […]

Top 10 PC Cleaning and Optimization Tools For Windows 11/10
Discover the best PC cleaning and optimization tools for Windows 11 and 10. Remove junk files, improve speed, and keep your PC healthy with trusted cleaners.

Clear Microsoft Teams Cache On Windows PC [Complete Guide]
Learn how to clear Teams cache on Windows PC with 3 easy methods. Fix slowdowns, glitches, and errors fast. A simple guide for every Windows 11 user.

How To Clear Browsing History on PC: Chrome, Edge, Firefox, Opera
Learn how to clear browsing history on PC across Chrome, Edge, Firefox, and Opera with easy steps, tips, pros, and FAQs.

Clear Cache and Cookies: Complete Guide For Windows 11/10
Learn how to clear cache and cookies on Windows 10 and 11. This complete guide covers Chrome, Edge, and Firefox with simple, step-by-step instructions for every user.

How To Clean PC Trackpad/Touchpad Without Damaging It
Learn how to clean PC trackpad and clean PC touchpad safely with simple steps. Improve performance, remove dirt, and keep your laptop surface smooth and responsive.

How To Clean Your GPU/Graphics Card [Complete Guide]
Introduction A graphics card is one of the most important parts of a computer. It handles visuals, gaming, video editing, and design work. Over time, dust builds up inside it. This dust blocks airflow and traps heat. When heat increases, performance drops. In some cases, the system may even crash. That is why learning how […]

How To Clean PC Power Supply Unit Safely Without Damaging
Follow simple, safe steps to clean your computer’s power supply unit. Improve cooling, reduce overheating, and protect your PC’s performance.

How To Clean a CPU Without Damaging It [Complete Guide]
Learn how to clean a CPU safely without damage. Follow simple steps, precautions, and methods to improve cooling, boost performance, and extend your computer’s life.

How To Clear Browser Cache On Windows 11/10 [Chrome, FireFox, Edge]
Learn how to clear browser cache on Windows 11 and 10. Follow simple steps to clean browser cache, fix slow browsing, and improve performance easily.
