How to Fix the “Class not Registered” Error on Windows
Last updated on February 24th, 2026 at 8:45 am
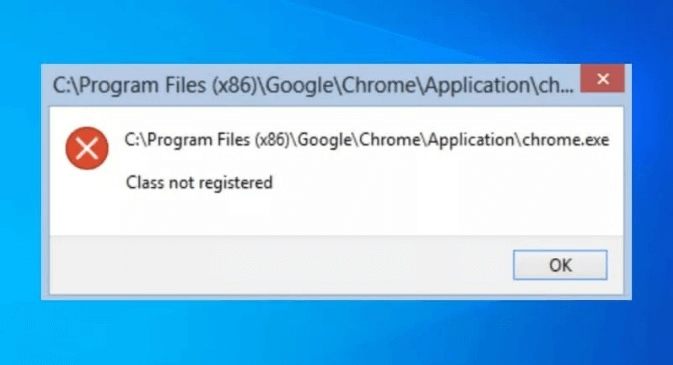
If you’ve ever encountered the frustrating “Class not Registered” error message on your Windows computer, you’re not alone. This common issue can occur when you attempt to open a file, launch an application, or perform certain actions on your system. It often leaves users puzzled and wondering what went wrong.
The “Class not Registered” error typically indicates that a specific class or component required to perform a particular task is either missing or not properly registered in the Windows Registry. This registry is a crucial database that stores configuration settings and information about software and hardware on your computer. When a class or component is not registered correctly, it can cause various problems, including the dreaded error message.
In this comprehensive guide, we will walk you through step-by-step solutions that will help you diagnose and fix the issue.
How to Fix the Class Not Registered Error on Windows 11/10?
Here are some tips and troubleshooting techniques to tackle this error and regain control over your computer without any hindrances.
Method 1: Re-register the Windows DLL Files
Well, agree or not, the error message “Class not registered Windows 10” usually occurs when there are problems with DLL (.dll) files, which may be corrupted or faulty. To resolve this issue, it is essential to re-register all the DLL files on your device.
Here are the steps to re-register the DLL files on your PC:
- Open the Run command dialog box by pressing the Win + R keys.
- Type “cmd” in the textbox and hit Enter to launch the app.
- Enter the provided command and press Enter:
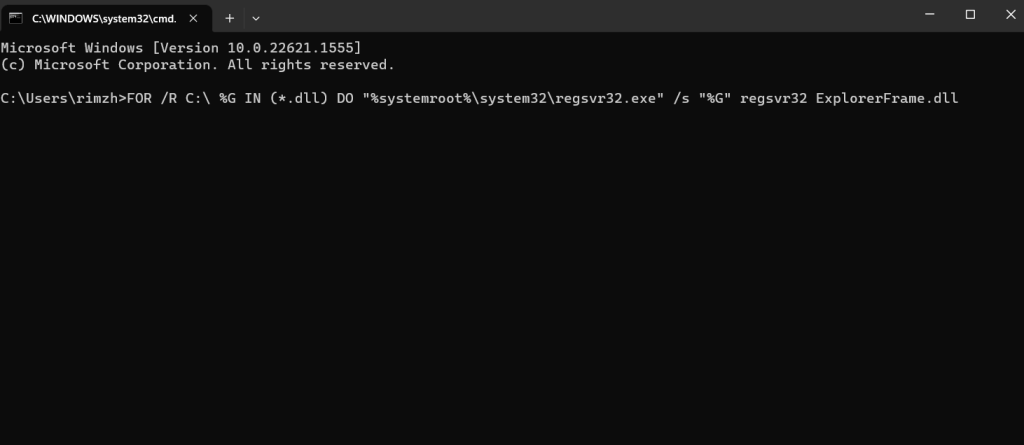
FOR /R C:\ %G IN (*.dll) DO “%systemroot%\system32\regsvr32.exe” /s “%G” regsvr32 ExplorerFrame.dll
After executing this command, reboot your device and check if the issue persists.
Method 2: Restart the File Explorer App
Restarting the File Explorer app can prove as a useful workaround for fixing minor bugs and glitches. Here’s how you can perform the same using the Windows Task Manager app.
- Press the Ctrl+ Shift + Esc key combination to launch the Task Manager app. Alternatively, you also right-click on the Windows icon and select “Task Manager” from the context menu.
- The Task Manager app will now appear on the screen. Go to the “Processes” tab. Now, look for “Windows Explorer” in the list.
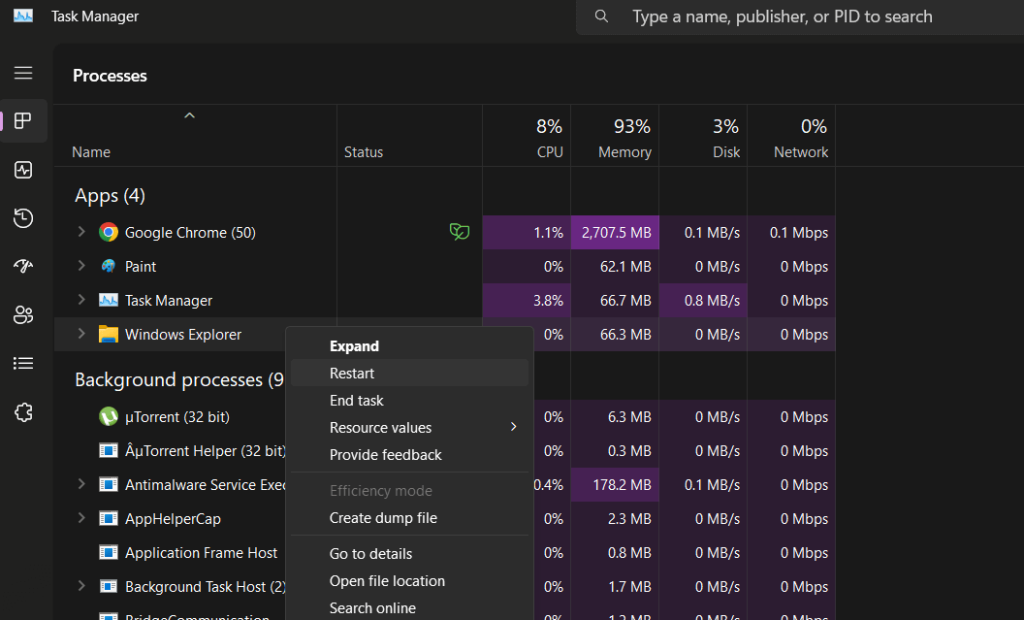
- Right-click on Windows Explorer and select “Restart”.
Reboot your device after performing the above-listed steps.
Method 3: Re-register Windows Store Apps
If you encounter the “class not registered” error, certain Windows apps on your system are probably defective or corrupted. In such a situation, a potential solution would involve re-registering all your Windows apps.
Tap on the search bar placed on the Taskbar, type “PowerShell” and select the “Run as administrator” option to launch the app in admin mode.
In the PowerShell app, execute the following command:
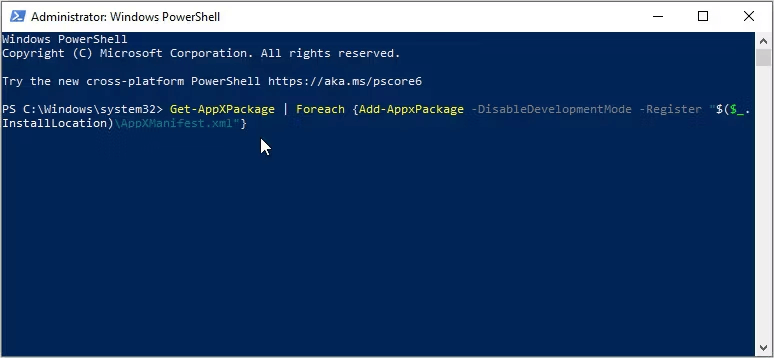
Get-AppXPackage | Foreach {Add-AppxPackage -DisableDevelopmentMode -Register “$($_.InstallLocation)\AppXManifest.xml”}
After executing this command, exit all windows and reboot your Windows PC.
Method 4: Repair Microsoft Visual C++ Programs
To resolve the “class not registered” issue on Windows 10 or Windows 11, one effective approach is to repair or update the Microsoft Visual C++ programs.
The Microsoft Visual C++ runtime library packages play a crucial role in ensuring the smooth operation of your device. When these packages become corrupted, it can lead to various system problems.
Follow these steps to repair the Microsoft Visual C++ programs on Windows 10/11.
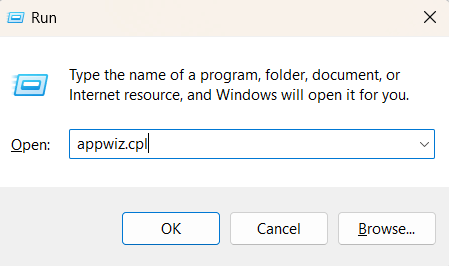
- Open the Run command dialog box by pressing Win + R and type “appwiz.cpl” and press Enter to open the Programs and Features window.
- Right-click on each Microsoft Visual C++ program and select “Change” from the available options.
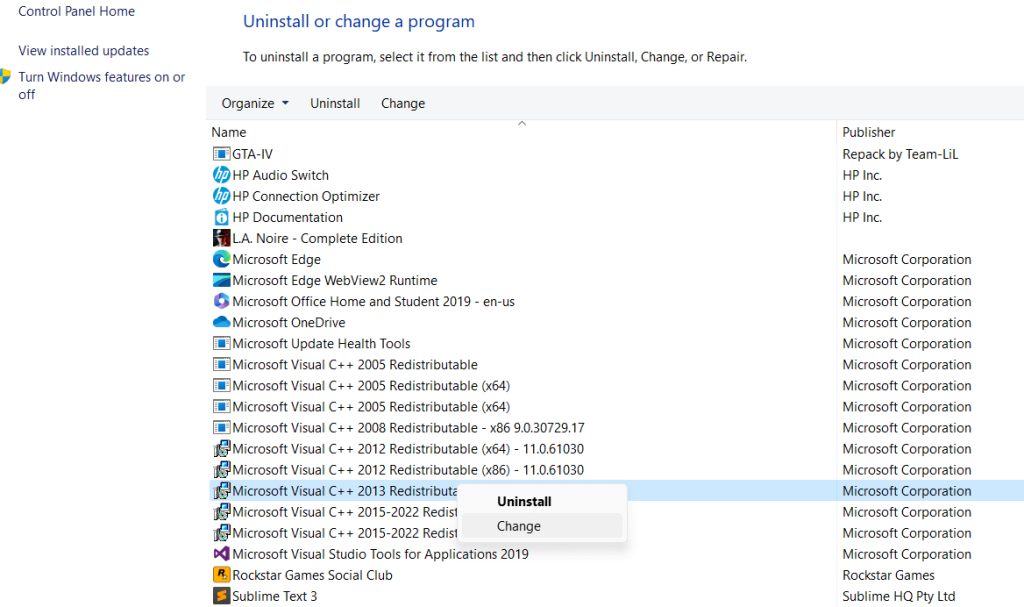
- You will now see a pop-up window on the screen. Hit on the “Repair” button to proceed. Follow the on-screen instructions to repair all Microsoft Visual C++ programs installed on your device.
Method 5: Run the SFC and DISM Scan
To run an SFC (System File Checker) scan, which helps detect and repair corrupted system files, follow these steps:
- Tap on the search bar and type “Command Prompt”. Select the “Run as administrator” option to launch Terminal with admin privileges.
- In the Command Prompt window, type the following command and press Enter:
sfc /scannow
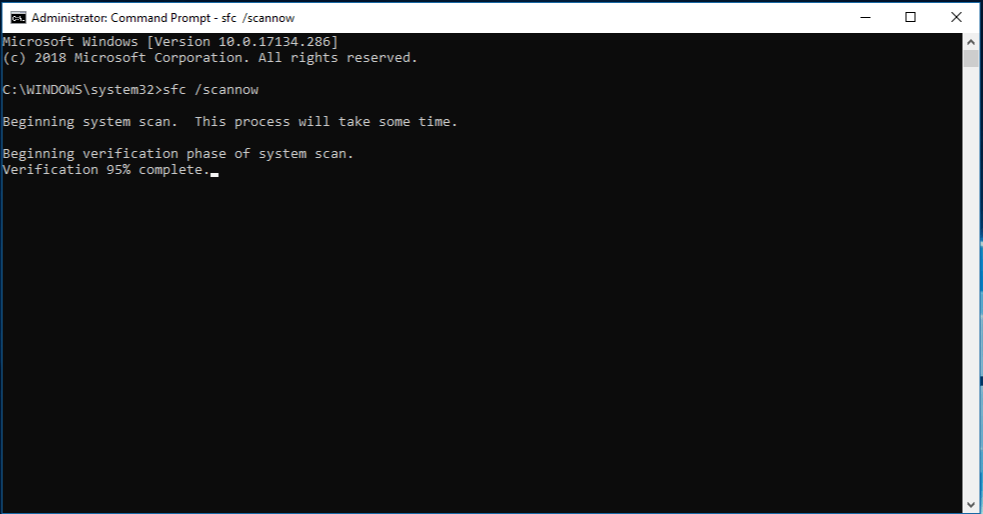
- Wait for the scan to complete. It may take some time.
Once the scan finishes, the Command Prompt will display the results and notify you if any issues were found and repaired.
After running the SFC scan, run the DISM (Deployment Image Servicing and Management) scan as well. It is a command-line tool in Windows used for servicing and managing Windows installation images, including offline images or running operating systems.
In the Command Prompt window, type the following command and press Enter:
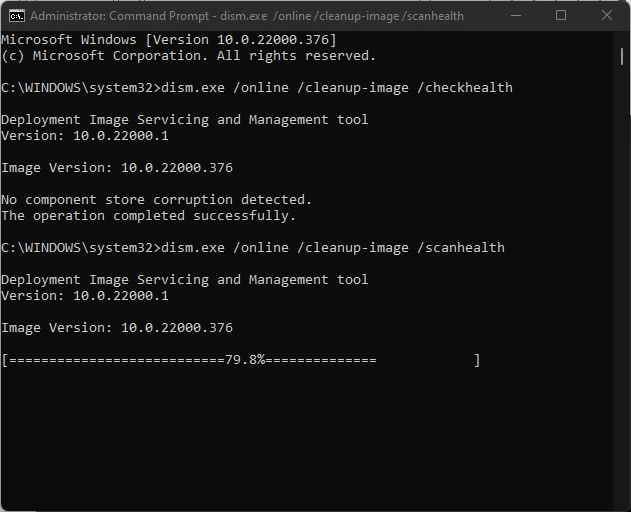
DISM /Online /Cleanup-Image /ScanHealth
Once the scan finishes, the Command Prompt will display the results, indicating if any issues were found with the Windows image. Running the SFC and DISM scans on Windows is an effective solution to fix the “Class not registered” error.
Method 6: Check the Hard Drive Status
Hard drive issues can also trigger errors on your Windows PC. Here’s how you can check the hard drive status:
- Open the Command Prompt. Press the Win + R keys, type “cmd,” and then press Enter.
- In the Command Prompt window, type the following command and press Enter.
wmic diskdrive get status
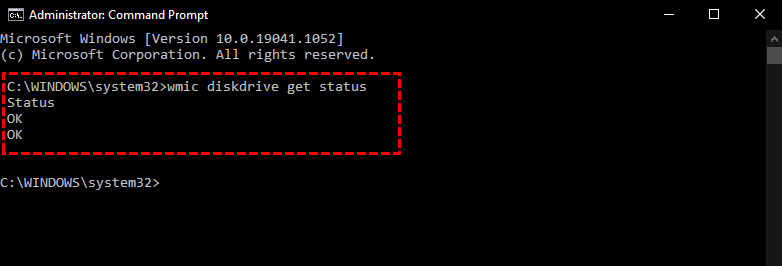
- Wait for the command to execute. It will display the status of all connected disk drives on your system.
- Check the “Status” column for each drive to determine its status. The possible values of the command include “OK” (healthy), “Pred Fail” (predicted failure), “Error” (error detected), or other relevant status messages.
By running this command, you can get a quick overview of the disk drive status for each connected drive on your system.
Method 7: Perform a System Restore
Performing a system restore can potentially help in resolving the “class not registered” error, as it allows you to revert your system settings and configuration to a previous state.
To perform a system restore on Windows 11/10, follow these steps:
- Press the Win + R keys to open the Run command dialog box and type “rstrui” and press Enter to open the System Restore window.
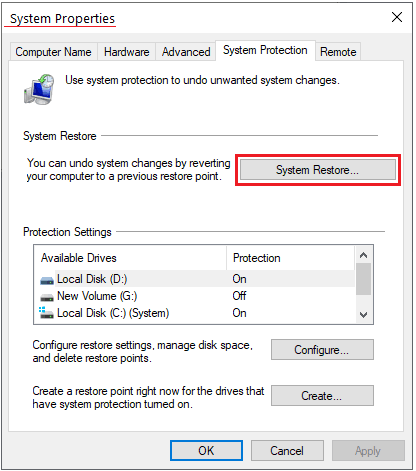
- Click “Next” to proceed.
- Select a restore point from the available list. Choose a restore point that predates the occurrence of the error.
- Follow the on-screen instructions to complete the system restore process.
Once the restoration is finished, your system will restart, and the selected settings and configuration will be applied.
Conclusion
Encountering the “Class not Registered” error on Windows can be annoying, but there are several effective solutions available to resolve it. By following the steps outlined in this guide, you can tackle the error and regain smooth functionality on your system.
Was this post helpful? Which method did the trick for you? Feel free to share your troubleshooting experiences in the comments section!
Popular Post
Recent Post
How To Clear Cache Memory On Windows 11/10 [2026]
Learn how to clear cache memory on Windows 11/10 using safe built-in methods to improve speed, free space, and maintain smooth system performance.

Windows Installer Cleanup Utility: Complete Review And Alternatives
Detailed review of Windows Installer Cleanup Utility, reasons for removal, risks, and safer modern alternatives explained clearly.

How To Clean Junk Files On Windows 11/10
Learn how to clean junk files on Windows 11 and 10 using safe, simple steps to boost speed and free storage space effectively.

Clearing App Cache Data on Windows 11/10: Complete Guide
Learn how to safely clear app cache on Windows 11 and 10 to fix slow apps, free disk space, and improve overall system performance.
How To Clean Up System Files On Windows 11/10: Complete Guide
Explore a step-by-step guide explaining how Windows users can safely remove unnecessary system data using built-in tools.
How To Clean a Laptop Fan Without Opening [2026 Guide]
Learn how to clean a laptop fan without opening the device using safe steps, simple tools, and easy methods for better cooling.
How to Clear the Queue in the Printer Automatically in 2026
Learn how to clear the queue in the printer with simple steps. This easy guide explains why print jobs get stuck and how to fix them safely for smooth printing.

How To Clear Delivery Optimization Cache In Windows
Learn how to clear Delivery Optimization Cache in Windows safely and easily. This guide explains steps, precautions, benefits, and FAQs to free space and avoid update issues.
How To Clear Cache in Edge [Windows 11/10]: Latest Guide
Learn how to clear cache in Edge on Windows 11 and Windows 10. Step by step guide with precautions, FAQs, and tips to fix slow pages and errors.

Top 15 Questions About PC Cleaning and Their Answers
Learn safe and simple ways to clean your PC. This guide answers top questions, covers precautions, and gives advanced tips for better PC health and performance.
