How to Screen Record on Windows 11 With & Without Snipping Tool
Open the Snipping Tool to begin a screen recording in Windows 11 to capture what is on your screen. You can also open the Game Bar on your Xbox by pressing Windows+G, then launch the recording window and tap the record button. Use a third-party program, such as OBS, ScreenPresso, or GeForce Service, to record your screen.
A procedure, or even something amusing or intriguing, may be captured by capturing your screen. You may use additional programs in addition to the built-in recording of screen recording feature of Windows 11. Understand the complete process of how to screen record on Windows 11.
How To Record a Screen
Windows 10 with Windows 11’s Xbox Game Bar tools, for instance, both consist of a built-in screen-capturing feature. However, it has certain limitations, such as the reality that it can only screen record a single application at a time instead of the full desktop. If you are running Windows 11 edition 22621.1344 or later, the Snipping Tool allows you to select a specific desktop region and capture the screen. Given that it is unable to record sounds, for example, it cannot be a perfect remedy. If you want more options, you may also utilize a third-party screen recording program that has more features than OBS.
We will show you how to record the display in Windows 10 or Windows 11, following the Xbox Gaming Bar, the Snipping Tool, one of the most recent releases of Windows 11, and OBS. For more information on recording the screen on Windows 10 or 11, see our tutorial.
Windows Screen Recording Using the Snipping Tool
The integrated Snipping Tool in Windows 11 is the most straightforward approach for screen recording. You may record movies on your screen while using it to take and edit snapshots. Windows 11 and subsequent users have access to the Snipping Tool’s screen recording feature, allowing you to draw a box around only the desktop area you wish to record.
If you are trying to create a lesson on using the Start Menu, this may be a specific window or just the menu’s space. You may generate a box across the whole desktop if your program’s window might move or otherwise fill the entire screen. The methods below will show you how to screen record using Windows 11’s Snipping Tool.
Step 1: To launch the software, first access the Start button and type “Snipping Tool” into the search bar.

Step 2: Change the snip technique to the video recorder icon and select “New” to begin recording a screen.
Step 3: To choose a portion of the screen you want to record, click and drag the crosshair-shaped mouse pointer.
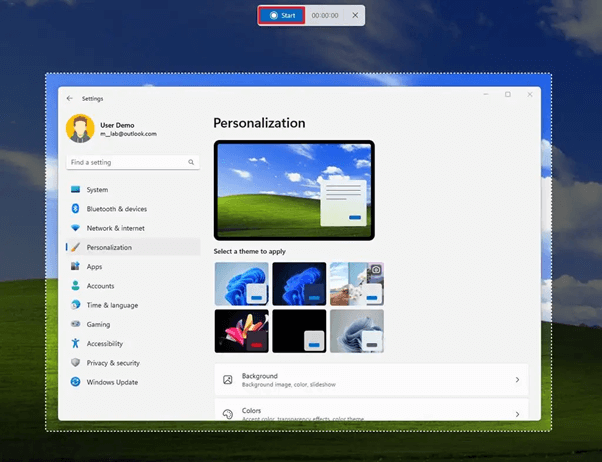
Step 4: Click “Start” on the floating toolbar to commence the screen recording.
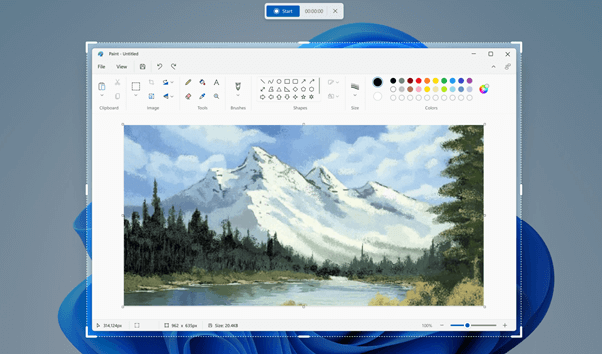
Step 5: Click the red “stop” button in the toolbar to finish. During the recording, you may pause and erase as well.
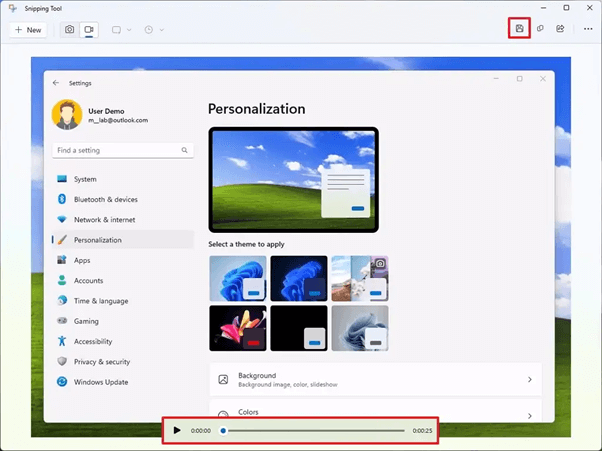
Step 6: When you stop, the recording will start playing in a player box. From this point, you can replay, store, duplicate, or send it.
This screen-capturing tool is enjoyable and easy. Use one of the other techniques in this tutorial if you would like more options, such as the capacity to record audio.
Making a Screen Recording with the Xbox Game Bar
The Xbox Game Bar, available with the latest version of Windows 11 by design, is the other built-in option for capturing your monitor in Windows 11. Use the Windows+G keyboard as a shortcut to launch the Xbox Game Bar, or look it up in the start menu. The Microsoft Xbox Game Bar is a native program with Windows 11, although it is also accessible as an add-on.
The Game Bar contains several features designed exclusively for gaming, including the ability to communicate with other players while playing Xbox games and access to widgets for specific titles. Additionally, it has an extension for screen recording and capture:
Step 1: You will see the Xbox Game Bar at the top left of your screen. Select the “Camera” icon to open the Capture window.
Step 2: You can record your screen in the Capture window. Before you do, though, you need to enable (or turn off) your microphone. Ensure that the Microphone icon has not been crossed out with an outline or that it is not selected if you would like to speak while recording your screen.
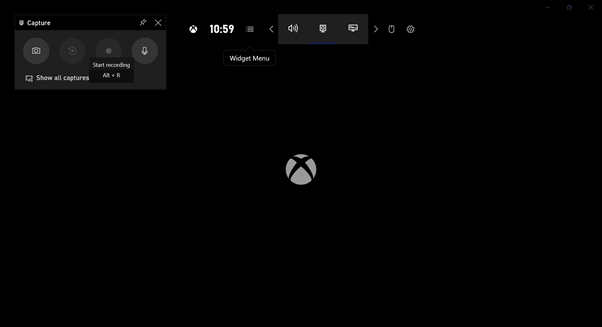
Step 3: Select the “Record” button, which is the one with a large white circle, when you are ready to start recording.
Step 4: The recording of your screen will start. When done, click the “Stop” button to see a square of solid white. The Record button’s old location is still where this one is. Click “Show All Captures” at the end of the Screen capture window to locate your recording.

The Xbox Gamebar has limitations in that it only allows for one app at a time and does not display the computer’s desktop or file manager while screen recording on Windows. Snipping Tool is more capable but has fewer features and does not support audio.
You require a third-party tool to register everything on your desktop and every window on it with a full range of settings, and while there are several available, we recommend you choose one for this.
Using Microsoft PowerPoint, Capture A Screen.
PowerPoint was created by the same corporation that created Windows. Even though it is not a built-in option, you may use this tool to record your desktop without worrying about the junkware that sometimes accompanies third-party downloads.
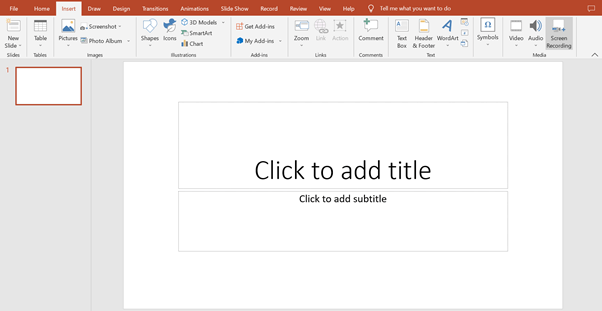
Step 1: Open PowerPoint, choose the “Insert” button, and select “Screen Recording” from the Media group to record your screen.
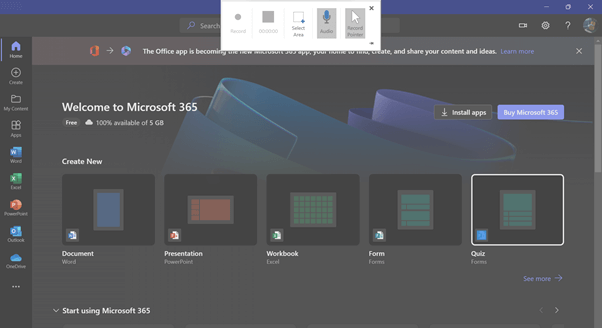
Step 2: A little bar will now appear at the edge of your screen instead of PowerPoint. You may select whether to record audio or use your cursor to move to the right menu bar. An option is enabled if it appears highlighted in a particular peach and vice versa.
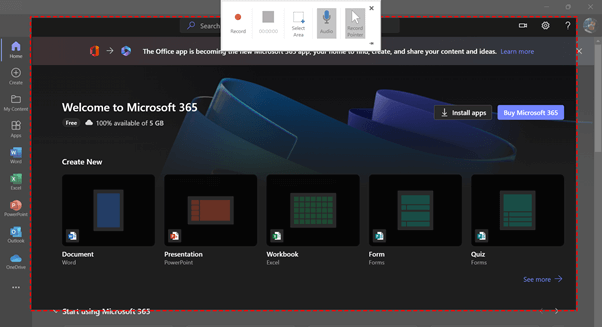
Step 3: Choose the portion of the display you wish to capture. When the menu button appears, your cursor will change to a plus sign automatically. Use the cursor to click and drag to choose the area you want to record. A red line with holes around it borders the space.
Step 4: When you are ready to start recording, select “Record” from the menu.
Step 5: The recording on your screen will start. The “Pause” option/button in the menu bar allows you to stop recording, while “Play,” which will only be available if you stop your screen, allows you to continue recording. After recording, you may also select “Stop,” represented by the solid blue square.
Keep in mind that during recording, the choices in the bar will vanish. Drag the cursor to the highest point of your screen and make it reappear.
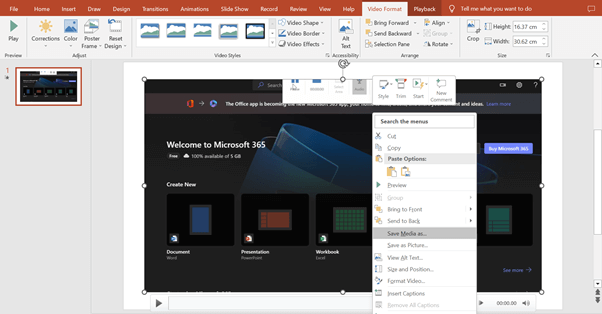
Step 6: The recording will display on your PowerPoint slides after you have completed it. Right-click on the recording and choose “Save Media As” from the associated menu to download it. Please select a location to save the recording on your computer and upload it there.
Utilize A Tool or Extension.
There are many Windows 11 applications available in the Microsoft Store that let you watch movies, edit images, engage in gaming, and more. You might use separate software to capture your screen, even though the Snipping Tool with the Game Bar on your Xbox has already been included. Thank goodness, there are a ton of both free and paid alternatives. Consider starting the Screen Recording for Windows software or the Screen Recording add-on in Microsoft Edge as a free choice.
Once you have a handle on the fundamentals, capturing the display on Windows 11 is relatively easy. Whether you use a native program or download one if you would rather, Snipping Tool enables you to select the specific region of the display you wish to capture. Still, with other options, you will get a recording of the entire screen. It is also possible to alter those recordings, so you are fortunate. You may produce the stuff of your desires with the aid of Microsoft’s Clipchamp software.
Conclusion
Here is the answers for How to screen record on Windows 11. You can record your screen to catch whatever is happening, just like you would with a camera. You can record something hilarious you want to impart to others or store for later, or you can register a procedure. Even if Windows 11 has a built-in program for recording screens, there are a few other options. So, you can record a screen using the steps above.
Popular Post
Recent Post

Advanced SystemCare: Tool To Clean Your PC
Your computer slows down over time. Files pile up, junk builds inside the system, and things start to feel sluggish. You open a browser, and it takes forever. Programs crash without warning. This is a sign that your PC needs a good cleanup. Many users ignore these signs. They think buying a new computer is […]

Top 10 PC Cleaning and Optimization Tools For Windows 11/10
Discover the best PC cleaning and optimization tools for Windows 11 and 10. Remove junk files, improve speed, and keep your PC healthy with trusted cleaners.

Clear Microsoft Teams Cache On Windows PC [Complete Guide]
Learn how to clear Teams cache on Windows PC with 3 easy methods. Fix slowdowns, glitches, and errors fast. A simple guide for every Windows 11 user.

How To Clear Browsing History on PC: Chrome, Edge, Firefox, Opera
Learn how to clear browsing history on PC across Chrome, Edge, Firefox, and Opera with easy steps, tips, pros, and FAQs.

Clear Cache and Cookies: Complete Guide For Windows 11/10
Learn how to clear cache and cookies on Windows 10 and 11. This complete guide covers Chrome, Edge, and Firefox with simple, step-by-step instructions for every user.

How To Clean PC Trackpad/Touchpad Without Damaging It
Learn how to clean PC trackpad and clean PC touchpad safely with simple steps. Improve performance, remove dirt, and keep your laptop surface smooth and responsive.

How To Clean Your GPU/Graphics Card [Complete Guide]
Introduction A graphics card is one of the most important parts of a computer. It handles visuals, gaming, video editing, and design work. Over time, dust builds up inside it. This dust blocks airflow and traps heat. When heat increases, performance drops. In some cases, the system may even crash. That is why learning how […]

How To Clean PC Power Supply Unit Safely Without Damaging
Follow simple, safe steps to clean your computer’s power supply unit. Improve cooling, reduce overheating, and protect your PC’s performance.

How To Clean a CPU Without Damaging It [Complete Guide]
Learn how to clean a CPU safely without damage. Follow simple steps, precautions, and methods to improve cooling, boost performance, and extend your computer’s life.

How To Clear Browser Cache On Windows 11/10 [Chrome, FireFox, Edge]
Learn how to clear browser cache on Windows 11 and 10. Follow simple steps to clean browser cache, fix slow browsing, and improve performance easily.
