How To Fix PowerShell Has Stopped Working or Not Opening in Windows
While operating Windows, people can expect high-grade functionality and simple usability throughout. However, some errors occur and cause issues with steady operations or at least disrupt other functions to some extent. The “Windows PowerShell not opening” error is one such issue that is rare but can affect regular functions for users.
Best Ways for Fixing the PowerShell Stopped Working Issue
After trying out various solutions, we present the most effective methods to resolve the PowerShell performance issue on Windows. The Poweliks virus influences this issue, but various situations also cause the error.
Consider the condition of your system, the operating system version, and which works within your skill range to decide which solution to try.
Fix 1: Handle a Complete System Scan
In most cases, the Windows PowerShell not opening error is due to the effect of the malware that has entered the system. One of the initial solutions you should scan the system fully.
After activating this software, the program scans the device for possible infected data files and removes them automatically. Before using this method, you should first access Safe Mode and run an overall system security scan.
Fix 2: Operating with another Microsoft Account
For some users, the main reason for the Windows PowerShell not opening issue is related to the account users are utilizing. In this case, the best solution is to start using another account instead of the active Microsoft account. In case you only have and use one Microsoft account, it is better to focus on creating a new one to resolve the problem.
How to proceed?
Step 1: On your PC, tap the Windows key.
Step 2: Then, from the options, choose Settings.
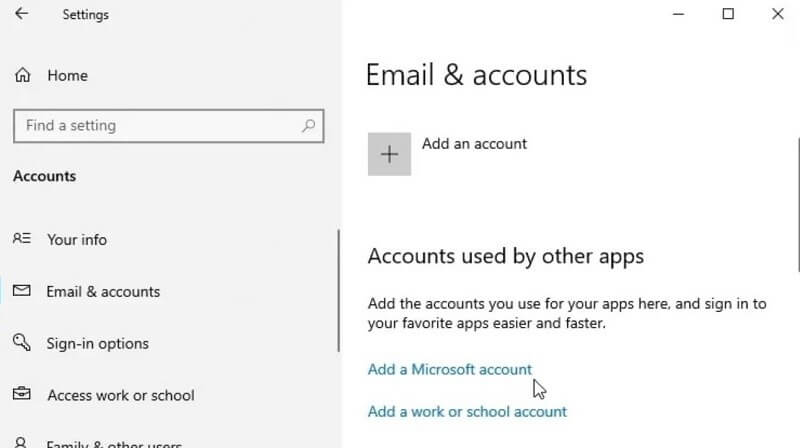
Step 3: In the Settings menu, click on the Accounts option and then choose “Email & accounts” from the left.
Step 4: Choose the Add a Microsoft Account option from the right-side pane. Then, add the necessary data in the text fields here.
Step 5: Then, try to access the PowerShell tool. If it opens successfully, the problem is fixed. If not, you must try other methods.
Fix 3: Utilize Administrative Privileges While Running Windows PowerShell
To fix this PowerShell not opening issue, it is useful to open this using administrative privileges. This is accessible through the Task Manager and involves relatively simple steps.
How to proceed?
Step 1: On your Windows PC, tap on the Start button and type in the term “Task Manager”.
Step 2: Click on the best match choice to access it.
Step 3: At the top-left side of the screen, choose the File option. Under the tab, choose Run New Task.
Step 4: Next, type in the term “Powershell” on the next prompt. Tick the “Create this task with administrative privileges” box.
Step 5: Then press OK.
Fix 4: Start the Clean Boot
Sometimes, the Windows PowerShell not opening error happens due to software conflicts in the Windows 10 system. Therefore, it is best to opt for a clean boot- it will help you understand if any software conflict exists and take action accordingly.
After this process, you would know there is some software conflict in case the error does not repeat. Following that, delete the application detected as the cause.
How to proceed?
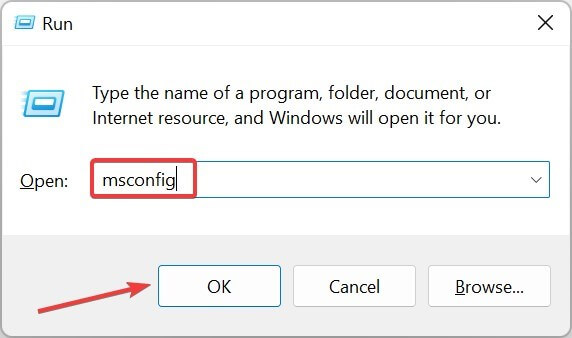
Step 1: Press the Win + R keys on your keyboard to access the Run dialog box. In this, type in the command “msconfig” and press the OK button.
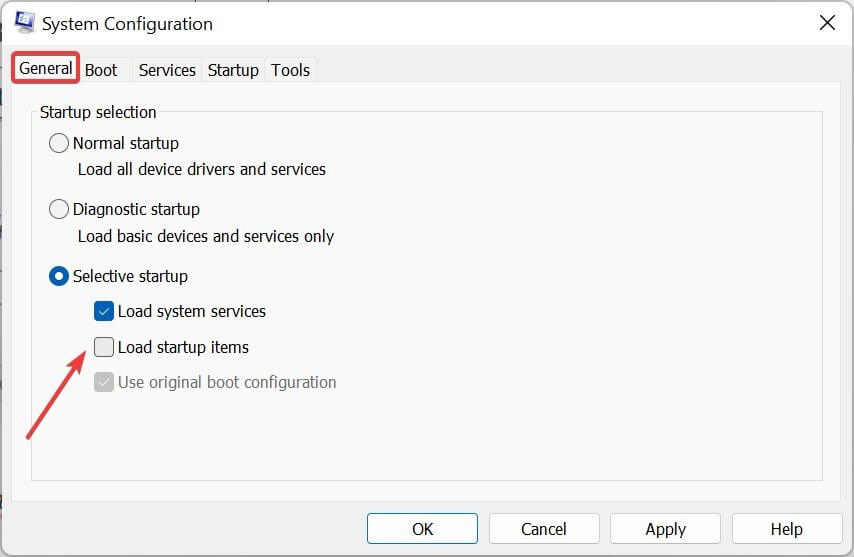
Step 2: Choose System Configuration and then tap on the General tab. In this window, remove the checkmark beside the “Load Startup items” option under the Selective Startup category. Then, tap on OK.
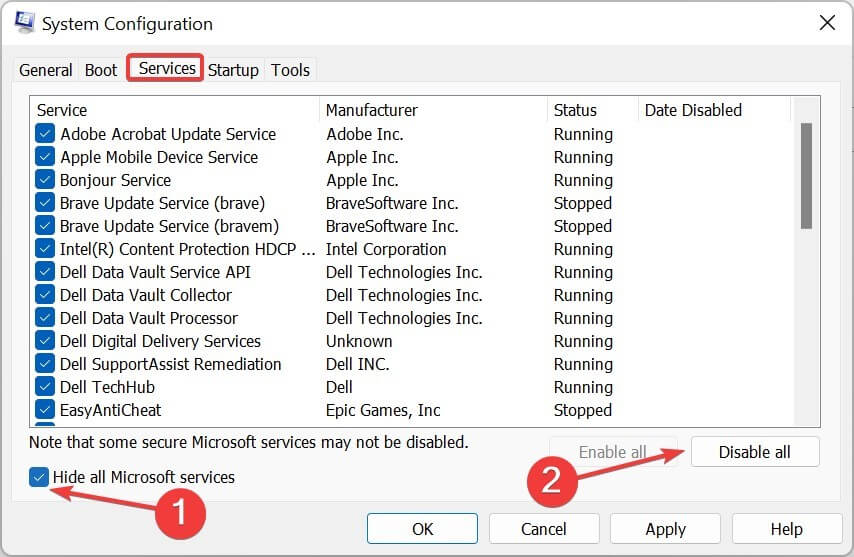
Step 3: Next, access the tab named “Services”. Under this section, tick the “Hide all Microsoft services”.
Step 4: Tap on the Disable All button.
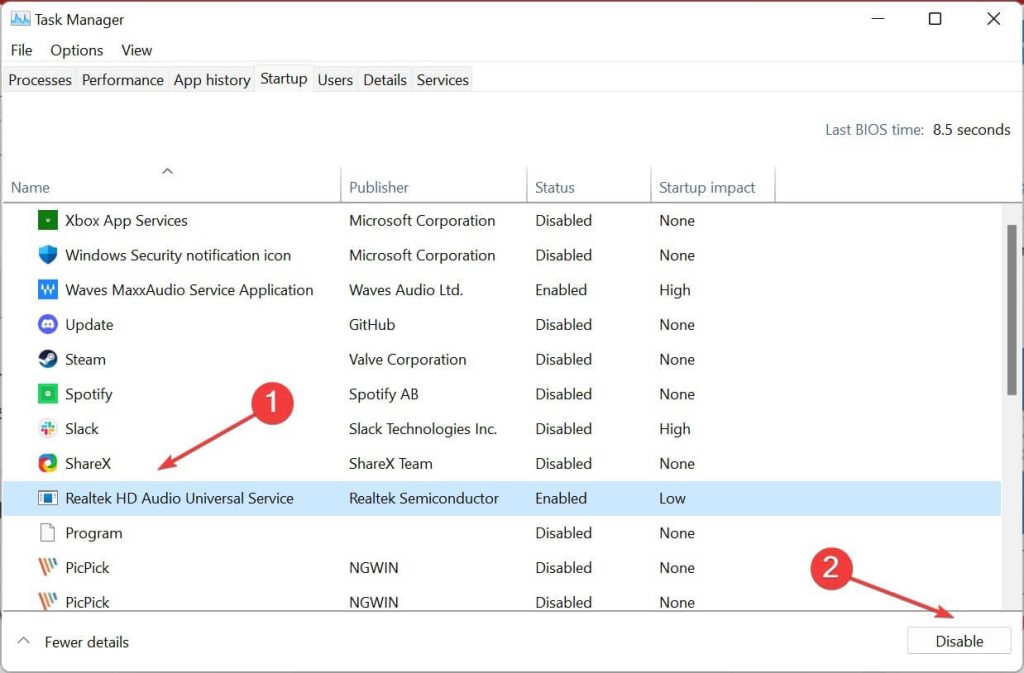
Step 5: Go to the Startup category and access the link of Open Task Manager.
Step 6: Choose the individual programs you want to deactivate from the list in the next window, and tap on Disable.
Step 7: Return to the previous System Configuration page and tap on OK.
Step 8: Then, a prompt to restart the computer will appear. Press the Restart button.
Fix 5: Disable the Windows PowerShell and Re-enable It Later
One of the prominent solutions for the “PowerShell not opening” problem on Windows is to deactivate the source utility, i.e., PowerShell. This will automatically stop the issue, creating the problem mid-way. Then, you must re-activate the program again.
Keep in mind that this goes both ways. In some cases, the PowerShell feature was disabled ahead of time. In that case, you should enable the feature again to fix this error when it comes up quickly.
How to proceed?
Step 1: Access the Control Panel from the Start menu on your Windows PC and select the Programs option.
Step 2: Next, tap on Uninstall a program > Turn Windows features on and off.
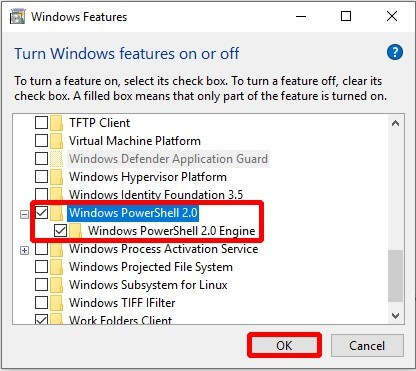
Step 3: In the next section, search for Windows PowerShell from the list and click the checkbox beside it to uncheck the selection. Press OK.
Step 4: Restart the device. Following that, carry out all of the steps mentioned here again to re-activate Windows PowerShell.
Fix 6: Reset the PowerShell Program to Default
Some of the changes you made within the Windows PowerShell setting may prove incompatible with the other system configurations. That can inevitably cause functional errors like the Windows PowerShell not opening issue. The solution, in this case, is to reset the program to its default mode.
How to proceed?
Step 1: Click on Win + E keys on your Windows computer. This will access File Explorer.
Step 2: In the address bar, add the following path. Make sure to put in the name of your device in the “username” section: C:\Users\Username\AppData\Roaming\Microsoft\Windows\Start Menu\Programs\Windows PowerShell
Press the Enter key.
Step 3: Choose the Windows PowerShell entry. Press the delete key and remove this entry.
Step 4: Make another account by clicking on the “create a new user account” option and repeating the same path. Then, copy the shortcut for the PowerShell solution into the USB drive section.
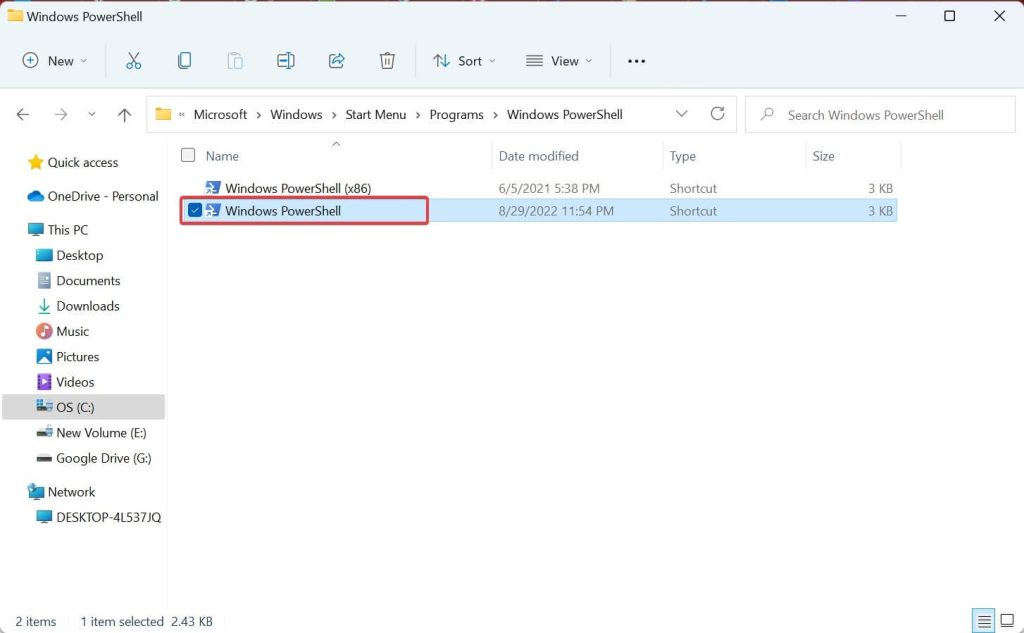
Step 5: Return to the first account. Please search for the Windows PowerShell folder to open it and then paste the shortcut here.
Fix 7: Use Built-in Troubleshooters
Windows has troubleshooters pre-configured into the systems for users to handle most of the common system issues easily. While most of them focus on specific functions, some of these troubleshooters have multi-directional uses.
So, if the cause of the PowerShell-related issue occurred due to problems with system maintenance, it is best to use the System Maintenance Windows troubleshooter. You can fix the unidentified system issue causing this error when you run this troubleshooter and choose another if this solution does not work.
Two variations are detailed here.
How to proceed with System Maintenance Troubleshooter?
Step 1: Tap on the Start menu on your PC and type the term “Control Panel” in the search field. Then, choose the program that appears and open it.
Step 2: Tap on the drop-down menu for View by > Small icons.
Step 3: Among the menu items available, choose Troubleshooting.
Step 4: Scroll down and choose System and Security > System Maintenance.
Step 5: Then, tap on the Advanced option and tap on the checkbox beside “Apply repairs automatically” to select it.
Step 6: Click on Next. Carry out the on-screen instructions that come up.
How to proceed with Hardware & Devices Troubleshooter?
Step 1: On your PC, click on Win + I keys on the keyboard.
Step 2: When the System Settings section opens, choose the Update & Security option.
Step 3: From the left pane, tap on Troubleshoot.
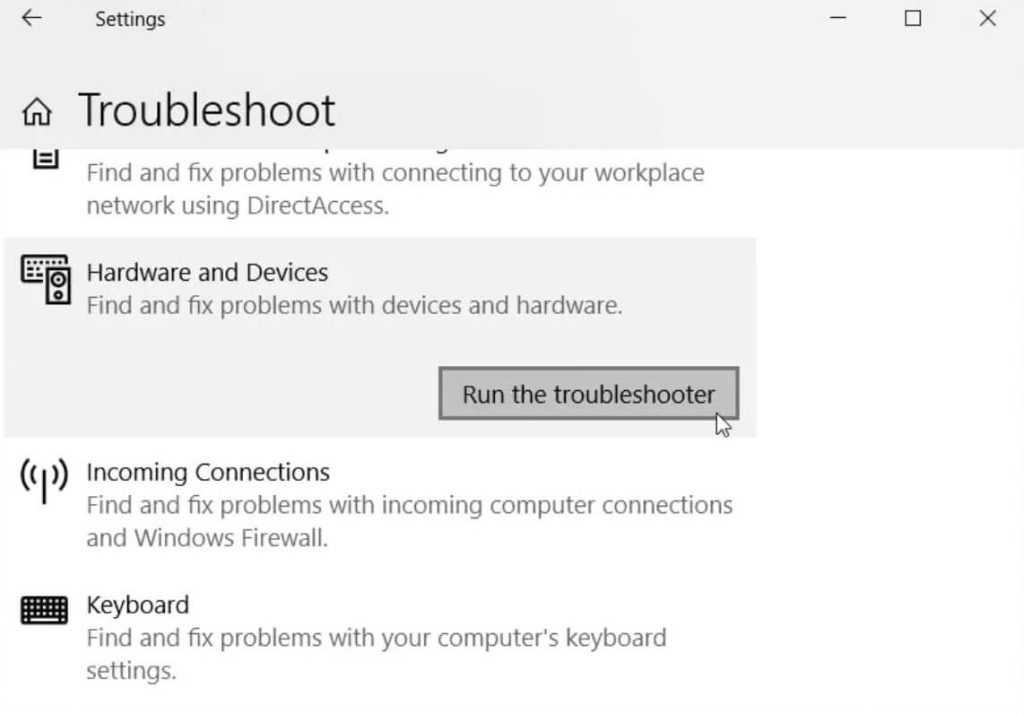
Step 4: Next, browse for the “Hardware and Devices troubleshooter” option and then click on it.
Step 5: Tap on the “Run the troubleshooter” button. Follow on-screen instructions as they come up next to complete the full troubleshooting process.
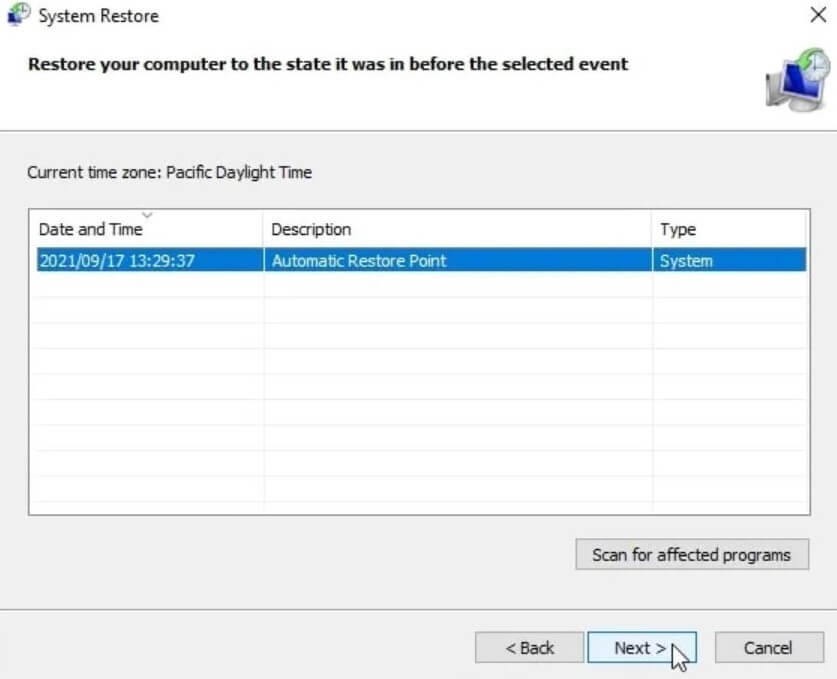
Fix 8. Restore the Windows Device
You can utilize the built-in System Restore tool here, as the Windows utility’s feature will undo all recent changes. So, if any of these adjustments are causing system issues like existing bugs, restoring the device removes them efficiently.
How to proceed?
Step 1: Go to the Start Menu. In the search text field, type Control Panel. Then, choose the best match.
Step 2: Tap on “View by” to access the drop-down menu and then choose “Small icons” from the list.
Step 3: Browse and choose Recovery. Then, tap on the Open System Restore selection and press Next.
Step 4: From the following restore points that appear, choose the one you prefer and tap Next.
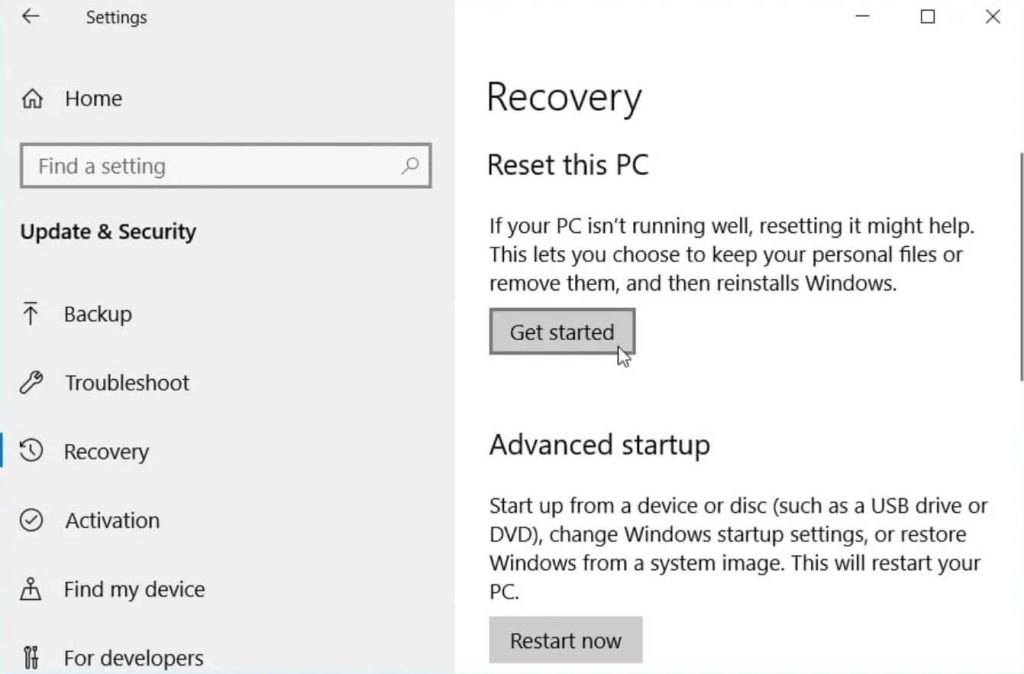
Fix 9: Reset to Factory Settings on the Device
If none of the other solutions work, you can factory reset the Windows computer to remove this issue. However, avoid using this step as the first solution since all your data will be deleted after resetting. So, try out all of the other fixes, and if they don’t work, back up your device data and then reset its factory settings.
How to proceed?
Step 1: Press the Win and I keys on the PC keyboard to access System Settings directly.
Step 2: Under it, tap on the Update & Security selection and press Recovery next.
Step 3: From the right side, hit the Get Started button. Then, continue as the on-screen instructions mention.
Conclusion
To summarise, the Windows PowerShell not opening error can heavily impact the overall computer experience for users. It is better to use one of the solutions mentioned in this post after considering which one best suits your needs.
Try them out depending on your system’s condition, and use additional tools like IObit Advanced SystemCare to speed the system up. If the issue still continues, you can take the help of professionals.
Popular Post
Recent Post

Advanced SystemCare: Tool To Clean Your PC
Your computer slows down over time. Files pile up, junk builds inside the system, and things start to feel sluggish. You open a browser, and it takes forever. Programs crash without warning. This is a sign that your PC needs a good cleanup. Many users ignore these signs. They think buying a new computer is […]

Top 10 PC Cleaning and Optimization Tools For Windows 11/10
Discover the best PC cleaning and optimization tools for Windows 11 and 10. Remove junk files, improve speed, and keep your PC healthy with trusted cleaners.

Clear Microsoft Teams Cache On Windows PC [Complete Guide]
Learn how to clear Teams cache on Windows PC with 3 easy methods. Fix slowdowns, glitches, and errors fast. A simple guide for every Windows 11 user.

How To Clear Browsing History on PC: Chrome, Edge, Firefox, Opera
Learn how to clear browsing history on PC across Chrome, Edge, Firefox, and Opera with easy steps, tips, pros, and FAQs.

Clear Cache and Cookies: Complete Guide For Windows 11/10
Learn how to clear cache and cookies on Windows 10 and 11. This complete guide covers Chrome, Edge, and Firefox with simple, step-by-step instructions for every user.

How To Clean PC Trackpad/Touchpad Without Damaging It
Learn how to clean PC trackpad and clean PC touchpad safely with simple steps. Improve performance, remove dirt, and keep your laptop surface smooth and responsive.

How To Clean Your GPU/Graphics Card [Complete Guide]
Introduction A graphics card is one of the most important parts of a computer. It handles visuals, gaming, video editing, and design work. Over time, dust builds up inside it. This dust blocks airflow and traps heat. When heat increases, performance drops. In some cases, the system may even crash. That is why learning how […]

How To Clean PC Power Supply Unit Safely Without Damaging
Follow simple, safe steps to clean your computer’s power supply unit. Improve cooling, reduce overheating, and protect your PC’s performance.

How To Clean a CPU Without Damaging It [Complete Guide]
Learn how to clean a CPU safely without damage. Follow simple steps, precautions, and methods to improve cooling, boost performance, and extend your computer’s life.

How To Clear Browser Cache On Windows 11/10 [Chrome, FireFox, Edge]
Learn how to clear browser cache on Windows 11 and 10. Follow simple steps to clean browser cache, fix slow browsing, and improve performance easily.
