How to Enable Secure Boot in Windows 11 and Windows 10
One of the key features that can significantly enhance the security of your Windows operating system is Secure Boot. By enabling Secure Boot on your Windows 11 or Windows 10 system, you can protect your device against malware and unauthorized operating systems.
Benefits of Enabling Secure Boot in Windows 11 And 10
1. Protection Against Rootkits and Bootkits
Enabling secure boot in Windows 11 and 10 helps protect the system against rootkits and bootkits. Rootkits and bootkits are malicious software that can compromise the boot process of a computer, allowing attackers to gain control of the system before the operating system fully loads. Secure boot helps prevent these types of attacks by ensuring that only trusted software components are allowed to run during the boot process.
2. Enhanced System Integrity
Secure boot helps to ensure the integrity of the operating system by verifying the digital signatures of bootloader and kernel components before allowing them to execute. This verification process helps to prevent unauthorized or malicious code from running during the boot process, thereby enhancing the overall security and trustworthiness of the system.
3. Protection Against Malware
By enforcing the use of digitally signed bootloaders and kernel components, secure boot helps protect the system against malware that attempts to tamper with the boot process. This can significantly reduce the risk of malware infections and unauthorized system modifications, thereby enhancing the overall security posture of the system.
4. Hardware Compatibility and Driver Verification
Enabling secure boot in Windows 11 and 10 encourages the use of digitally signed hardware drivers, which can help improve system stability and compatibility. Secure boot verifies the digital signatures of device drivers during the boot process, ensuring that only trusted and properly signed drivers are loaded into the operating system. This can help prevent the installation of incompatible or malicious drivers that could compromise system stability and security.
How to Enable Secure Boot on Windows 11 and Windows 10
Method 1: Enabling Secure Boot through UEFI Firmware Settings
Here’s how to enable secure boot of Windows 11 and 10 using this method:
Step 1: Restart your computer and enter the UEFI firmware settings by pressing the designated key during the boot process.
Step 2: Navigate to the “Security” or “Boot” tab in the UEFI settings.
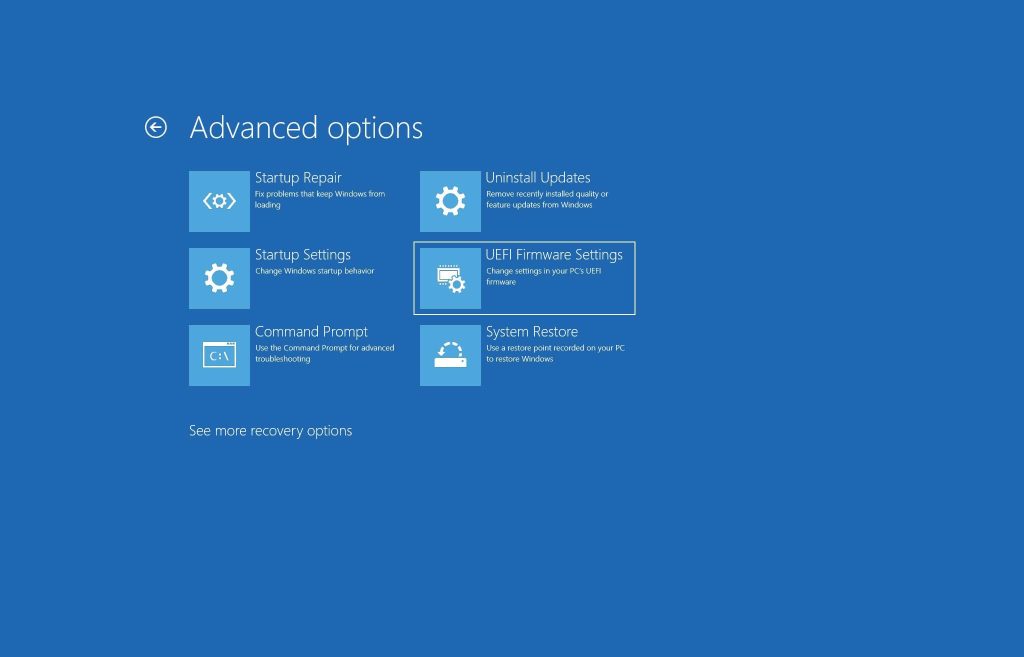
Step 3: Locate the Secure Boot option and set it to “Enabled.”
Step 4: Save the changes and exit the UEFI settings.
Step 5: Your system will now boot with Secure Boot enabled, ensuring that only trusted software is loaded during the boot process.
Method 2: Using the System Configuration Utility (msconfig)
Another method to enable Secure Boot on Windows 11 and Windows 10 is through the System Configuration Utility (msconfig). Here’s how to use this method:
Step 1: Press the Windows key + R to open the Run dialog box.
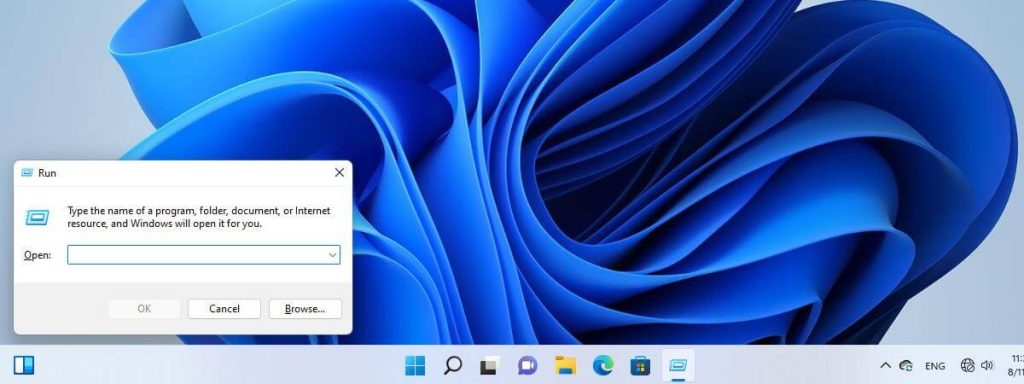
Step 2: Type “msconfig” and press Enter to open the System Configuration Utility.
Step 3: Navigate to the “Boot” tab in the System Configuration Utility.
Step 4: Check the “Secure Boot” option under Boot Options.
Step 5: Click Apply and then OK to save the changes.
Step 6: Restart your computer to enable Secure Boot.
Method 3: Using Group Policy Editor
If you are using Windows 10 Pro, Enterprise, or Education editions, you can enable Secure Boot using the Group Policy Editor. Here’s how you can do it:
Step 1: Press the Windows key + R to open the Run dialog box.
Step 2: Type “gpedit.msc” and press Enter to open the Group Policy Editor.
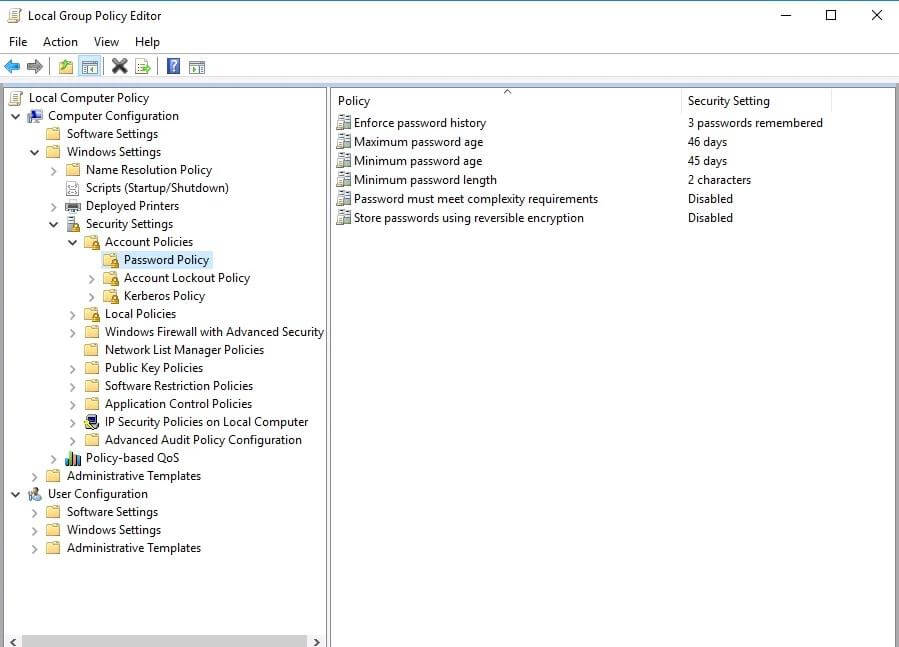
Step 3: Navigate to Computer Configuration > Administrative Templates > System > Early Launch Anti-Malware.
Step 4: Double-click on “Use Secure Boot for integrity validation.”
Step 5: Select “Enabled” and click Apply, then OK.
Step 6: Restart your computer to apply the changes.
Method 4: Using Command Prompt
You can also enable Secure Boot on Windows 11 and Windows 10 using Command Prompt. Follow these steps:
Step 1: Right-click on the Start menu and select “Windows PowerShell (Admin)” or “Command Prompt (Admin).”

Step 2: In the Command Prompt window, type the following command and press Enter:
bcdedit /set {default} bootmenupolicy standard
Step 3: Restart your computer to apply the changes.
Method 5: Using Windows Defender System Guard
Windows Defender System Guard is a security feature in Windows 10 that provides advanced security capabilities, including Secure Boot. Here’s how you can enable Secure Boot using Windows Defender System Guard:
Step 1: Open Windows Security by clicking on the shield icon in the taskbar.
Step 2: Click on Device Security.
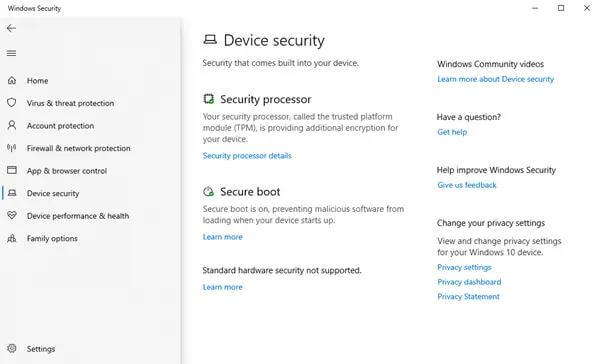
Step 3: Under Core isolation, click on “Core isolation details.”
Step 4: Toggle on “Memory integrity” to enable Secure Boot.
Step 5: Restart your computer to apply the changes.
Method 6: Using Windows Registry Editor
If you are comfortable working with the Windows Registry, you can enable Secure Boot using the Registry Editor. Here’s how you can do it:
Step 1: Press the Windows key + R to open the Run dialog box.
Step 2: Type “regedit” and press Enter to open the Registry Editor.
Step 3: Navigate to the following key:
HKEY_LOCAL_MACHINE\SYSTEM\CurrentControlSet\Control\SecureBoot\State
Step 4: Double-click on the “UEFISecureBootEnabled” entry and set its value to 1.
Step 5: Restart your computer to enable Secure Boot.

Conclusion
By following the methods discussed here, you can easily enable secure boot of Windows 10 and 11, thereby enhancing the security of your device and protecting it against malware and unauthorized software.
FAQs
1. What is Secure Boot?
Secure Boot is a security feature integrated into the Unified Extensible Firmware Interface firmware. It ensures that only digitally signed operating system components are loaded during the boot process. This prevents the loading of unauthorized or malicious software that could compromise the system’s security.
2. Why is Secure Boot Important?
Secure Boot is important because it helps protect the system against bootkits, rootkits, and other types of malware that attempt to tamper with the boot process. By verifying the digital signatures of the boot components, Secure Boot helps ensure the integrity of the operating system and enhances the overall security posture of the system.
3. How to check if Secure Boot is enabled?
To check if Secure Boot is enabled on a Windows 11 or Windows 10 system, you can access the UEFI firmware settings during the system boot process. The exact method for accessing the UEFI settings may vary depending on the hardware manufacturer. Once in the UEFI settings, navigate to the SecureBoot configuration section to verify if it is enabled.
Popular Post
Recent Post

Advanced SystemCare: Tool To Clean Your PC
Your computer slows down over time. Files pile up, junk builds inside the system, and things start to feel sluggish. You open a browser, and it takes forever. Programs crash without warning. This is a sign that your PC needs a good cleanup. Many users ignore these signs. They think buying a new computer is […]

Top 10 PC Cleaning and Optimization Tools For Windows 11/10
Discover the best PC cleaning and optimization tools for Windows 11 and 10. Remove junk files, improve speed, and keep your PC healthy with trusted cleaners.

Clear Microsoft Teams Cache On Windows PC [Complete Guide]
Learn how to clear Teams cache on Windows PC with 3 easy methods. Fix slowdowns, glitches, and errors fast. A simple guide for every Windows 11 user.

How To Clear Browsing History on PC: Chrome, Edge, Firefox, Opera
Learn how to clear browsing history on PC across Chrome, Edge, Firefox, and Opera with easy steps, tips, pros, and FAQs.

Clear Cache and Cookies: Complete Guide For Windows 11/10
Learn how to clear cache and cookies on Windows 10 and 11. This complete guide covers Chrome, Edge, and Firefox with simple, step-by-step instructions for every user.

How To Clean PC Trackpad/Touchpad Without Damaging It
Learn how to clean PC trackpad and clean PC touchpad safely with simple steps. Improve performance, remove dirt, and keep your laptop surface smooth and responsive.

How To Clean Your GPU/Graphics Card [Complete Guide]
Introduction A graphics card is one of the most important parts of a computer. It handles visuals, gaming, video editing, and design work. Over time, dust builds up inside it. This dust blocks airflow and traps heat. When heat increases, performance drops. In some cases, the system may even crash. That is why learning how […]

How To Clean PC Power Supply Unit Safely Without Damaging
Follow simple, safe steps to clean your computer’s power supply unit. Improve cooling, reduce overheating, and protect your PC’s performance.

How To Clean a CPU Without Damaging It [Complete Guide]
Learn how to clean a CPU safely without damage. Follow simple steps, precautions, and methods to improve cooling, boost performance, and extend your computer’s life.

How To Clear Browser Cache On Windows 11/10 [Chrome, FireFox, Edge]
Learn how to clear browser cache on Windows 11 and 10. Follow simple steps to clean browser cache, fix slow browsing, and improve performance easily.
