How to Fix Windows 11 Search Bar Not Working? — 11 Solutions
Windows Search Bar is one of the important Windows 11 utilities for many users. It is the quickest way to search for particular apps, documents, or the web. In fact, you can use the drop-down menu to get options like Music, People or Photos.
It is an extremely helpful tool for everyday Windows users. But it is often reported that the Windows 11 Search bar is not working or showing to users. The problem is mostly reported by users who have migrated from Windows 10 to 11. It will unlikely affect the PC or laptop preinstalled with Windows 11.
There is no significant reason for the Windows 11 Search bar not working bug other than the system update. The error might look small, but it can be annoying and might not let you access the Restart or Shutdown buttons.
So, before we head over to discuss some quick fixes, we suggest you install a powerful antivirus program on your computers like Norton, McAfee or Avast. This way, you can ensure that no external infection can harm your Windows 11 PC.
Now, let’s fix the Windows 11 Search bar not working error.
11 Solutions to Fix Windows 11 Search Bar Not Working
Windows 11 Search bar not working can impact your daily operations and slow your work speed. Thus, instantly try these solutions when you can not access the Search bar on your Windows 11 computer.
Solution 1. Turn on the Search Button
First of all, ensure that the search function is enabled on your computer. On Windows 11, the search features are merged with Taskbar functions. So, you need to go to the Taskbar menu and ensure the Search menu is enabled.
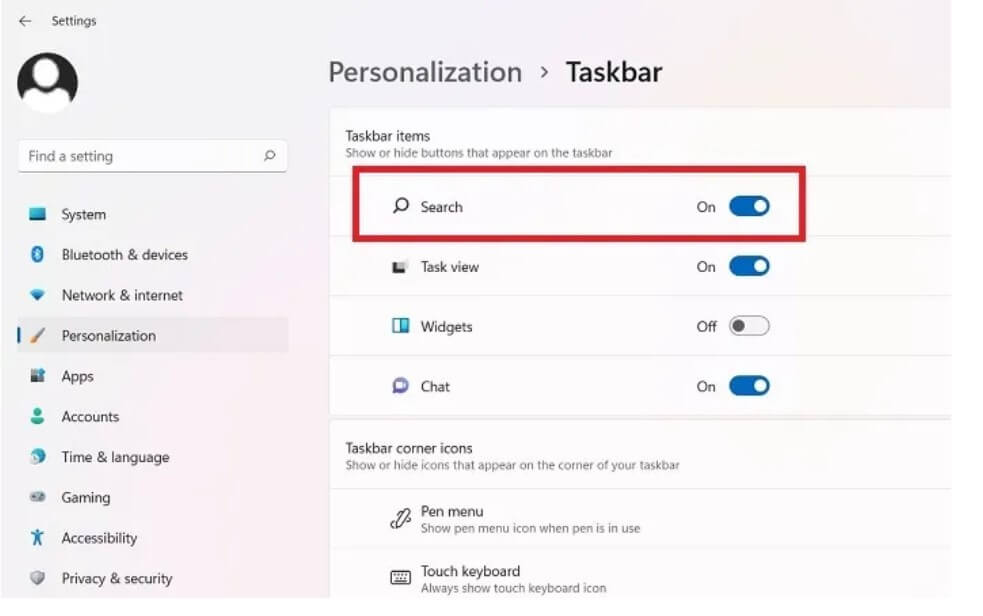
Step 1. Press Windows and I keys to open Settings > All Settings.
Step 2. Navigate to Settings > Personalization > Taskbar.
Step 3. From there, switch the Search toggle to enable it.
Solution 2. Restart Your PC
The simplest option to fix the Windows 11 Search bar not working is to restart your computer. It will easily fix the temporary cache memory issues.
Step 1. Press the Windows key and click on the Power icon.
Step 2. Click on the Restart.
Sometimes the Search error cannot let you access the Restart button. In that case, you can press the Power button on your device for a few minutes to restart it.
Solution 3. Look for Windows Updates
If you have not updated your Windows 11 software in a while, it can cause multiple glitches, including Search errors. So, have a look at your Windows updates and install them.
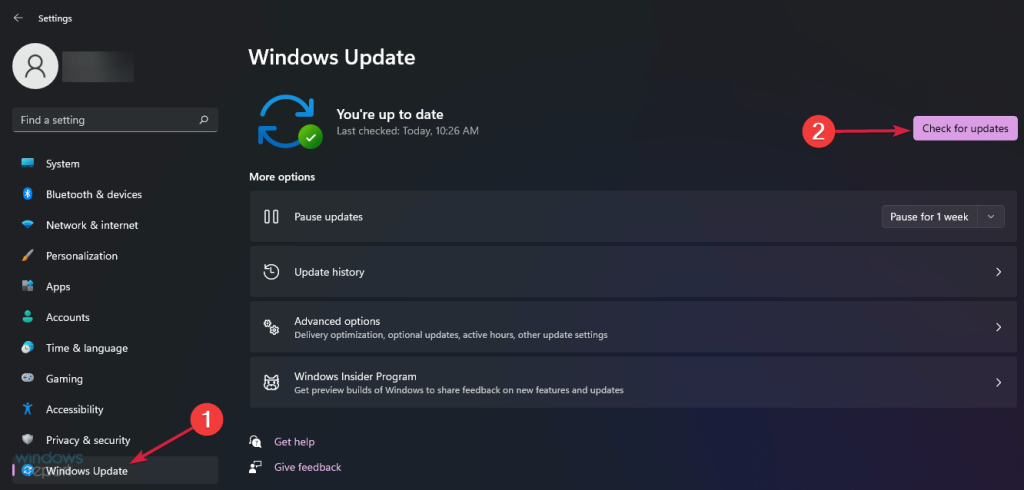
Step 1. Go to Settings from the Start button.
Step 2. Click on Windows Update and then on the Check for updates button. If updates are available, click on the Install Now button.
Solution 4. Run the Windows Search Troubleshooter
The best thing about Windows is that it has a built-in troubleshooter to fix all the problems. There you can use the Search and Indexing troubleshooter to automatically fix the Windows 11 Search bar not working error.

Step 1. Press Windows and I keys to open the Settings.
Step 2. Go to the System from the left pane and choose the Troubleshoot.
Step 3. Click on the Other troubleshooter and search for the Search and Indexing. Then, click on the Run button. This will show all the Search issues along with the suggestions to fix them.
Solution 5. Restart Windows Search Bar Process
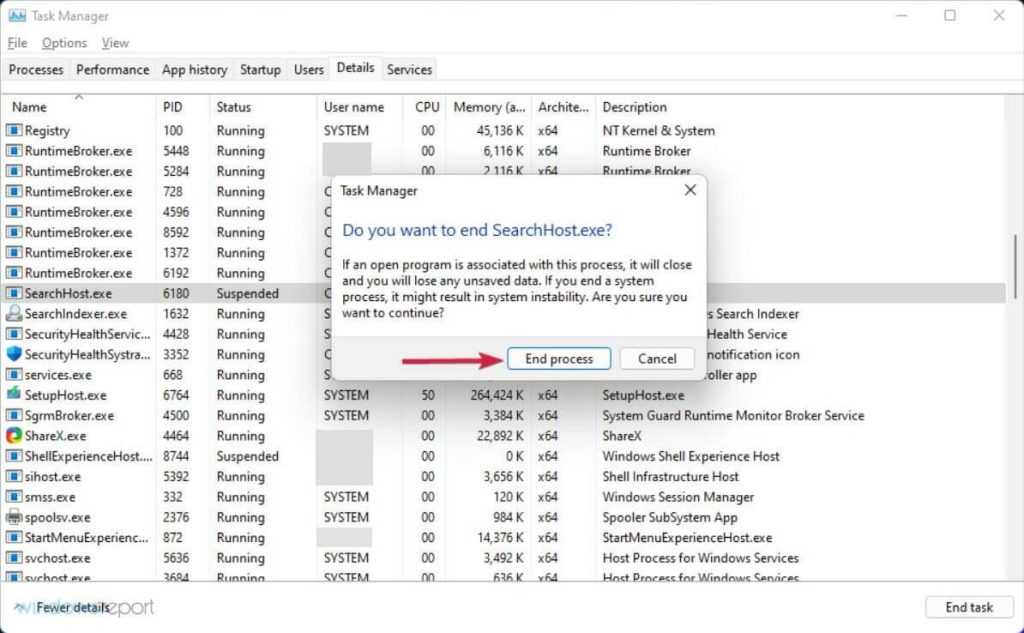
On Windows 11, when you are not using the Windows Search bar, the process is automatically suspended in the background. Normally, when you start typing in the Search bar, the process automatically activates. But sometimes it doesn’t make due to some system glitches. In that case, you can restart the Search bar process manually as follows:
Step 1. Press the Search button on the Taskbar, type task manager and choose the app from the results.
Step 2. Click on the Details tab.
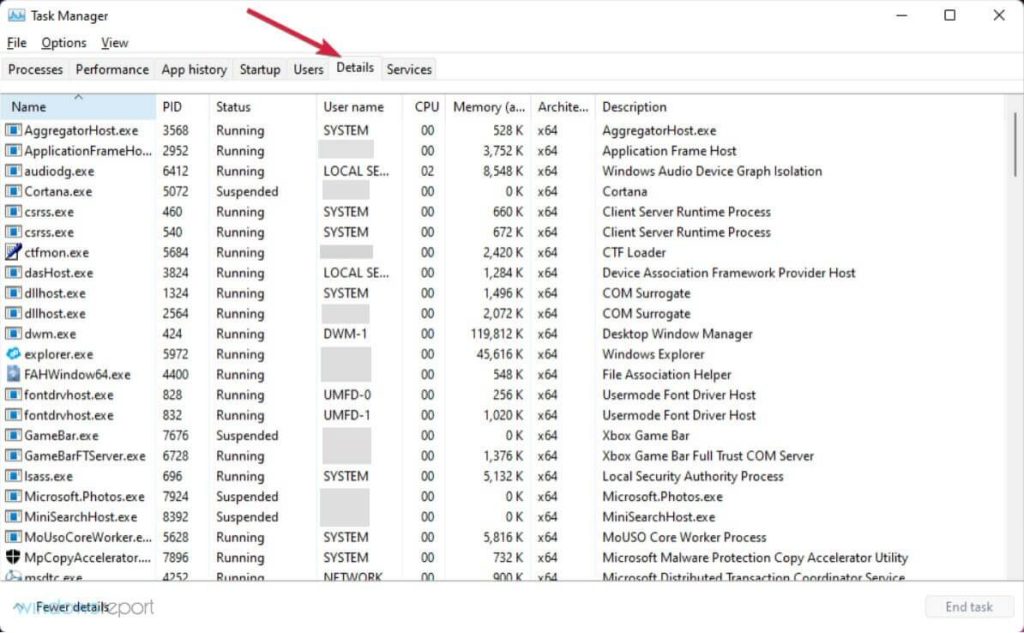
Step 3. Under the name column, look for SearchHost.exe, then right-click on it, and select End task.
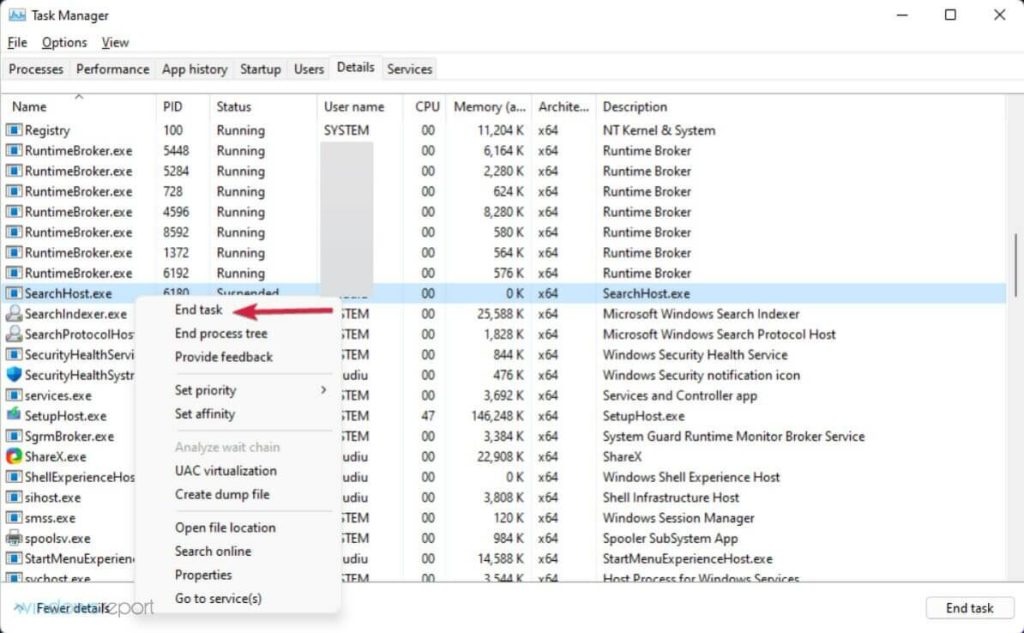
Step 4. When you are at the end of SearchUI.exe, click on the End process.
Solution 6. Activate the Elevated Indexing
You can enable the enhanced indexing to make the Search bar again work for you. To do so:
Step 1. Click on the Start button and launch Settings.
Step 2. Click on the Privacy & security tab from the left pane and then select Searching Windows from the right side.
Step 3. Under the Find my files section, select Enhanced, and you can remove the folders that you don’t want to include in the search from the list.
Solution 7. Restart the Windows Search Service
If your Windows Search bar is still not working, you can try to restart the Windows Search service. Here’s how you can do that:
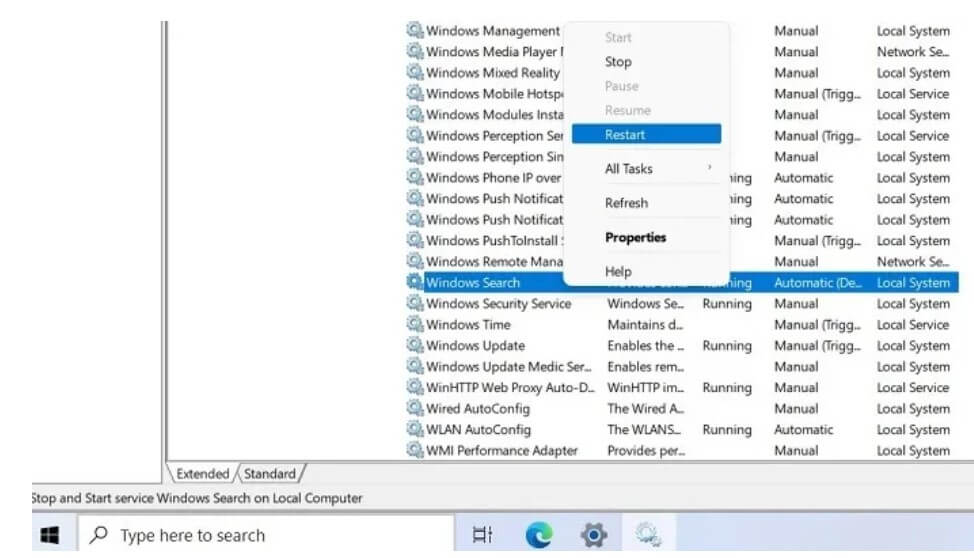
Step 1. Press Windows and R keys to launch the Run command box. Type services.msc in the search field and hit the Enter.
Step 2. Once the Services console pops up, look for the Windows Search and double-click on it.
Step 3. You will now land on the service’s Properties window. Simply click on the Stop button and then click on the Start button.
Solution 8. Modify the Touch Keyboard and Handwriting Panel Service
Sometimes the Windows 11 Search bar is not working problem is not related to software. In fact, your touch keyboard or handwriting panel service might have some issues. So, you can cam fix them as follows:
Step 1. From the Windows Services window, you can find ‘Touch Keyboard and Handwriting Panel Service’ option.
Step 2. Right-click to open the Properties.
Step 3. Under the General tab, tweak the manual default startup type to automatic.
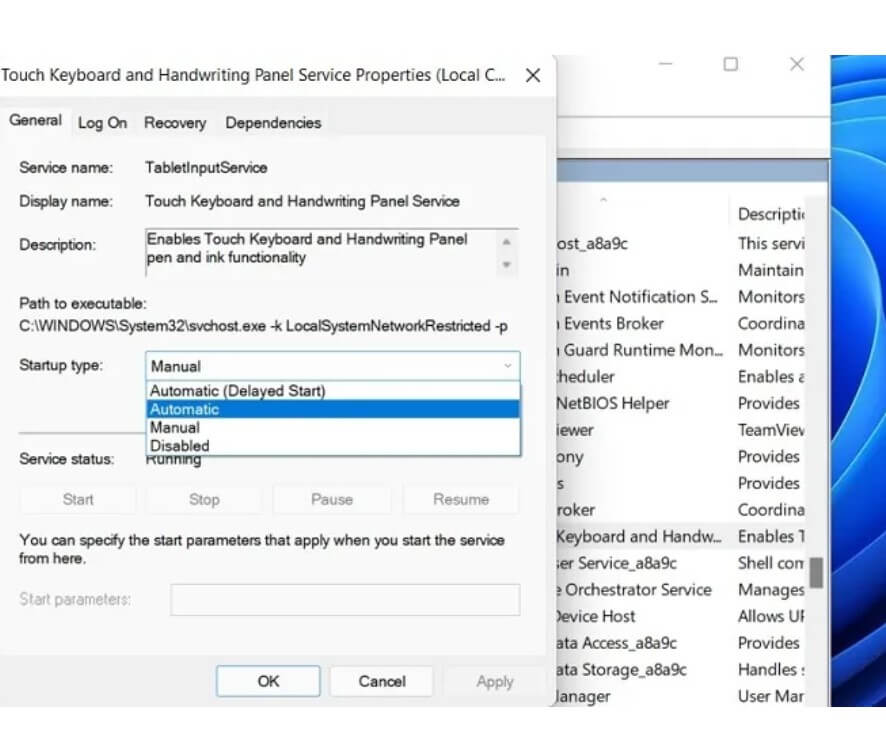
Step 4. Under the Recovery tab, set Subsequent failures to Restart the service. In addition, reset the fail count from 1 to 0.
Step 5. Go to the General tab and reset the Start button.
Solution 9. Rest Windows 11
If none of the solutions worked for you, as a last resort, you could reset Windows 11. Of course, this solution comes with the threat of losing your entire data. But if nothing works, you can backup your system and follow this command:
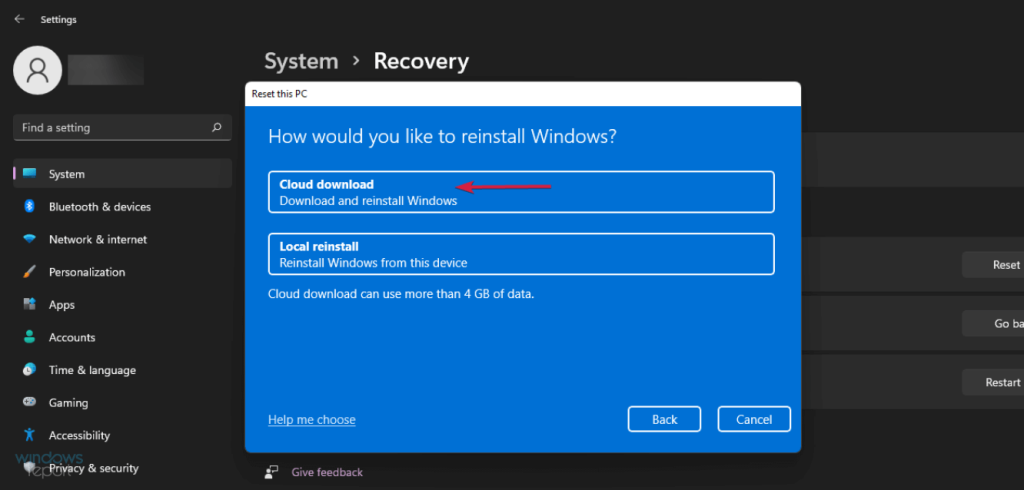
Step 1. Open the Settings and go to System > Recovery > Recovery Options > Reset this PC and click on the Reset PC.
Step 2. Select either Remove everything or Keep your files.
Step 3. Wait for a few minutes to complete the process.
Step 4. You have now two options — Cloud download and Local reinstall. The former option will replace the same search bug if you have upgraded from Windows 10.
Step 5. Once the Additional settings are open, restore the apps and settings that come with the PC. For this, you need at least 4 GB of free space on your disk. Click on the Next to proceed.
Step 6. Once you are ready to reset your computer, you can no longer go back to your Windows settings. You can review the apps that will be removed during the reset, so you always reinstall them.
Step 7. It will take some time to complete the process, so wait up for a few minutes.
Solution 10. Uninstall the Recent Programs
If the Windows 11 Search bar is not working bug is initiated after you have installed a new program on your computer; uninstall it and check if it has fixed the problem. To do so:
Step 1. Go to the Settings, click on the Search icon in the Windows taskbar and type Apps and Features.
Step 2. Once all the Apps and Features appear, look for the app you want to uninstall.
Step 3. Click on the Menu icon next to the app and click on the Uninstall.
Solution 11. Rollback to the Windows 10
If you have recently uploaded Windows 11 on your computer, leading to the Search issues, you can always switch back to Windows 10. That’s because your device might be old to handle Windows 11 features.
Remember, you can only downgrade to Windows 10 within the 10 days of your upgrade. Follow these steps to roll back to the Windows 10:
Step 1. Open the Settings and go to System > Recovery. From there, click on the Go back option.
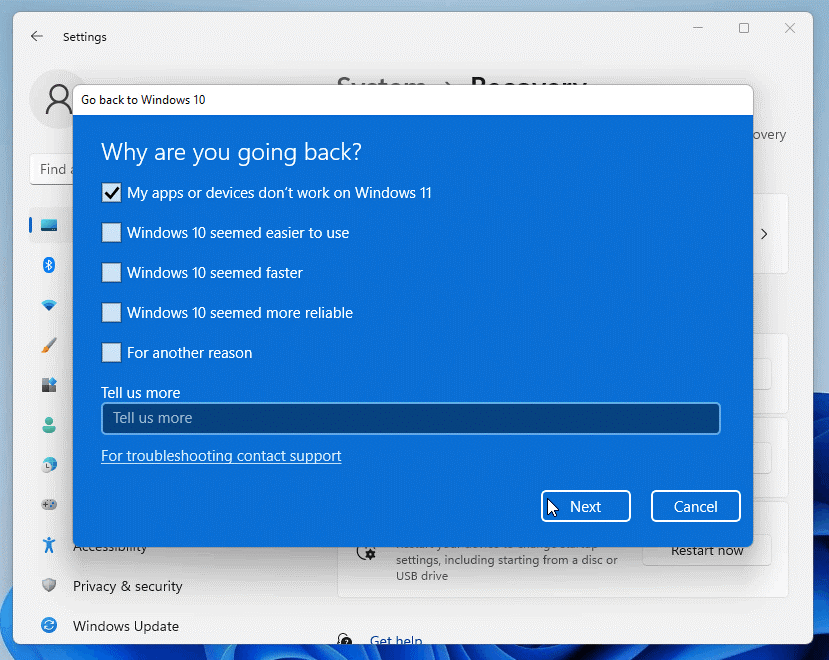
Step 2. Now, the Go back to Windows 10 screen will pop up. Select a reason to switch and click on the Next button.
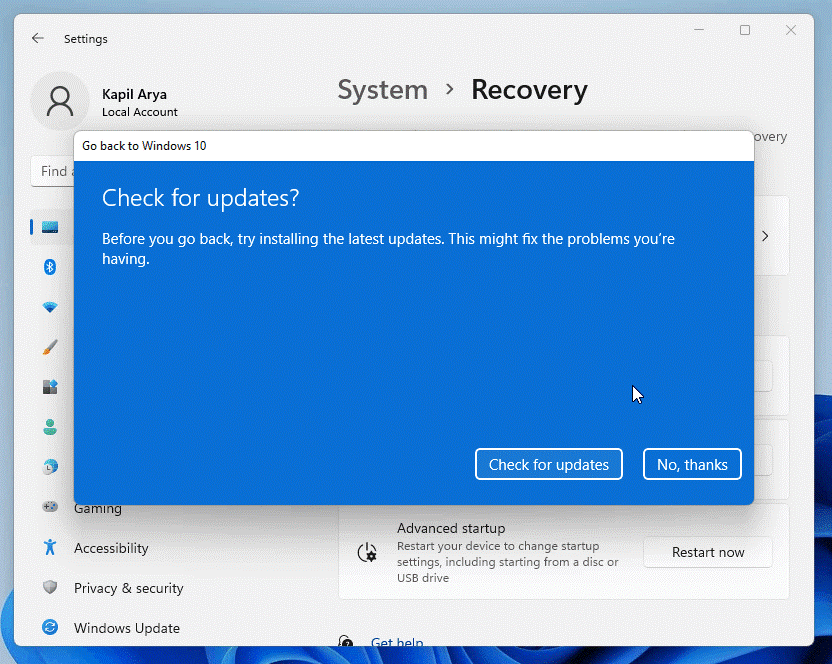
Step 3. On the next screen, Check for updates. If you don’t want that, click on the No thanks to continue.
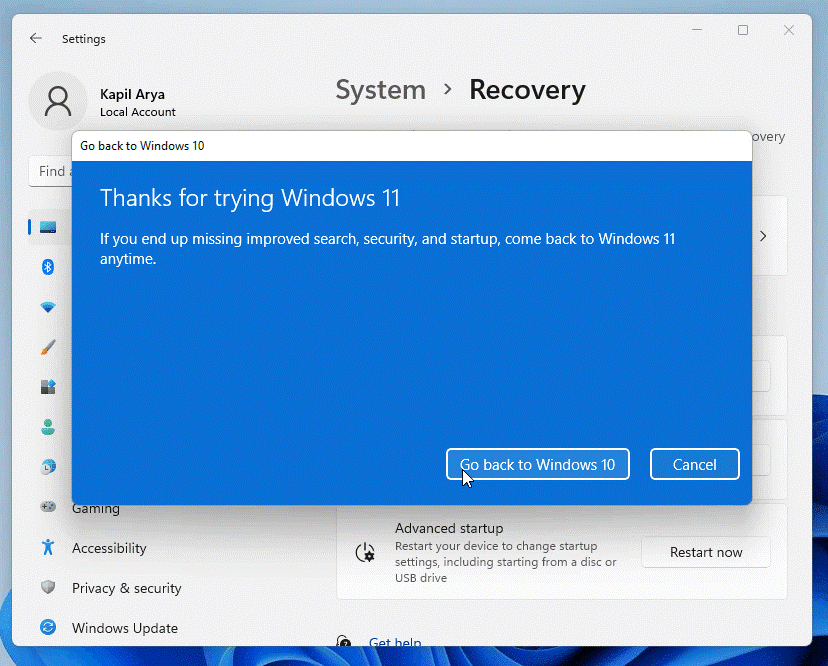
Step 4. Keep on clicking on the Next until you get the final option to Go back to Windows 10.
Step 5. Your system will now restart, and after that, it will attempt to recover the installation.
Step 6. The restoration process will complete in a few minutes, and you are back to Windows 10. Now, the Windows Search bar will work for you.
Parting Remarks
Windows Search bar not working is a small system bug. But it can be a bit annoying when you cannot easily access your files and applications.
You can use all the discussed solutions to fix the Search functions on your computer. But we advise you to reset your Windows and roll back to the previous version when you have no other option left.
If you find this post helpful, don’t forget to share it with your friends and follow other posts on this website.
Popular Post
Recent Post

Advanced SystemCare: Tool To Clean Your PC
Your computer slows down over time. Files pile up, junk builds inside the system, and things start to feel sluggish. You open a browser, and it takes forever. Programs crash without warning. This is a sign that your PC needs a good cleanup. Many users ignore these signs. They think buying a new computer is […]

Top 10 PC Cleaning and Optimization Tools For Windows 11/10
Discover the best PC cleaning and optimization tools for Windows 11 and 10. Remove junk files, improve speed, and keep your PC healthy with trusted cleaners.

Clear Microsoft Teams Cache On Windows PC [Complete Guide]
Learn how to clear Teams cache on Windows PC with 3 easy methods. Fix slowdowns, glitches, and errors fast. A simple guide for every Windows 11 user.

How To Clear Browsing History on PC: Chrome, Edge, Firefox, Opera
Learn how to clear browsing history on PC across Chrome, Edge, Firefox, and Opera with easy steps, tips, pros, and FAQs.

Clear Cache and Cookies: Complete Guide For Windows 11/10
Learn how to clear cache and cookies on Windows 10 and 11. This complete guide covers Chrome, Edge, and Firefox with simple, step-by-step instructions for every user.

How To Clean PC Trackpad/Touchpad Without Damaging It
Learn how to clean PC trackpad and clean PC touchpad safely with simple steps. Improve performance, remove dirt, and keep your laptop surface smooth and responsive.

How To Clean Your GPU/Graphics Card [Complete Guide]
Introduction A graphics card is one of the most important parts of a computer. It handles visuals, gaming, video editing, and design work. Over time, dust builds up inside it. This dust blocks airflow and traps heat. When heat increases, performance drops. In some cases, the system may even crash. That is why learning how […]

How To Clean PC Power Supply Unit Safely Without Damaging
Follow simple, safe steps to clean your computer’s power supply unit. Improve cooling, reduce overheating, and protect your PC’s performance.

How To Clean a CPU Without Damaging It [Complete Guide]
Learn how to clean a CPU safely without damage. Follow simple steps, precautions, and methods to improve cooling, boost performance, and extend your computer’s life.

How To Clear Browser Cache On Windows 11/10 [Chrome, FireFox, Edge]
Learn how to clear browser cache on Windows 11 and 10. Follow simple steps to clean browser cache, fix slow browsing, and improve performance easily.
