Here’s How to Turn Off Sticky Keys in Windows 10
Sticky keys are a useful Windows 10 feature. However, many users turn off sticky keys in Windows 10 as it interferes with their work.
Some even reported that Sticky Keys randomly pop up, and some complain that they are unable to turn off Sticky Keys on their computer.
This is not only an issue with the latest Windows OS. In fact, in older versions like Windows 7 or 8, this problem is also common.
So, we have dedicated this article to discussing several methods to turn off Sticky Keys in Windows 10. This way, when one method fails, you can always use another method to turn off Sticky Keys.
What are Sticky Keys?
To be honest, Sticky Keys was initially designed as an accessibility feature. That means it was designed for users who are physically incapable or suffering from repetitive stress injuries.
Sticky Keys can virtually hold a key down when a user presses it. So, that way, someone who is incapable or injured to physically press keys on the keyboard can work on the computer.
It is also helpful when you are learning to type and want to recognise the position of different keys on the keyboard.
Is It Fine To Turn Off Sticky Keys in Windows 10?
Sticky Keys are simply utility features. Thus, unless you want to use the feature, disabling it will not impact your computer. It will have no impact on the day-to-day operations of your computer or keyboard.
Plus, it is easy to turn back on whenever you want. So, there is no issue in turning off Sticky Keys in Windows 10, 8, 7 or older versions.
How to Turn Off Sticky Keys on Windows 10 in 9 Easy Ways?
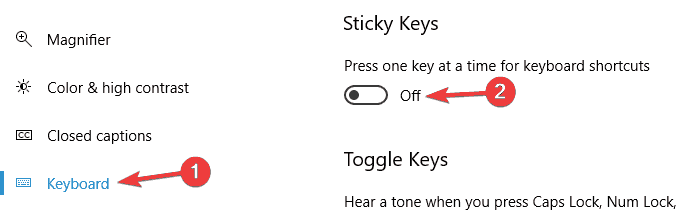
Basically, it is pretty straightforward to turn off Sticky Keys in Windows 10. Simply press the Windows and U keys at the same time.
This will take you to the Ease of Use Settings. Click on the keyboard on the left and uncheck the box that says Allow the shortcut key to start Sticky Keys.
In most cases, Sticky Keys will not now turn on when you press the Shift key five times in a row.
Unfortunately, many users have reported that this has not turned off Sticky Keys for them. If this is also the case with you, follow these methods to turn off Sticky Keys in Windows 10:
Method 1. Scan Your PC for Malware
There is a possibility that your PC is infected with malware, leading to Sticky Keys not turning off. Thus, you should run a full system scan to ensure your PC is not infected with malware.
We suggest you get the best anti-malware program to scan your PC. For Windows 10, many great antivirus solutions are available, like McAfee, Norton, Malwarebytes, etc.
So, when Sticky Keys randomly pop up on your screen or won’t turn off, just run a full system scan for malware infection and fix it.
Method 2. Reinstall Your Keyboard Drivers
Outdated or corrupted keyboard drivers can also cause the Sticky Keys problem. Thus, you can uninstall your current keyboard drivers and install them again on your PC. Follow these steps to reinstall drivers in Windows 10:
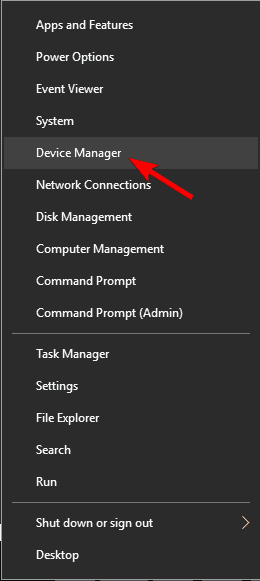
Step 1. Press Windows and X keys to launch a pop-up menu. After that, select Device Manager from the list.
Step 2. Look for your keyboard driver’s manufacturer name, containing the folder, and right-click on it.
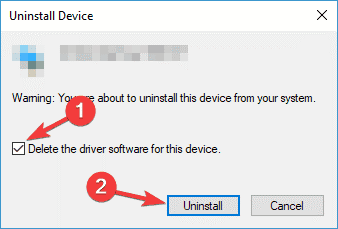
Step 3. Choose the Uninstall device and click on the Uninstall button to confirm.
Step 4. Now you can restart your PC, and the default driver will automatically install. However, you can go to your keyboard driver manufacturer’s site to install the desired driver version.
However, if you are not comfortable with the manual method to update drivers, you can use Driver Easy to automatically update drivers. This free tool can scan your entire system and look for outdated drivers. And you simply have to press the Update Now button to automatically update or fix your corrupted keyboard drivers.
Method 3. Reinstall the Synaptic Pointing Device
If you are using Sticky Keys on a laptop, the issue can be with your Synaptics pointing device. So, it is recommended to reinstall the software.
The best way to uninstall is using an uninstaller application. That’s because Synaptics’ pointing device uninstallation process includes registry entries. So, it might not be easy for novice users to uninstall Synaptics pointing devices completely.
Therefore, look for the best Windows 10 uninstaller software to turn off Sticky Keys on your computer.
Method 4. Tweak Registry Values
Changing registry values can trigger certain issues in your computer. Thus, only use this method if you are confident enough to handle the registry settings. Also, ensure to back up your system before making any changes in the Registry Editor. It is always smart to be cautious rather than sorry.
Here’s how you can change registry values in Windows 10:
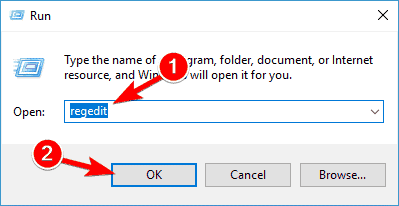
Step 1. Press Windows and R keys. After that, type Regedit and hit Enter.
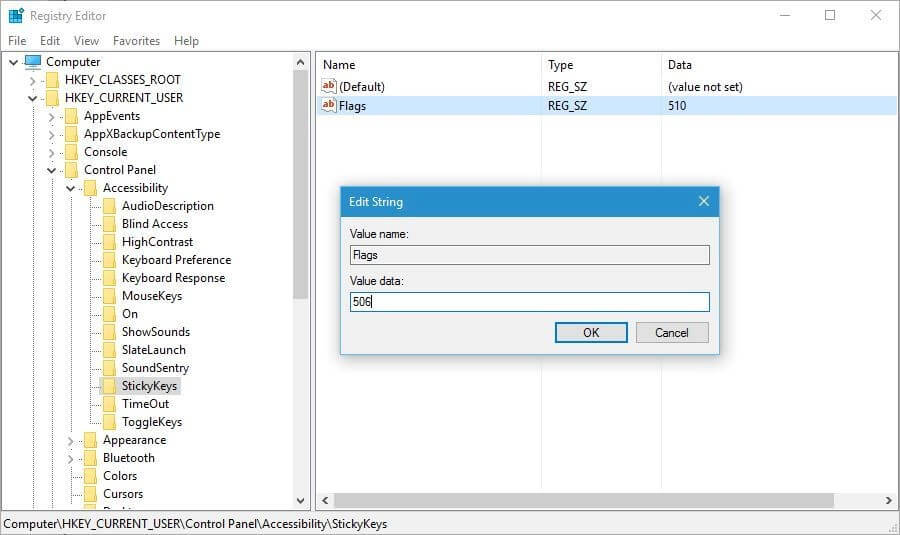
Step 2. Search for the following location on the Registry Editor—
HKEY_CURRENT_USERControl PanelAccessibilityStickyKeys
Step 3. From the right pane, look for Flags, double-click on it and change its value to 506.
Step 4. In the left pane, move to this path—
HKEY_CURRENT_USERControl PanelAccessibilityKeyboard Response
Step 5. Now, look for Flags in the right panel, double-click on it, and set its value to 122.
Step 6. Next, go to the left and follow this path—
HKEY_CURRENT_USERControl PanelAccessibilityToggleKeys
Step 7. Once again, look for Flags in the right panel and set its value to 58.
Step 8. Close the Registry Editor and restart your PC to implement the changes.
Method 5. Change Your Keyboard Power Management Settings
Adjusting the keyboard power management settings often turns off Sticky Keys in Windows 10. However, your keyboard might be listed in both the Keyboard and Human Interface Device sections. So, you have to make changes in both sections.
Follow these steps to change your keyboard power management settings:
Step 1. Press Windows and X keys.
Step 2. Select Device Manager and navigate to your keyboard. Right-click on it and select Properties from the menu.
Step 3. Go to the Power Management tab and uncheck the option Allow the computer to turn off this device to save power.
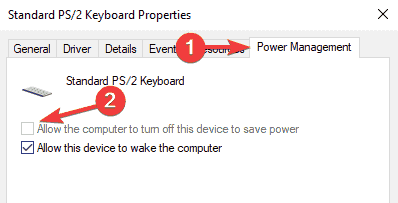
Step 4. Click on OK to save changes.
Method 6. Press Both Shift Keys Together
Usually, pressing the Shift key five times in a row can turn on Sticky Keys. However, some users have reported that pressing the right and left Shift keys at one time can fix the error. So, this method is worth giving a shot at.
Method 7. Press the Num Lock Key
Is the FN key always pressed on your laptop? If yes, it might activate certain shortcuts accidentally.
So, you can turn off the Num Lock button to fix the error. Simply press the button on your keyboard, and the problem should be resolved.
Method 8. Update Your Windows OS
An outdated Windows operating system is always a base for several PC problems. Thus, when you can’t turn off Sticky Keys in Windows 10, simply ensure that your system doesn’t need updates. To do so:
Step 1. Press Windows and I keys to launch the Settings app.
Step 2. Go to the Update & Security section.
Step 3. After that, click on Check for updates.
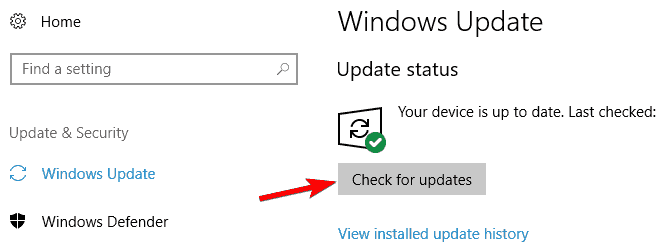
Step 4. If updates are available for your computer, install them and see if the problem still persists.
Method 9. Replace Your Keyboard
If Sticky Keys still don’t turn off, this might have something to do with a faulty keyboard. So, you can replace your keyboard to fix the problem.
However, before you replace your keyboard, make sure to check for a hardware malfunction. Sometimes certain keys are not working or get stuck, which can cause the problem.
Let’s Turn Off Sticky Keys in Windows 10 Now!
So, people, if you don’t need Sticky Keys, it is better to turn them off as they unnecessarily create a hassle. Plus, it is easy to turn off Sticky Keys from the Ease of Use settings.
However, if you are unable to turn off Sticky Keys in Windows, refer to this guide to fix the error.
So, let’s bid farewell now! For more guides and tips, keep on following this guide.
Recommended Articles
How To Clean Junk Files On Windows 11/10
How To Clean Up System Files On Windows 11/10: Complete Guide
Popular Post
Recent Post

Advanced SystemCare: Tool To Clean Your PC
Your computer slows down over time. Files pile up, junk builds inside the system, and things start to feel sluggish. You open a browser, and it takes forever. Programs crash without warning. This is a sign that your PC needs a good cleanup. Many users ignore these signs. They think buying a new computer is […]

Top 10 PC Cleaning and Optimization Tools For Windows 11/10
Discover the best PC cleaning and optimization tools for Windows 11 and 10. Remove junk files, improve speed, and keep your PC healthy with trusted cleaners.

Clear Microsoft Teams Cache On Windows PC [Complete Guide]
Learn how to clear Teams cache on Windows PC with 3 easy methods. Fix slowdowns, glitches, and errors fast. A simple guide for every Windows 11 user.

How To Clear Browsing History on PC: Chrome, Edge, Firefox, Opera
Learn how to clear browsing history on PC across Chrome, Edge, Firefox, and Opera with easy steps, tips, pros, and FAQs.

Clear Cache and Cookies: Complete Guide For Windows 11/10
Learn how to clear cache and cookies on Windows 10 and 11. This complete guide covers Chrome, Edge, and Firefox with simple, step-by-step instructions for every user.

How To Clean PC Trackpad/Touchpad Without Damaging It
Learn how to clean PC trackpad and clean PC touchpad safely with simple steps. Improve performance, remove dirt, and keep your laptop surface smooth and responsive.

How To Clean Your GPU/Graphics Card [Complete Guide]
Introduction A graphics card is one of the most important parts of a computer. It handles visuals, gaming, video editing, and design work. Over time, dust builds up inside it. This dust blocks airflow and traps heat. When heat increases, performance drops. In some cases, the system may even crash. That is why learning how […]

How To Clean PC Power Supply Unit Safely Without Damaging
Follow simple, safe steps to clean your computer’s power supply unit. Improve cooling, reduce overheating, and protect your PC’s performance.

How To Clean a CPU Without Damaging It [Complete Guide]
Learn how to clean a CPU safely without damage. Follow simple steps, precautions, and methods to improve cooling, boost performance, and extend your computer’s life.

How To Clear Browser Cache On Windows 11/10 [Chrome, FireFox, Edge]
Learn how to clear browser cache on Windows 11 and 10. Follow simple steps to clean browser cache, fix slow browsing, and improve performance easily.
