How To Use Microsoft Safety Scanner To Scan For Malware?
Seamless internet connectivity is essential for any system to perform various functions effectively. However, this internet connection comes at the cost of increased cyber threats. The personal and professional data of the users is at stake with malware trying to enter the systems. Hence, there is a need for a straightforward and effective solution to scan for possible malware on the Windows system.
Microsoft Safety Scanner MSERT is a perfect solution for scanning malware on Windows systems. Downloading the latest version of this tool helps users detect and scan malware in the system. Let us know all about Microsoft Safety Scanner and the detailed steps to use it.
Microsoft Safety Scanner- What is it?
Microsoft Safety Scanner is a dedicated tool used on the Windows system for displaying suspicious malware files and their locations. Further, the Microsoft Malware Protection Center detects if the file has any malware or needs to be deleted from the Windows system.
Microsoft Safety Scanner can be used when manually triggered only. It is a free and standalone tool available from Microsoft. Users can quickly download this scanner for scanning the malware in the system, followed by a separate tool to delete the malware. It can be quickly downloaded for different Windows systems, i.e., 32-bit or 64-bit. The three different scan modes, i.e., quick scan, full scan, and customized scan, can be used according to the user’s needs.
Why choose Microsoft Safety Scanner over Microsoft Defender?
One common question that comes to the mind of Windows users is the use of Microsoft Safety Scanner over Microsoft Defender. First things first, both these tools have different modes of functioning and uses. Hence, there is no need to confuse the main reason for Microsoft Safety Scanner and Microsoft Defender.
Secondly, Microsoft Defender is used during the normal operation of the Windows system. However, it can’t be used in cases of malware threats. Thus, Microsoft Safety Scanner is perfect for detecting malware threats and events when Microsoft Defender can’t be used.
Go through a quick comparison between the two to understand their key differences in detail, as mentioned below:
| Sr. No. | Feature | Microsoft Safety Scanner | Microsoft Defender |
| 1 | Type | It is only a malware detection tool. | It is a full-on antivirus. |
| 2 | Mode of use | It can be quickly used after downloading only. | It needs a complete installation. |
| 3 | Operation | It can only detect malware. | It can detect and eliminate malware from the system. |
| 4 | Time required | It can be used quickly. | It takes time for full operations. |
Microsoft Safety Scanner- System requirements:
Microsoft Safety Scanner runs effectively on the following Windows versions:
- Windows 11
- Windows 10
- Windows 10 Tech Preview
- Windows 8.1
- Windows 8
- Windows 7
- Windows Server 2019
- Windows Server 2016
- Windows Server Tech Preview
- Windows Server 2012 R2
- Windows Server 2012
- Windows Server 2008 R2
Steps to use Microsoft Safety Scanner to scan for malware:
Step 1. Download Microsoft Safety Scanner on the system from the official website. It is easy to use the following links:
- For 32-bit Microsoft Safety Scanner, go for this link
- For 64-bit Microsoft Safety Scanner, go for this link
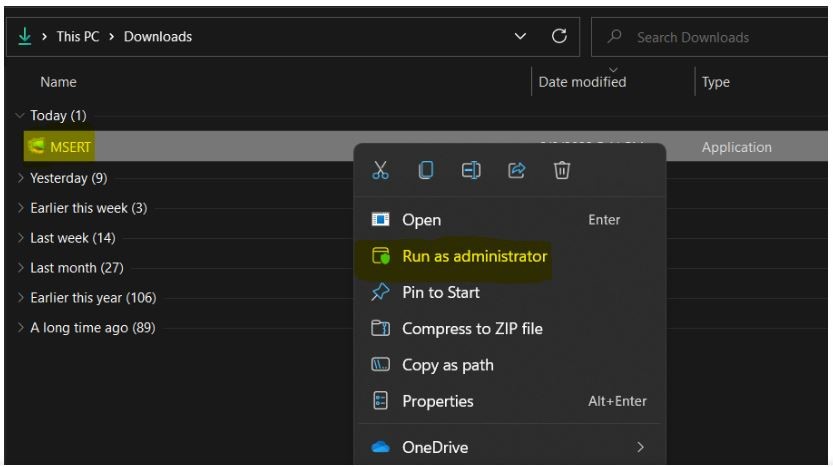
Step 2. Right-click on the Microsoft Safety Scanner and select “Run as Administrator.”
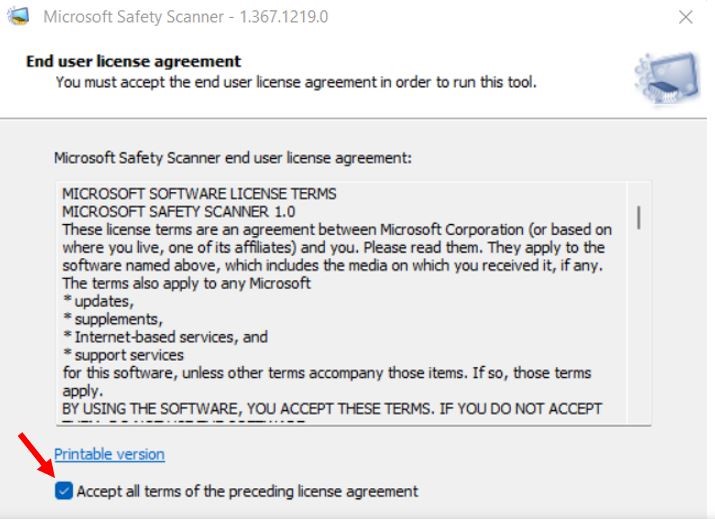
Step 3. Go to the “Accept all terms of the preceding license agreement” box and click on “Next.”
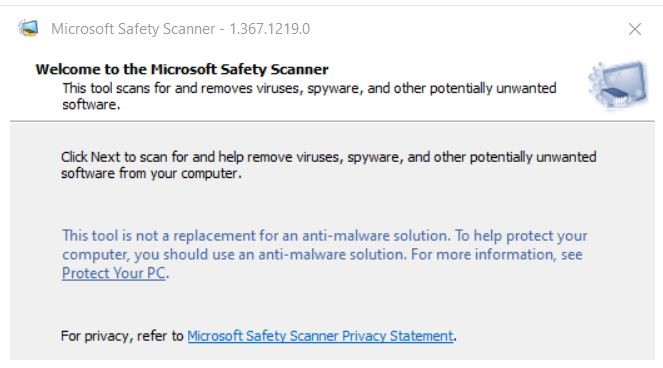
Step 4. Go to the “Next” option to scan for and help remove viruses, spyware, and other unwanted software from the system.
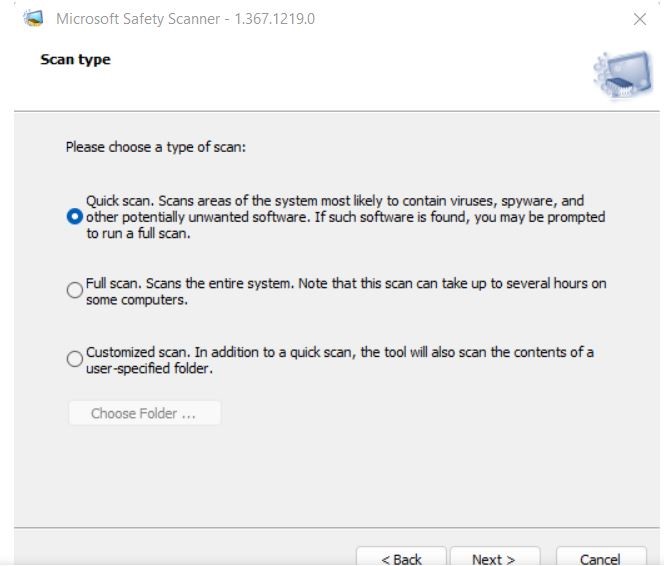
Step 5. It is easy to select the type of scan from the available three options, Quick, Full, and Customized scan.
- The quick scan covers all the system areas having a high chance of storing unwanted software, spyware, viruses, etc.
- A full scan covers the entire system and may take multiple hours. Hence, while running a full scan, be ready to spare some minutes to scan the entire system.
- The customized scan covers the specific folder contents only.
Once the type of scan is selected, click on the “Next” option then.
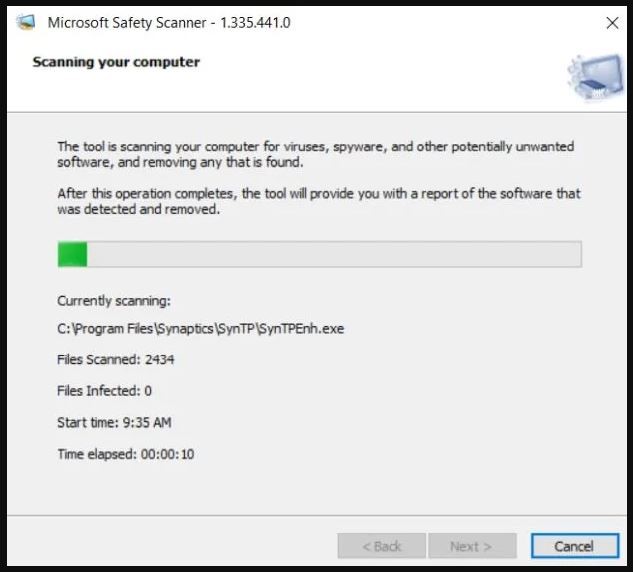
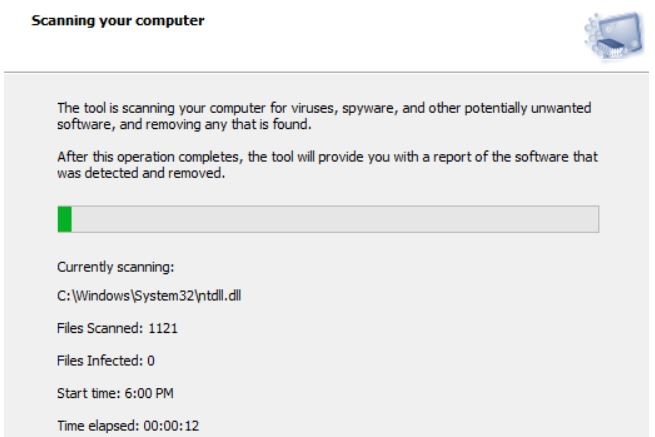
Step 6. Once done, the Microsoft Safety Scanner starts computer scanning. The tool shows a dedicated report of the detected and removed software after completion.
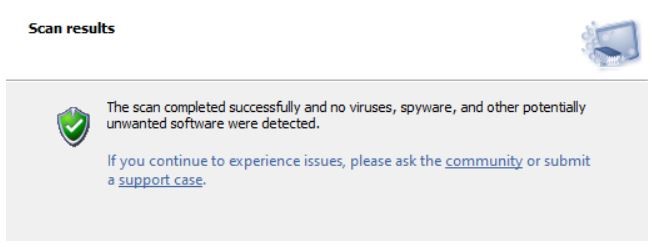
Step 7. It is easy to review the scan results displayed on the screen. Click on “Finish” to exit the wizard.
Step 8. Microsoft Safety Scanner saves a log file of every action. It is easy to view this tool’s log file at %SystemRoot%\debug\msert.log for detailed detection results. It can be opened in Notepad also to get more information.
Errors in Microsoft Safety Scanner
Like any other utility, Microsoft Safety Scanner has its specific limitations. Firstly, it can be used for ten days after it has been downloaded to the Windows system. This tool doesn’t remove the malware but only scans the system. The only method to get rid of the malware file is to locate and manually remove it. In addition to it, it is necessary to use the updated Microsoft Safety Scanner to keep the security definitions protected from aging out.
Some of the common errors observed while using Microsoft Safety Scanner are:
- Code 0x80508019: It means that the scan destination file or drive does not exist.
- Code 0x80508007: It indicates that there is not enough memory to finish the process.
- Code:0x80508024: It hints that a complete scan is necessary.
- Code 0x80508001: It indicates that the scanning engine could not be loaded.
Wrapping up
Hope everything is clear to the readers about the Microsoft Safety Scanner. It is a dedicated tool available for quick download from Microsoft’s official website. This utility eliminates the use of any third-party malware detector as it can quickly detect and scan possible malware. However, there remains a need to use a complete antivirus. There is no need for a detailed installation, as it can be used quickly when downloaded.
The detailed steps to use Microsoft Safety Scanner for the Windows system ensure quick detection of malware in the system. It is easy to go through the system requirements and possible errors in it. Beginners or professionals can start using this tool to get rid of the issues on their Windows system due to malware.
Recommended Articles:
Popular Post
Recent Post

Advanced SystemCare: Tool To Clean Your PC
Your computer slows down over time. Files pile up, junk builds inside the system, and things start to feel sluggish. You open a browser, and it takes forever. Programs crash without warning. This is a sign that your PC needs a good cleanup. Many users ignore these signs. They think buying a new computer is […]

Top 10 PC Cleaning and Optimization Tools For Windows 11/10
Discover the best PC cleaning and optimization tools for Windows 11 and 10. Remove junk files, improve speed, and keep your PC healthy with trusted cleaners.

Clear Microsoft Teams Cache On Windows PC [Complete Guide]
Learn how to clear Teams cache on Windows PC with 3 easy methods. Fix slowdowns, glitches, and errors fast. A simple guide for every Windows 11 user.

How To Clear Browsing History on PC: Chrome, Edge, Firefox, Opera
Learn how to clear browsing history on PC across Chrome, Edge, Firefox, and Opera with easy steps, tips, pros, and FAQs.

Clear Cache and Cookies: Complete Guide For Windows 11/10
Learn how to clear cache and cookies on Windows 10 and 11. This complete guide covers Chrome, Edge, and Firefox with simple, step-by-step instructions for every user.

How To Clean PC Trackpad/Touchpad Without Damaging It
Learn how to clean PC trackpad and clean PC touchpad safely with simple steps. Improve performance, remove dirt, and keep your laptop surface smooth and responsive.

How To Clean Your GPU/Graphics Card [Complete Guide]
Introduction A graphics card is one of the most important parts of a computer. It handles visuals, gaming, video editing, and design work. Over time, dust builds up inside it. This dust blocks airflow and traps heat. When heat increases, performance drops. In some cases, the system may even crash. That is why learning how […]

How To Clean PC Power Supply Unit Safely Without Damaging
Follow simple, safe steps to clean your computer’s power supply unit. Improve cooling, reduce overheating, and protect your PC’s performance.

How To Clean a CPU Without Damaging It [Complete Guide]
Learn how to clean a CPU safely without damage. Follow simple steps, precautions, and methods to improve cooling, boost performance, and extend your computer’s life.

How To Clear Browser Cache On Windows 11/10 [Chrome, FireFox, Edge]
Learn how to clear browser cache on Windows 11 and 10. Follow simple steps to clean browser cache, fix slow browsing, and improve performance easily.
