How To Sync With iTunes Without Deleting Apple Music Playlists?

Are you trying to work with your offline music library and Apple Music library together? Then, you must be confused and overwhelmed right now.
The confusion doubles when Apple Music and iTunes Match features get overlapped. So, to clear some of your confusion, we will explain how to sync with iTunes without deleting Apple Music playlists.
So, let’s dig in.
Why Should I Learn About How to Sync With iTunes Without Deleting Apple Music Playlists?
Usually, when you turn off the iCloud Music library, it will delete all songs from Apple Music present on your iPhone. And it will sync your Mac music library to your iPhone.
However, when you again turn on the iCloud Music library, have you ever imagined what will happen?
Well, lots of confusion will happen.
Whenever you sync Apple Music in iTunes, it will erase all your existing music files from your iPhone before syncing. It is not a problem if your library contains old playlists backed to iCloud because these files will sync back to the iPhone.
However, if you deleted your old playlist from your offline library or added music from another computer, you will lose the old files. And thus, you have to learn how to sync with iTunes without deleting Apple Music playlists.
Difference Between Apple Munch and iTunes Match
Before moving ahead with the topic, let’s understand what’s the difference between Apple Music and iTunes Match.
Once you get an Apple Music subscription, it will scan up all the songs present on your computer if any of them match with the available songs on the Apple Music library. The matched song will immediately stream on your device that you are using into your Apple Music library.
However, the iCloud Music library works for songs that are only available on the iTunes Music library. If your iPhone music tracks are not available on the iTunes Store, Apple Music will automatically download these tracks on the cloud.
This way, you can listen to your favorite music tracks on all your devices. However, Apple Music puts DRM on the tracks that you have downloaded from any other device. Thus, when your Apple Music subscription is over, you will not be able to hear those tracks anymore.
iTunes Match does a better job in matching, uploading and storing the unoriginal content. It doesn’t add DRM to tracks.
Therefore, many Apple users are now looking for a way to sync with iTunes without deleting the Apple Music playlist and enjoy an uninterrupted music experience.
How To Sync With iTunes Without Deleting Apple Music Playlists?
Apple Music always gives you two options — Replace or Merge your new music with the content already present on your iPhone. You should always select the merge option so Apple Music won’t delete your content.
Follow these steps from iTunes Match to merge it with Apple Music:
Step 1. Press on Music and set off your Music Library.
Step 2. Open the Music app and tap on the Playlist. If no playlist is present, there is nothing to worry about as all your playlists are saved in iCloud.
Step 3. After that, connect your iPhone to your computer using the USB cable. Open iTunes and select the device that you have connected to.
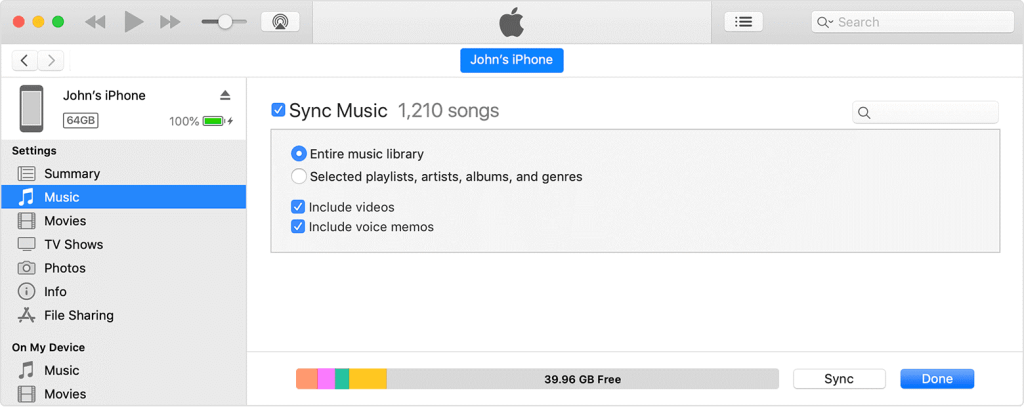
Step 4. From the sidebar, select Sync Music.
Step 5. Choose music tracks that you want on your iPhone.
Step 6. After that, head back to check your playlist. It will be now replaced with one that you have synced, so don’t stress as they will be back soon.
Step 7. Go to your iPhone settings and turn on your iCloud Music Library.
Step 8. Now, you will get two options — Merge or Replace. Tap on the Merge. Don’t press on Replace, as it will replace all your Apple Music content.
Step 9. Within a few minutes, your Music library will load, and you will now get all your playlists back.
How to Transfer Songs From New iTunes Library to an iPhone
The music sync between iTunes and iPhones can’t combine multiple libraries. Whether you have purchased a new computer or deleted your old iTunes music library, you have to overwrite the existing content on your phone to sync your new library.
You have to authorize your new computer to transfer all your iTunes purchases. Here’s how you can do that:
Step 1. Launch iTunes, select the Store menu and click on the Authorize This computer option.
Step 2. Now, you have to enter your Apple ID and password used to access iTunes Store and click Authorize.
Step 3. Connect your iPhone to your new computer using the USB cable.
Step 4. Click on the Transfer Purchases on the popup window. If no window appears, go to the File menu > Devices > Transfer Purchase from. This process will copy previous iTunes purchases to your new library, but it will not copy any other files from your iPhone.
Step 5. Now, tap on your iPhone’s info window by clicking your phone’s name above the iTunes library.
Step 6. Open the Music tab and check the Sync Music box.
Step 7. Tap on Remove and Sync to confirm you want to delete the existing content from your phone.
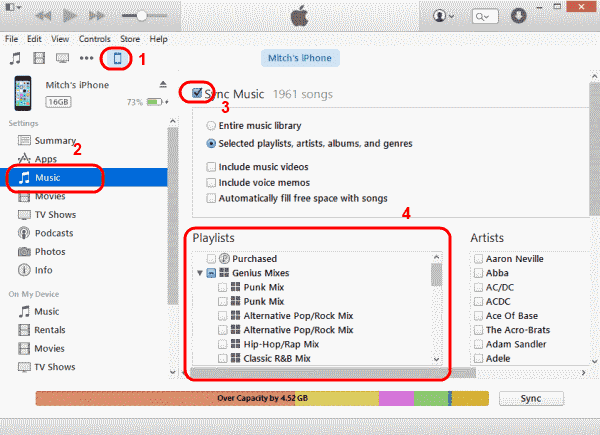
Step 8. Choose “Selected playlists, artists, albums, and genres” and pick specific groups to sync.
Step 9. Press Apply to delete the old music from your iPhone and sync your new library.
How to Sync Movies Without Deleting the Data From the iPhone
When you select the option to automatically sync movies with iTunes, it will erase any videos that are not present on your computer while connected to your device. However, manually configuring synchronization will solve this problem.
It will also limit storage space on your iPhone as it will not copy large video files. Follow these steps to sync videos without deleting your iPhone data:
Step 1. Launch iTunes on your computer without connecting to the iPhone.
Step 2. Press and hold Ctrl + Shift on the PC and Command + Option on the Mac.
Step 3. Now, connect your iPhone to your computer using the USB cable.
Step 4. Release the keys after your iPhone appears on the list. This will prevent iTunes from automatically syncing your data.
Step 5. Select your iPhone from the device list and check Manually Manage Music and Videos from the Summary tab.
Step 6. Click Done. Go to your Movies library and drag the videos you want to sync. Right-click on your iPhone name and drop videos there.
Parting Remarks
There you have it! You have learned how to sync with iTunes without deleting Apple Music playlists. In addition, you also know how to sync moves and transfer iPhone data to a new computer without losing anything.
So, let’s think of anyone and sync all your music libraries to enjoy good music anytime.
Popular Post


Recent Post
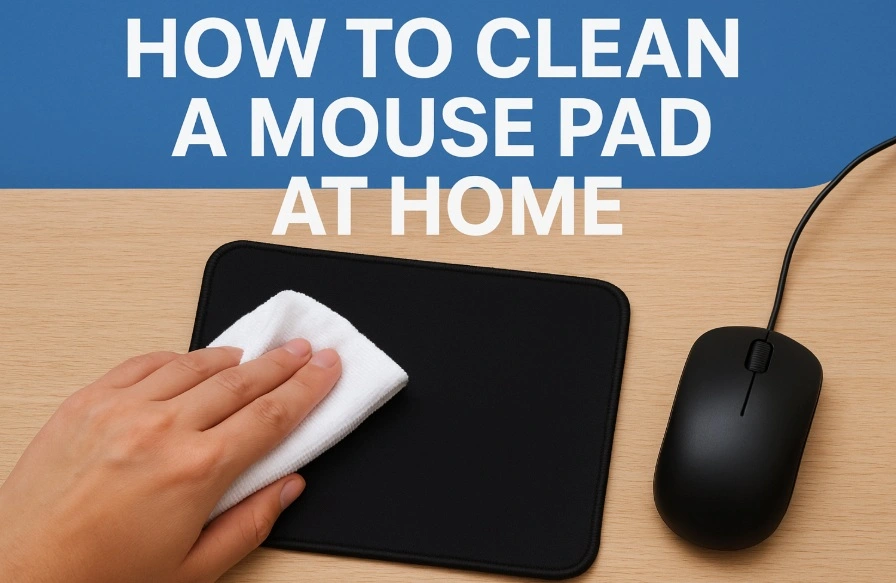
How To Clean a Mouse Pad At Home
Learn how to clean a mouse pad at home with simple steps. Keep cloth, hard, or RGB pads fresh and smooth. Easy guide with tips, FAQs, and care advice.

How To Clean Your Computer Mouse Without Damage?
Learn how to clean a computer mouse after disconnecting it from your system to prevent any further damage.
How To Clean Your Computer To Run Faster [2025]
Learn how to clean computer to run faster, from Disk Cleanup to deleting unnecessary files and more. Follow the tips to maintain the speed of the comput
How To Clean Your Computer’s Hard Drive [2025]
Discover all the top ways to clean computer hard drive to improve performance and prevent lagging.

How To Clean Your Computer’s USB Ports The Right Way
Discover how to clean the computer’s USB port thoroughly and with proper precision to prevent dust accumulation and prevent further system damage.

How To Clean a Computer Motherboard Without Damage
Discover a step-wise procedure to clean the system motherboard without damaging it. Explore how to expand the lifespan of a motherboard through maintenance.

How PC Cleaning Tools Work: Complete Gudie
Discover all the top ways to clean your PC from physical cleanup to disk cleanup for an optimized performance and increased lifespan.

How To Clear Windows Update Cache In Windows 11 [2025]
Learn how to clear Windows update cache in Windows 11. Simple steps to delete Windows update cache and fix update problems. Safe methods included.
How To Clean Windows Update Files On Windows 11/10
Windows update files can take up lots of space on your computer. These files pile up over time. They can slow down your system and eat up storage. Most users don’t know these files exist. They stay hidden in system folders. Your hard drive fills up without you knowing why. Old update files serve no […]

How to Clean PC Storage – Clear Up Space on PC
Learn how to clean PC storage easily. Simple steps to clear up space on PC, delete junk files, and make your computer run faster. Free up storage space today!
