How to clean your keyboard Without Damage?
How often do you clean your keyboard?
Do you usually have to rush to the service center to get your keyboard repaired only to know the dust and debris that caused damage to the internal components?
Well, cleaning the keyboard is no rocket science. You can quickly achieve excellent results once you understand the proper process. In addition, you also need to get the best cleaning kit with everything you might need later to clean different parts of the product. So, to help you out of the dilemma, we have prepared a guide for you based on which you can gain more knowledge about keyboard cleaning and maintenance.
Why is it important to clean the keyboard?
The first thing we will learn here is the importance of cleaning the keyboard. Many people need to be made aware that leaving the keyboard as it is leads to the accumulation of dirt and debris inside. This can not only slow down the device but can also lead to thermal breakdown. Therefore, knowing the importance of keyboard cleaning is crucial for everyone.
- If dust accumulates on the critical panel, the keyboard delays response more than expected. Prolonged exposure to dust and debris can lead to short circuits in the IC, thereby leading to thermal breakdown.
- You won’t get the expected visibility when dust and grime accumulate over the keys in thin layers. You might see the grime leaving marks on the screen that are hard to remove.
- Dust and debris accumulation within the keyboard can also cost the device to consume excessive battery power, thereby leading to overheating and battery damage. So, cleaning the keyboard is crucial, especially if you don’t want the device to perform in adverse ways due to damage to the battery.
- Also, when you don’t clean your keyboard, its performance degrades, and all the operations slow down. This is why clean the device occasionally and ensure no debris or dust buildup is present inside that might compromise the performance.
- If there is any larger solid debris stuck between the keypad, you won’t be able to use those keys. They will get jammed and won’t operate until you remove the debris stuck in between.
Things to add to your keyboard cleaning basket
There are various things you can use to clean the keyboard. It mainly depends on the area you want to clean, the dust and debris accumulation level, and many other factors. Not going into the details of these factors, let’s see the significant products your keyboard cleaning kit should have.
- Cleaning brush: the first and foremost thing you must include in the kit is a cleaning brush. It should have delicate and soft bristles to remove the dust and dirt between the key panels, exhaust slats or holes, USB, and charging ports.
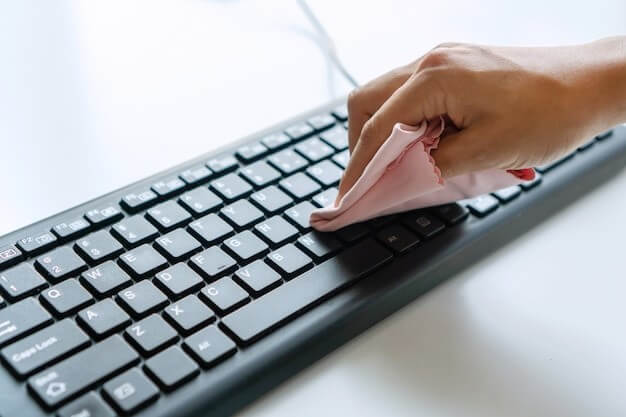
- Microfiber cloth: you also need a microfiber cloth to wipe the keys without leaving a scratch or any stain. It will also help you to remove the dust and debris from the corners and crevices of the keyboard body.
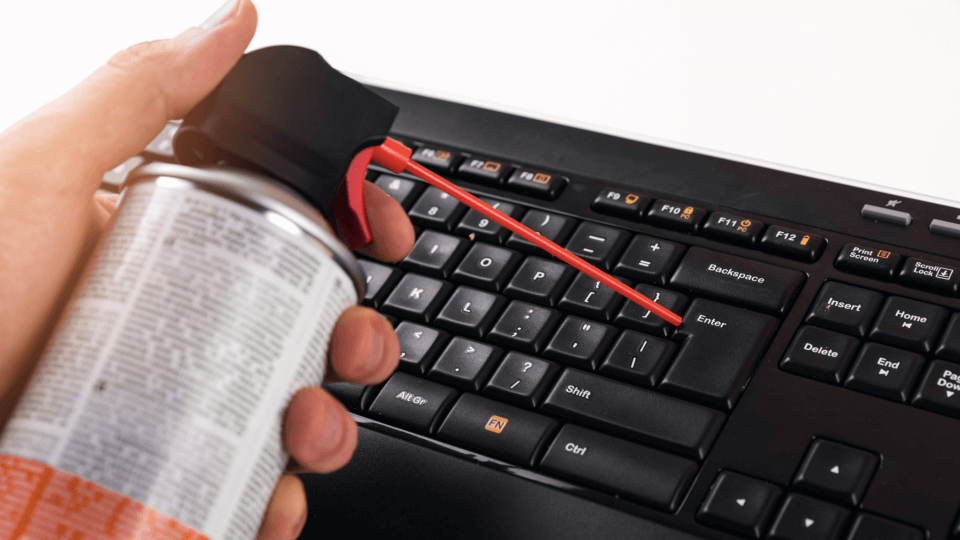
- Compressed air: you might also need a bottle of compressed air to blast the same and remove the dirt and debris, which are usually quite stubborn for other cleaning methods. These gases come in small canisters you can get from any electronic store and perform the same at your home.
Top ways to clean the keyboard
Method 1: Light and superficial cleaning
You can go for light and superficial cleaning when there is a small deposit of dirt and debris. To do so, follow these below steps, and you can achieve the best results.
- Turn and shake your keyboard but not agitatedly, so all the loose dirt and debris can fall off.
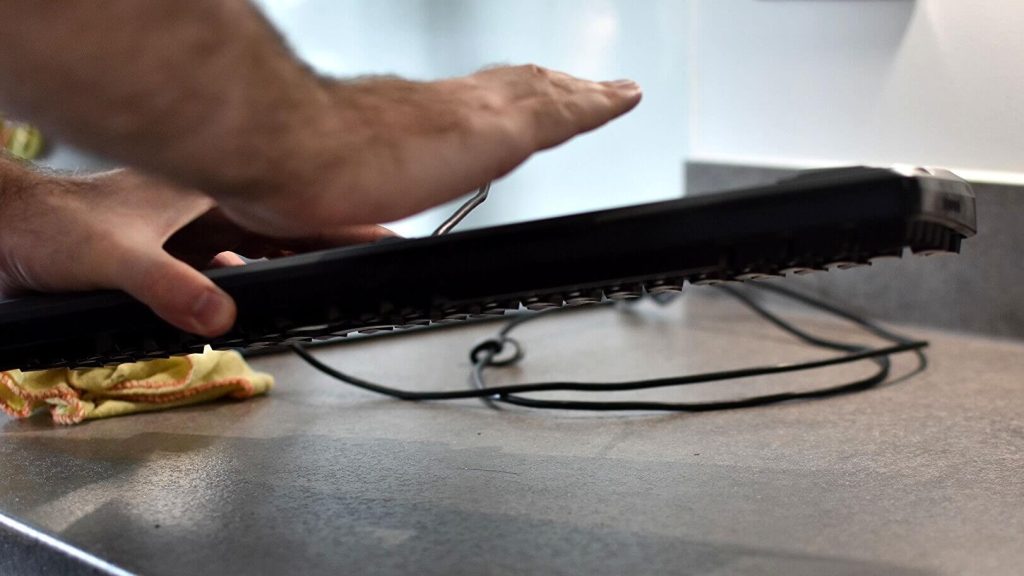
- The dust and debris can sometimes get stuck between the keys and the panels. You need the brush with fine bristles and gently remove the accumulated obstacles. Please do not press the keys while using the brush, as it can push debris farther into the keyboard panel.

- Use a small microfiber cloth to remove the dust from over the keyboard. If you do not have a brush, this cloth can be a substitute for removing debris quickly.
- If you have a small compressed air canister, release the high-pressure gas by tilting your keyboard in slow bursts. This will help you remove the dust and debris inside the keyboard panel.
Method 2: Removing grime and stain
Grime and stains are pretty stubborn and hard to remove. If you do not take appropriate steps or make any mistake during cleaning, it can leave a permanent mark on the keyboard, and the device can also get damaged. To help you out of this, we have described the steps to clean stains and grime from your keyboard like a professional.
- Soak your microfiber cloth or wipe to clean the grime and strain between the keys, the free blank space on the keyboard, and the corners.

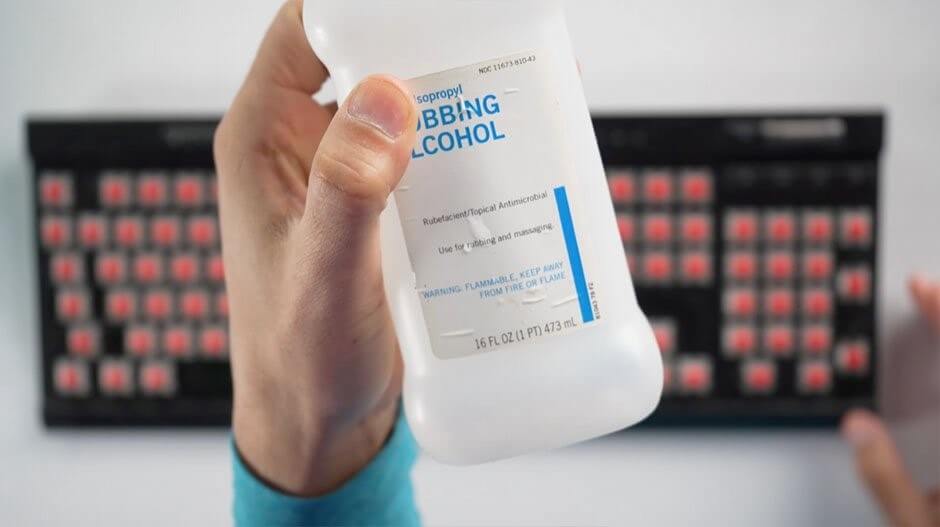
- Sometimes, the stains won’t go away after wiping them with water. In this case, you have to use isopropyl alcohol but in a minimal amount. You shouldn’t spray the alcohol directly over the keyboard as it can leave white stains. Instead, use the alcohol over a cotton swab or microfiber cloth and then use it to remove the grime.
- Use a toothpick or scraper to remove the coat if there is a paint stain or any other kind of grime.
Method 3: Keyboard deep cleaning
Last but not least, you can deep clean the keyboard to ensure all the keys perform best. Since deep cleaning requires a certain level of expertise, it would be better to connect with a professional.
Conclusion
In this article, we have walked you through the three primary ways to clean your keyboard and keep it healthy. Apart from this, we also introduced you to the benefits of cleaning the keyboard regularly, and the top items should be in the cleaning kit. Since you have to use the keyboard to complete your assignment, make a presentation for the office, or chat with others on social media accounts, your responsibility is to maintain its health through frequent cleaning and caring. These above methods will certainly help you in removing accumulated dust and debris in no time.
Suggested Articles:
How To Clean Your Computer Mouse Without Damage?
Popular Post
Recent Post

Advanced SystemCare: Tool To Clean Your PC
Your computer slows down over time. Files pile up, junk builds inside the system, and things start to feel sluggish. You open a browser, and it takes forever. Programs crash without warning. This is a sign that your PC needs a good cleanup. Many users ignore these signs. They think buying a new computer is […]

Top 10 PC Cleaning and Optimization Tools For Windows 11/10
Discover the best PC cleaning and optimization tools for Windows 11 and 10. Remove junk files, improve speed, and keep your PC healthy with trusted cleaners.

Clear Microsoft Teams Cache On Windows PC [Complete Guide]
Learn how to clear Teams cache on Windows PC with 3 easy methods. Fix slowdowns, glitches, and errors fast. A simple guide for every Windows 11 user.

How To Clear Browsing History on PC: Chrome, Edge, Firefox, Opera
Learn how to clear browsing history on PC across Chrome, Edge, Firefox, and Opera with easy steps, tips, pros, and FAQs.

Clear Cache and Cookies: Complete Guide For Windows 11/10
Learn how to clear cache and cookies on Windows 10 and 11. This complete guide covers Chrome, Edge, and Firefox with simple, step-by-step instructions for every user.

How To Clean PC Trackpad/Touchpad Without Damaging It
Learn how to clean PC trackpad and clean PC touchpad safely with simple steps. Improve performance, remove dirt, and keep your laptop surface smooth and responsive.

How To Clean Your GPU/Graphics Card [Complete Guide]
Introduction A graphics card is one of the most important parts of a computer. It handles visuals, gaming, video editing, and design work. Over time, dust builds up inside it. This dust blocks airflow and traps heat. When heat increases, performance drops. In some cases, the system may even crash. That is why learning how […]

How To Clean PC Power Supply Unit Safely Without Damaging
Follow simple, safe steps to clean your computer’s power supply unit. Improve cooling, reduce overheating, and protect your PC’s performance.

How To Clean a CPU Without Damaging It [Complete Guide]
Learn how to clean a CPU safely without damage. Follow simple steps, precautions, and methods to improve cooling, boost performance, and extend your computer’s life.

How To Clear Browser Cache On Windows 11/10 [Chrome, FireFox, Edge]
Learn how to clear browser cache on Windows 11 and 10. Follow simple steps to clean browser cache, fix slow browsing, and improve performance easily.
