Fix the “Windows Can’t Connect to This Network” In Windows 11
Introduction
Windows losing its network connection without warning may be very upsetting. Whatever the connection to your Wi-Fi is steady, you could still see the error message “Windows can’t connect to this network.” Fortunately, you may attempt a variety of options. This article will examine five solutions to a Windows computer’s inability to link to a network.
While some options are clear-cut and easy to understand, others might need more technical expertise. Read on for all the information you need to quickly get your laptop back on your workplace or home system.
What leads to the error “Windows cannot connect to this network”?
Windows issues are typically not caused by a single reason. They could originate from various situations that vary from laptop to computer. However, some reasons for this are more common than others and could apply to you. Wi-Fi can’t connect to this network for several reasons, including the following:
- Incorrect Wi-Fi information, including SSID and password.
- Your device is outside the Wi-Fi range because your cable connection is not properly plugged in.
- Interference with Wi-Fi and issues with your internet service provider
- missing or obsolete network adapter software
- Ethernet cable, router, or additional hardware damage
- Various hardware problems
Other factors affecting Wi-Fi network connectivity include incorrect Windows program settings and busy internet access points. It will help if you go through many stages to determine what is wrong and the best way to fix it since there can be many potential causes.
Steps to Fix the “Windows Can’t Connect to This Network” Error
Use these fixes to resolve the “Windows can’t connect to this network ” issue in your operating system. Although the instructions were designed for Windows 10, you may also use them with Windows 11 and 8.
Step 1: Disconnect the Wi-Fi network and reconnect with it
You may resolve this problem by disconnecting and uninstalling the internet connection from your gadget and then rejoining it.
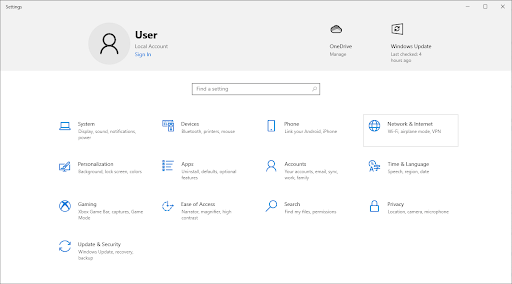
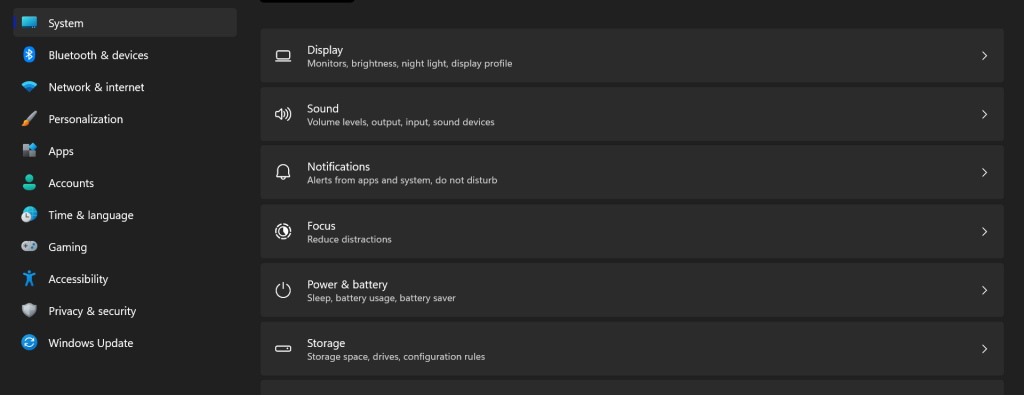
- Open the Start menu to access Settings.
- Select the Network & Internet tile by clicking.
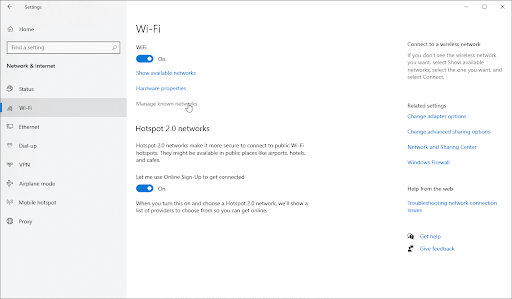
- Access the Wi-Fi tab now. To manage recognized networks, select this link.
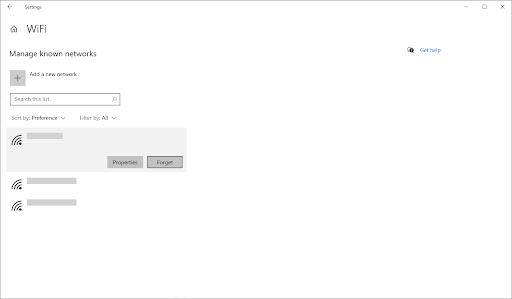
- Click the Forget button after choosing the Wi-Fi connection you have problems connecting to. This will result in a complete deletion of the profile.
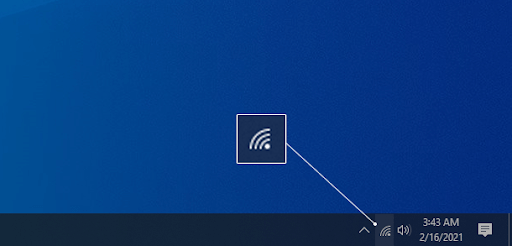
- Select a wireless network on which you deleted the profile by clicking the Networks symbol in the Windows system menu. Selecting the Connect button lets you see if you can connect properly.

You might need to provide login details, such as your Wi-Fi password. Enter the necessary data, then check whether the Wi-Fi can’t connect to this network Windows 11 still occurs.
Step 2: On and off button for Airplane mode
According to some users, switching Windows’ airplane settings on and off fixes the network issue. You can use airplane mode on your device, such as a laptop, to attempt to fix the connection to the internet.
- In your taskbar, choose the Network icon. The icon may display as an airplane icon if Flight mode is on.
- Your networks and several tiles with choices like Mobile hotspots will be visible. Verify that the Flight mode tile is active. If so, click the icon next to it to deactivate it.
- You must be able to see your networks over again. To determine whether you can get online again, try reconnecting to your internet connection.
Step 3: Upgrade your drivers
Drivers either create or mutilate a device. If the network’s drivers are outdated or missing, this error ‘can’t connect to this network ‘ Windows 11 is probably going to happen. Opportunely, manually or automatically upgrading your drivers is easy. Simply select your desired course of action and follow the below-listed activities.
How to Update Out-Of-Date Drivers?
You may quickly find and update a few of your drivers for devices using this rather than attempting to check each one manually for updates.
- Open the Start menu by selecting Settings from the Windows symbol in the lower left corner of the screen.
- You should select the New Update & Security icon from the drop-down menu. Almost all of the options for Windows updates are available here.
- If it is there, navigate to the security and updates section and click the View optional improvements link.
- To see what drivers require qa uick update, explore the Driver Upgrades section. Select the checkboxes next to the required drivers, then choose Downloads and Installation for updating them.
Before rebooting your computer, let Windows download and install your drivers that are out of date.
How can you update drivers manually in Windows?
Follow the instructions below to upgrade a driver that could be out of date manually. Remember that you should only obtain drivers from reliable websites! You could be tricked into downloading driver files that contain malware by some bogus websites.
- Press the Windows key + X keys on the keyboard to open the required application, then select the Device Manager program from the associated menu.
- Right-click on the existing network adapter after expanding the Network adapters category. From the corresponding menu, choose Update Driver.
- Select the driver update method that you like. You may manually search for a new driver installation on your computer or let Windows locate the Driver immediately.
Step 4: Reset Your Internet Connection Settings
You can restore your internet connection using the Network Reset tool. All current settings for all the networks with which your computer is linked are removed. Your machine will restart with the factory standard configuration. Once you have finished the steps below, remember that you will need to re-authorize each of the connections you previously used.
- To open the Start menu, click the Windows symbol in the lower left corner of your screen. Alternatively, press Windows + I to access Settings.
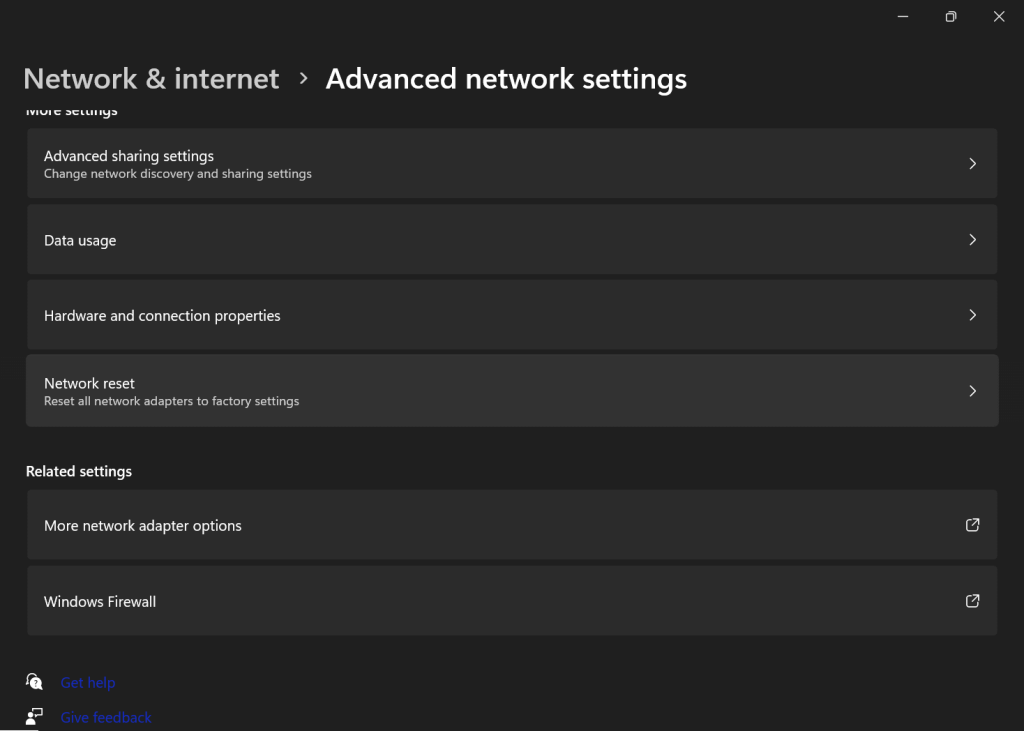
- Pick the Network & Connection icon by clicking.
- Click the network’s reset link at the end of the web page by scrolling down.
- Read the warnings before starting the network reset operation. Once you know what this function accomplishes, click the Reset Now option.

- Select Yes. Check whether you can access the internet once you reset your computer’s network profiles.
Conclusion
Operators of Windows 11 frequently see the “Windows can’t connect to this network ” problem. The lack of instructions provided by Windows to remedy this problem may be quite annoying. Sometimes you only need to run a networking troubleshooter or upgrade the network drivers.
Even if the answer might be a little more challenging, you can still resolve the “Windows can’t connect to this network” issue by following the detailed fix instructions mentioned above.
Popular Post
Recent Post

Advanced SystemCare: Tool To Clean Your PC
Your computer slows down over time. Files pile up, junk builds inside the system, and things start to feel sluggish. You open a browser, and it takes forever. Programs crash without warning. This is a sign that your PC needs a good cleanup. Many users ignore these signs. They think buying a new computer is […]

Top 10 PC Cleaning and Optimization Tools For Windows 11/10
Discover the best PC cleaning and optimization tools for Windows 11 and 10. Remove junk files, improve speed, and keep your PC healthy with trusted cleaners.

Clear Microsoft Teams Cache On Windows PC [Complete Guide]
Learn how to clear Teams cache on Windows PC with 3 easy methods. Fix slowdowns, glitches, and errors fast. A simple guide for every Windows 11 user.

How To Clear Browsing History on PC: Chrome, Edge, Firefox, Opera
Learn how to clear browsing history on PC across Chrome, Edge, Firefox, and Opera with easy steps, tips, pros, and FAQs.

Clear Cache and Cookies: Complete Guide For Windows 11/10
Learn how to clear cache and cookies on Windows 10 and 11. This complete guide covers Chrome, Edge, and Firefox with simple, step-by-step instructions for every user.

How To Clean PC Trackpad/Touchpad Without Damaging It
Learn how to clean PC trackpad and clean PC touchpad safely with simple steps. Improve performance, remove dirt, and keep your laptop surface smooth and responsive.

How To Clean Your GPU/Graphics Card [Complete Guide]
Introduction A graphics card is one of the most important parts of a computer. It handles visuals, gaming, video editing, and design work. Over time, dust builds up inside it. This dust blocks airflow and traps heat. When heat increases, performance drops. In some cases, the system may even crash. That is why learning how […]

How To Clean PC Power Supply Unit Safely Without Damaging
Follow simple, safe steps to clean your computer’s power supply unit. Improve cooling, reduce overheating, and protect your PC’s performance.

How To Clean a CPU Without Damaging It [Complete Guide]
Learn how to clean a CPU safely without damage. Follow simple steps, precautions, and methods to improve cooling, boost performance, and extend your computer’s life.

How To Clear Browser Cache On Windows 11/10 [Chrome, FireFox, Edge]
Learn how to clear browser cache on Windows 11 and 10. Follow simple steps to clean browser cache, fix slow browsing, and improve performance easily.
