How to Set Multiple Clocks on Windows 11
Does your work require dealing with clients in different regions with different time zones? Regularly checking the local time in various cities might be inconvenient and time-consuming. However, having multiple world clock widgets in Windows 11 makes it easier to collaborate with individuals in various time zones. It also makes it easier to communicate with relatives and friends worldwide.
Windows 11 allows you to display two additional clocks in the Notification Center calendar from various time zones. Introducing clocks from multiple time zones to your Windows 11 desktop is a useful tool that does not hamper or clutter the screen. We will show you how to set up multiple clocks on Windows 11 in this article.
Top 3 Approaches to Set Multiple Clocks on Windows 11
Many individuals are unaware that their PCs running Windows 11 may display multiple clocks. Indeed, the Taskbar of the Windows 11 system may show up to two clocks. This is because when you initially run Windows, it prompts you to identify your location and, based on that data, displays the clock on the Taskbar. However, you might want to view more Windows 11 clocks occasionally. So, to achieve the greatest results, use the following methods.
Method 1: Set Up Clock to the Notification Center Calendar
Follow these steps to display the actual zone world clock widget in Windows 11 within the calendar flyout:
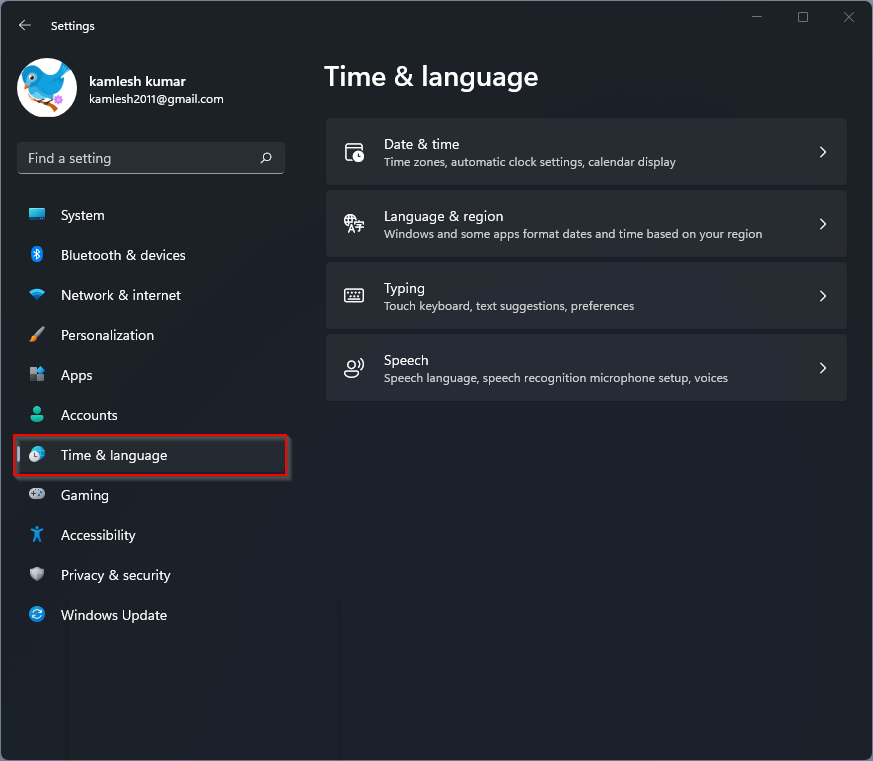
Step 1: Navigate to the Settings of Windows 11 and select the Time & Language option.
Step 2: Select the Date & Time page on the right side.
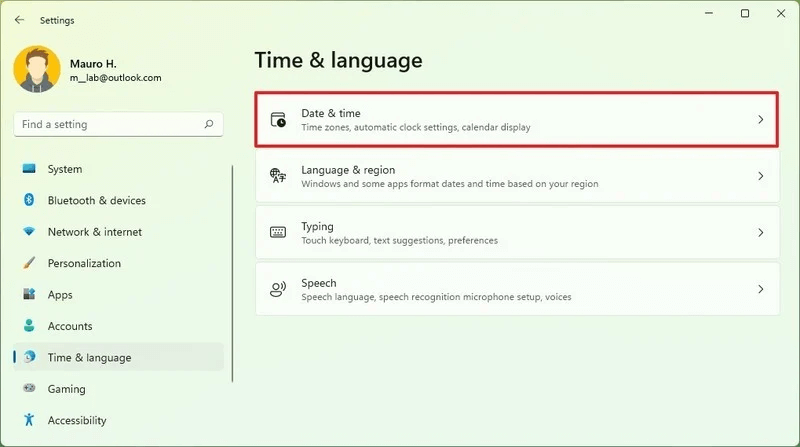
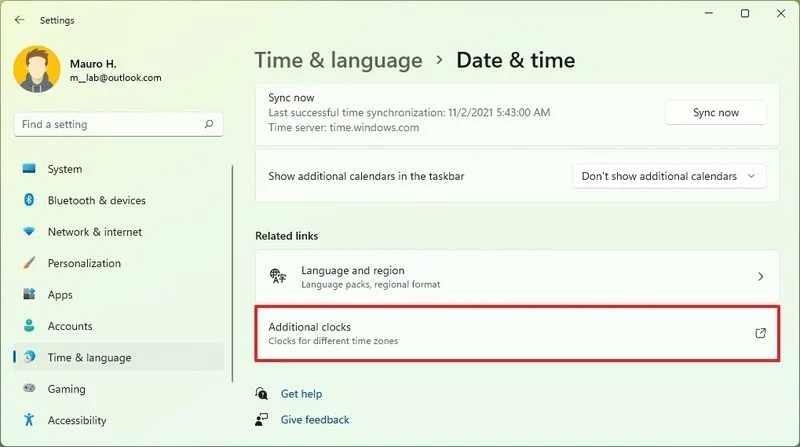
Step 3: Select the Additional clocks setting option displayed under the “Related links” column.
Step 4: Select the Show this clock option. You will get a new window that asks to “enter a display name.” Here, type in the name of the new clock you are setting up.

Step 5: Then, hit the Apply button and press the OK button.
The clock will display in the Notification Center once you have completed these instructions.
Method 2: Set Up Two Different Time Zone Clocks
In Windows 11, you may insert up to 2 time zones’ worth of clocks to the Notification Centre’s Calendar. Use the Settings app to add two different Windows 11 clocks to the Notification Center:
Step 1: Consider heading to the Start menu and navigating to the Settings app.
Step 2: Choose the Time & language option from the sidebar menu.
Step 3: You will now have to select the Date & Time tab.
Step 4: Scroll down to the Related links column after you have visited the Date & time settings page.
Step 5: A new dialogue box of Date & time will appear once you select the Additional clocks.
Step 6: Pick a time zone and give the clock a screen name by checking the Show this clock option.
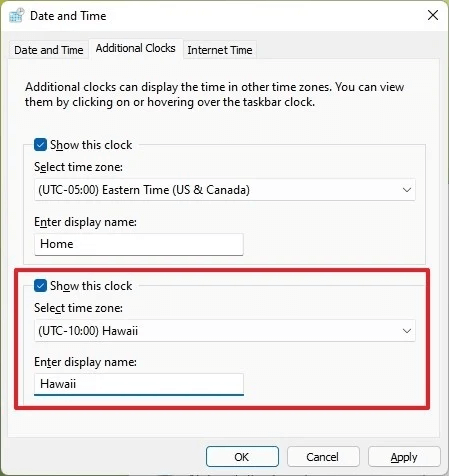
Step 7: Continue similarly for the second clock if you wish to add two clocks.
Step 8: After making the appropriate adjustments, select Apply and click on the Ok option afterwards.
By selecting the Date & Time in the Taskbar and then extending the calendar flyout, you may now see the other clocks.
Method 3: Set Up More than Two Additional Clocks
The standard Date and time in Windows 11 primarily assist users with two added time zone clocks. You will have to employ separate software if you want to set up more than three clocks, along with the main clock displayed on the desktop.
Conveniently, the Alarms & Clock software is an in-built Windows software that can display multiple time zone clocks as per your requirement. As a result, there’s no need to download a third-party program only to see clocks from other time zones. The steps to add a more than two-time zone world clock widget to Windows 11 are as follows.
Step 1: You may use the Search or Start menu to find and launch the Alarms & Clock application.
Note: Users get the option to pin the Alarms & Clock application to the Taskbar by right-clicking the search outcome and selecting Pin to the Taskbar. It helps them to launch it fast next time.
Step 2: Select the World Clock option on the Alarms and Clock app’s left sidebar.
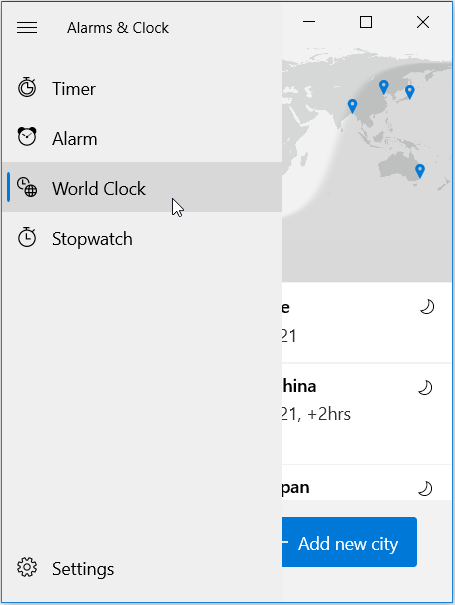
Step 3: Afterwards, select the “Add new city” option to append a clock for a time zone or city.
Step 4: Type the city name into the search field to find the location you want to set up the global clock.
Step 5: To insert a city’s local time clock into the global map, select its name displayed in the search results.
You may update the app with multiple Windows 11 clocks as you like from various places and time zones. The clocks that have been inserted will be stored. After exiting the application, display the globe clocks, and successfully launch the Alarms & Clock app once more.
Bottom Line
We enjoy several features in Windows 11, and the opportunity to modify several of them makes it all even better. For many Windows 11 users, this option of putting up a world clock widget windows 11 makes things easier. Use the three methods mentioned above and display two or more additional clocks for other locations and the standard time for the present location. Therefore, select any of the preferred approaches and set up multiple clocks on your Windows 11 desktop.
Recommended Articles:
How to Speed Up Gaming Experience on Windows 10?
Popular Post
Recent Post

Advanced SystemCare: Tool To Clean Your PC
Your computer slows down over time. Files pile up, junk builds inside the system, and things start to feel sluggish. You open a browser, and it takes forever. Programs crash without warning. This is a sign that your PC needs a good cleanup. Many users ignore these signs. They think buying a new computer is […]

Top 10 PC Cleaning and Optimization Tools For Windows 11/10
Discover the best PC cleaning and optimization tools for Windows 11 and 10. Remove junk files, improve speed, and keep your PC healthy with trusted cleaners.

Clear Microsoft Teams Cache On Windows PC [Complete Guide]
Learn how to clear Teams cache on Windows PC with 3 easy methods. Fix slowdowns, glitches, and errors fast. A simple guide for every Windows 11 user.

How To Clear Browsing History on PC: Chrome, Edge, Firefox, Opera
Learn how to clear browsing history on PC across Chrome, Edge, Firefox, and Opera with easy steps, tips, pros, and FAQs.

Clear Cache and Cookies: Complete Guide For Windows 11/10
Learn how to clear cache and cookies on Windows 10 and 11. This complete guide covers Chrome, Edge, and Firefox with simple, step-by-step instructions for every user.

How To Clean PC Trackpad/Touchpad Without Damaging It
Learn how to clean PC trackpad and clean PC touchpad safely with simple steps. Improve performance, remove dirt, and keep your laptop surface smooth and responsive.

How To Clean Your GPU/Graphics Card [Complete Guide]
Introduction A graphics card is one of the most important parts of a computer. It handles visuals, gaming, video editing, and design work. Over time, dust builds up inside it. This dust blocks airflow and traps heat. When heat increases, performance drops. In some cases, the system may even crash. That is why learning how […]

How To Clean PC Power Supply Unit Safely Without Damaging
Follow simple, safe steps to clean your computer’s power supply unit. Improve cooling, reduce overheating, and protect your PC’s performance.

How To Clean a CPU Without Damaging It [Complete Guide]
Learn how to clean a CPU safely without damage. Follow simple steps, precautions, and methods to improve cooling, boost performance, and extend your computer’s life.

How To Clear Browser Cache On Windows 11/10 [Chrome, FireFox, Edge]
Learn how to clear browser cache on Windows 11 and 10. Follow simple steps to clean browser cache, fix slow browsing, and improve performance easily.
