How to Fix Windows 11 Black Screen Issue (9 Solutions)

Windows 11 has rolled out with many new features and a stunning graphic interface. Despite Windows 11 being a better and bolder version of Windows 10; still, some things are the same in both Windows, like the black screen of death.
Yep, the famous Windows 10 blue screen issue has reappeared in Windows 11, but it is black this time due to the new Windows interface design. This issue can be annoying and frustrating, especially when you are updating your Windows OS.
However, there is no need to panic as Windows 11 black screen is a fixable error. So, without any ado, let’s explore how to fix Windows 11 black screen.
Reasons Behind the Windows 11 Black Screen Error
Before fixing the Windows 11 black screen issue, let’s first understand why this error actually happens. There are many factors that contribute to the black screen issue in Windows 11, such as:
- Outdated graphics drivers can cause black screens many times
- Installing incompatible or buggy programs
- Windows 11 system errors
- Loose peripheral connections
- Non-configured projection settings
- Hardware or driver problems
- Virus or malware attacks and more.
9 Solutions to Fix Windows 11 Black Screen Issue
No matter what has caused the Windows 11 black screen issue on your computer, there is a suitable fix for all the situations. Here are the common solutions to fix the black screen issue on your Windows 11:
Solution 1. Check All Physical Connections with Monitor
First of all, ensure that all physical connections are tight and properly attached to your device. For example, make sure your monitor is properly connected to the CPU and the power adapter.
Look for any faulty cable or loose wire connections. Also, unplug and replug the important cables to ensure everything is connected to the right spot.
Alternatively, you can use another monitor or connecting cable to check whether your monitor is working properly or not.
Solution 2. Restart your Windows 11 Computer
So, the easiest way to fix Windows 11 black screen is to shut down your device and restart it. Since your system is currently non-responsive, you can use the power button to restart it.
Press and hold the power button until the PC is turned off. Then, wait for a few minutes to press the power button again to turn on the computer. Now, check whether the Windows 11 black screen error is fixed or not.
Solution 3. Remove All Non-essential Accessories
If you face the Windows 11 black screen issue on boot, this could be due to incompatible hardware connections. So, you should disconnect all the non-essential devices connected to your computer like headphones, USB cables, etc.
Just leave the monitor, mouse, and keyboard connected to the PC. After that, restart your computer and see if the error is fixed. If the Windows 11 black screen issue is fixed, one by one reconnect all peripheral devices to find the problematic hardware accessory.
Solution 4. Roll Back the Display Adapter
Did your Windows 11 work perfectly fine before updating the OS? Then, the error occurs because the graphics driver is corrupt or incompatible with your Windows 11. Therefore, you have to roll back to the previous OS version in Safe Mode to fix the black screen. To do so:
Step 1. Hold the power button to restart your PC. Once Windows starts to boot, hold down the power button for 10 seconds to turn off your device and turn it back on.
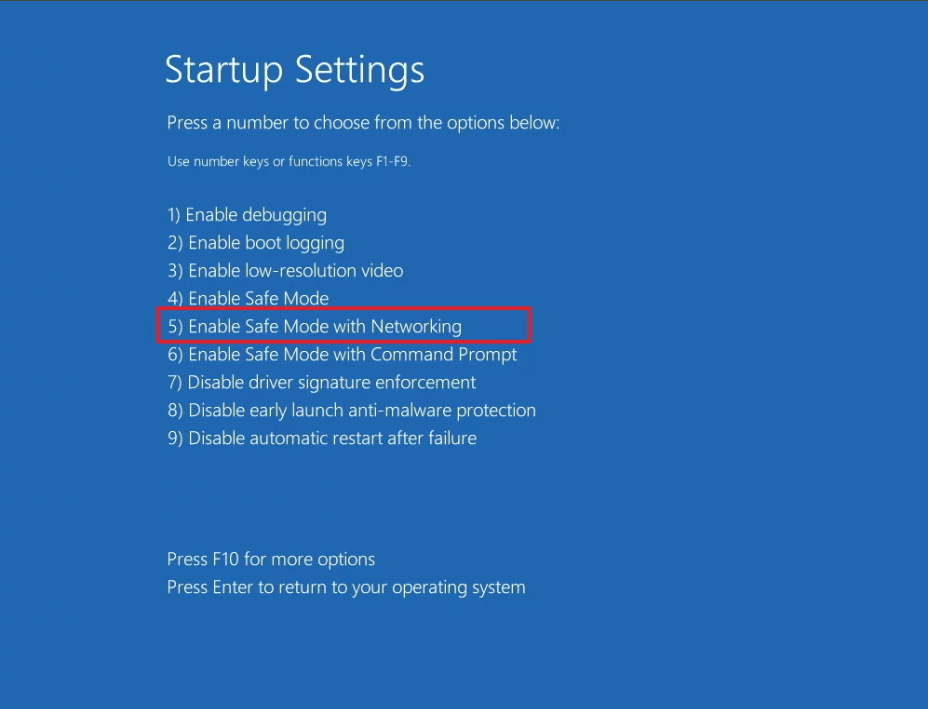
Step 2. Repeat the step once again and this time, allow your device to restart fully. Once you enter the wintRE window, select the Troubleshoot > Advanced options > Startup Settings > Restart.
Step 3. After your device restarts, you will find numerous options. Select option 5 to start your PC in the Safe Mode.
Step 4. Now, type the device manager in the search box to open the Device Manager.
Step 5. Expand Display Adapter and right-click on the items present under this section.
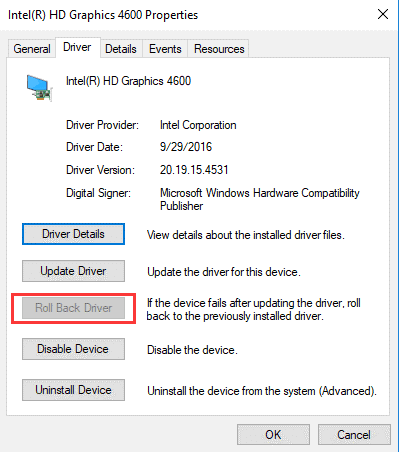
Step 6. Select the Properties and click on the Driver tab.
Step 7. Click on the Roll Back Driver and select OK. Finally, restart your PC.
Solution 5. Uninstall Display Adapter Driver
If roll backing the graphic driver is not an option for you, completely uninstalling them might fix the problem. To do so:
Step 1. Boot into the Safe Mode with the aforementioned steps.
Step 2. Open the Device Manager using the search box.
Step 3. Expand the Display Adapters, right-click on the items underneath it and select the Uninstall device.
Solution 6. Tweak your Projection Settings
Sometimes making adjustments to your projection settings can also lead to the Windows 11 black screen issue. So, here’s how you can fix this problem:
Step 1. Press the Windows + P keys to launch the projection settings window.
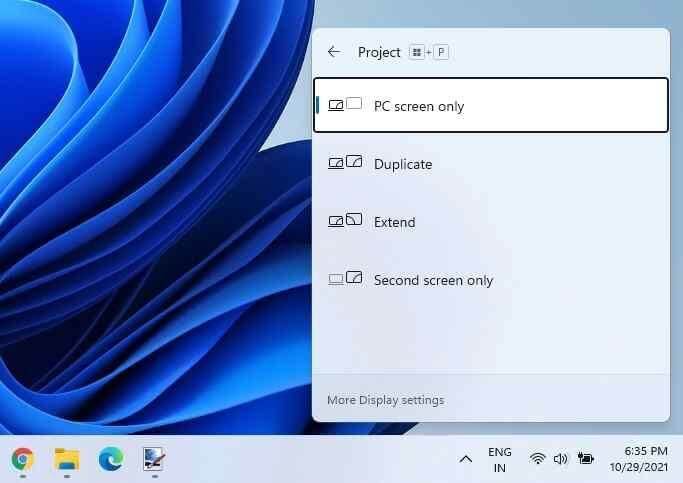
Step 2. Now use the keyboard or mouse to navigate between the different options and select the desired ones.
Solution 7. Restructure the BCD
If the Windows Boot Configuration Data settings are not properly configured or corrupted on your device, it can lead to the black screen error on Windows 11. Here are steps to rebuild the BCD on Windows 11;
Step 1. Take a bootable USB drive to boot your device.
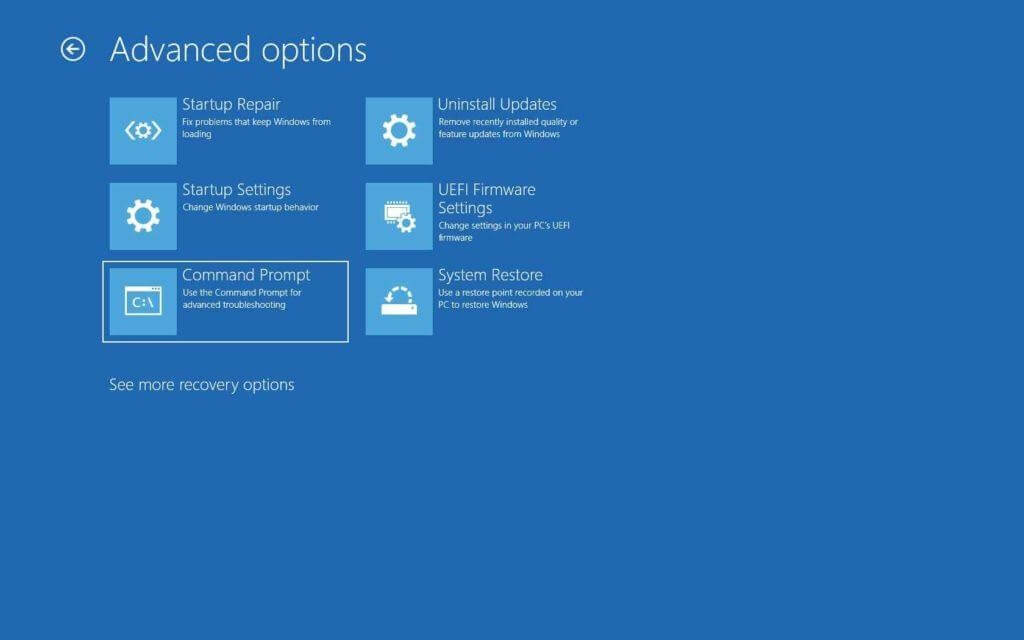
Step 2. On the winRE window, go to Repair your Computer > Troubleshoot > Advanced > Command Prompt.
Step 3. Type the following commands and press the enter:
bootrec /Fixmbr
bootrec /FixBoot
bootrec /ScanOs
bootrec /RebuildBcd
Step 4. Now exit the Command Prompt window and restart your computer to see if the error is fixed.
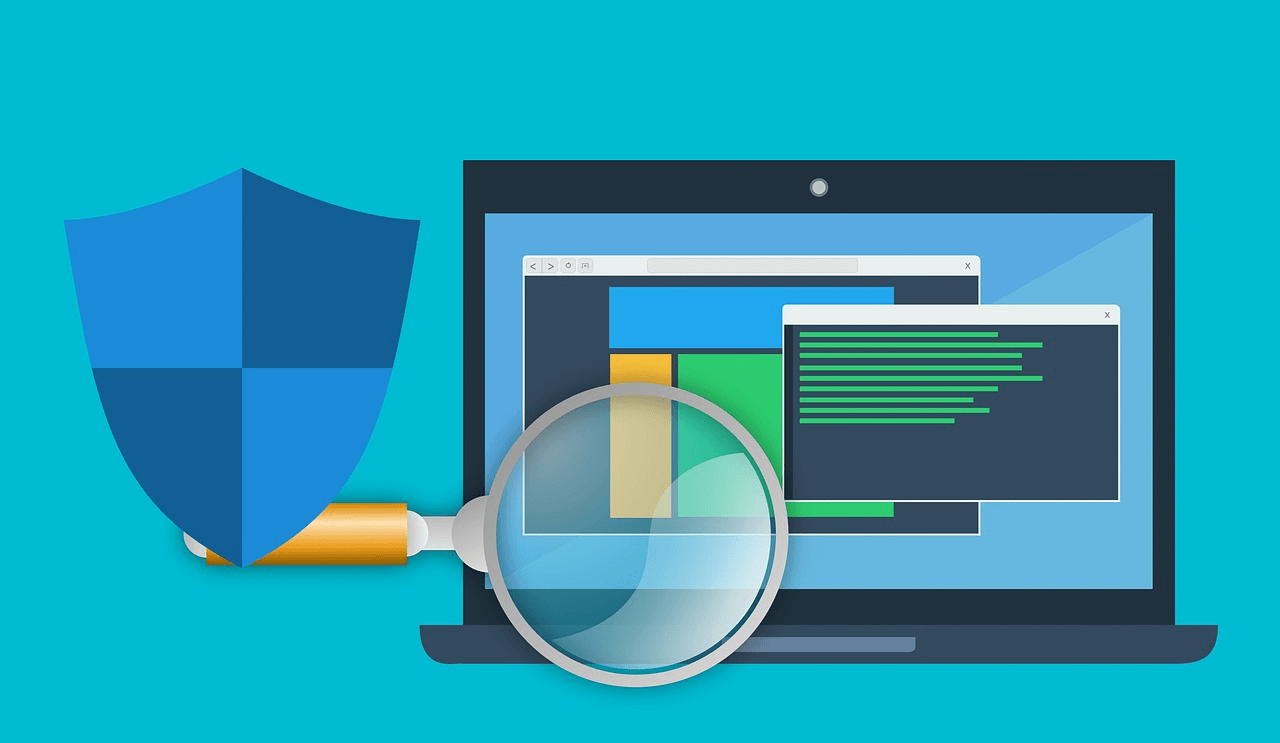
Solution 8. Remove Virus or Malware
You should run the virus or malware scan on your computer to detect and remove viruses, adware, trojans, spyware, or other malicious threats. You can use the antivirus tools like Systweak Antivirus, Norton Antivirus, and others.
Solution 9. Disable Fast Startup Settings
When the fast startup feature is enabled on your computer, it can also cause the Windows 11 black screen issue. Though the fast startup is designed to boost your Windows 11 faster, it can be the root cause of the black screen issue.
Here’s how to fix the blackout display by disabling the fast startup:
Step 1. Once you have booted your computer into Safe Mode.
Step 2. Click on the Start and search for the control panel
Step 3. Select the System and Security > Power Options > Choose what the power button does on the left sidebar on the Control Panel window.
Step 4. Now click on the Change settings that are currently unavailable and next uncheck the Turn on fast startup (recommended) option.

Step 5. Save the changes and restart your computer to see if the black screen is fixed or not.
There you have learned to fix the Windows 11 black screen problem. All the discussed solutions will easily fix the black screen of death.
But unfortunately, if nothing worked, better contact Microsoft support center or visit your local repair shop.
Meanwhile, don’t forget to share your thoughts on this post.
Popular Post


Recent Post
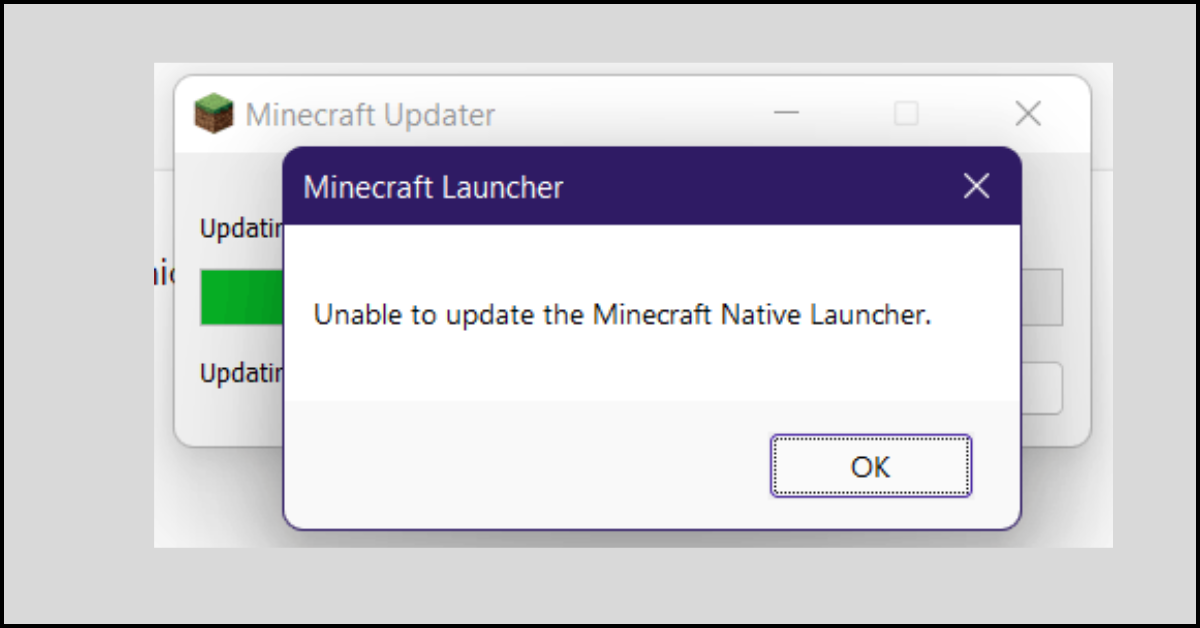
How to Fix Unable to update the Minecraft Native Launcher Windows 11
The “Unable to update the Minecraft Native Launcher” issue can be frustrating. However, there are many ways to fix it. Here, we will discuss some effective ways to fix this problem.

Troubleshooting Guide: How To Fix Copy And Paste Not Working On Windows 10/11
Fix the copy and paste not working issue on Windows 10/11 hassle-free with this comprehensive guide. Here you’ll find effective tried and tested methods that can troubleshoot and permanently resolve the problem.
How to Force Quit on Windows 11 and Windows 10
Encountering unresponsive programs or frozen applications on our Windows devices can be a frustrating experience. When a program hangs or stops responding, it can disrupt our workflow and hinder productivity. This is where the ability to force quit a program comes in handy. Here, we will explore different methods to force quit on Windows 11 […]

How to Enable Secure Boot Windows 11 and Windows 10
One of the key features that can significantly enhance the security of your Windows operating system is Secure Boot. By enabling Secure Boot on your Windows 11 or Windows 10 system, you can protect your device against malware and unauthorized operating systems. Benefits of Enabling Secure Boot in Windows 11 And 10 1. Protection Against […]

How to Change Administrator on Windows 10 and Windows 11
In Windows operating systems, the administrator account holds the highest level of privileges and control over the system. Sometimes, you may need to change the administrator account for various reasons such as security, ownership transfer, or simply to give someone else access to the system. Here, we will explore different methods to change the administrator […]

How to Open BIOS Windows 11 and Windows 10
Here are the best ways to Open BIOS Windows 11 and Windows 10. These steps are very easy.

How to Convert HEIC to JPG on Windows 11 and Windows 10
Learn the best ways to convert HEIC to JPG on Windows and Windows 10 computers.

How to Fix Valorant not uninstalling Windows 11 – Remove Valorant Completely
Online gaming has become increasingly popular, with many gamers enjoying multiplayer games. One such game that has gained a significant following is Valorant. However, like any software, Valorant is not immune to technical issues, and one common problem that players encounter is the difficulty in uninstalling the game, particularly on the Windows 11 operating system. […]
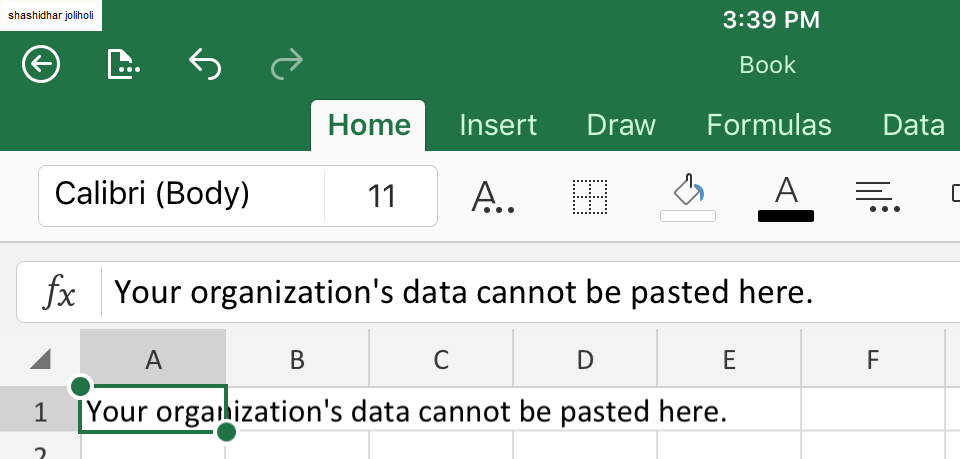
Your Organization’s Data Cannot Be Pasted Here: 7 Ways to Fix It
Encountering the “Your organization’s data cannot be pasted here” error can be frustrating, but armed with the right knowledge and troubleshooting steps, you can quickly overcome this hurdle.
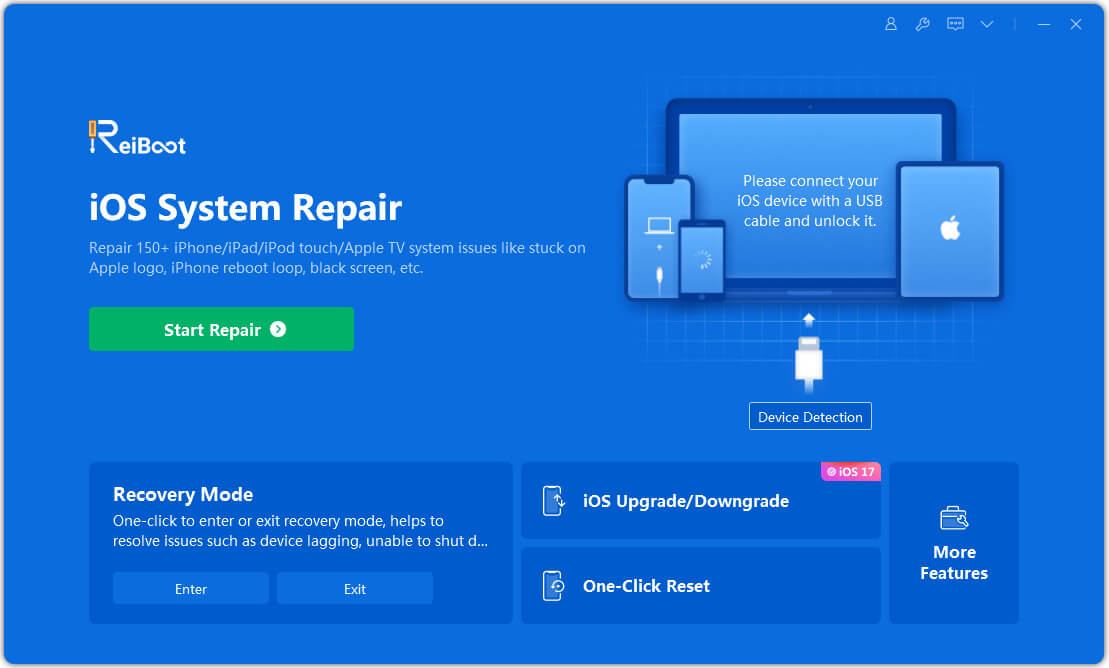
Tenorshare Reiboot Review 2024 [Fully Unbiased]
Read The Complete Unbiased Review of Tenorshare Reiboot

