How to Fix the “DNS_PROBE_FINISHED_NXDOMAIN” Error?
Does your browser not redirect you to the desired website? Instead, a DNS PROBE FINISHED NXDOMAIN error message appears in the browser.
This error is related to DNS (Domain Name System) or internet connectivity issues. The Domain Name System organizes internet traffic by mapping domain names to specific server IP addresses. In DNS transactions, a DNS server is essential. Its purpose is to convert alphabetic domain names to numeric IP addresses. But, some glitches can disturb the process, leading to the error.
Read through this article to learn what this error means and how to troubleshoot it.
What is the DNS_PROBE_FINISHED_NXDOMAIN Error?
The meaning of the dns_probe_finished_nxdomain is straightforward. The error indicates that the DNS probe to the server for a specific domain name’s corresponding IP address was successful. However, this probe could not locate a matching IP address for the domain and determined that it is Non-Existent (NXDOMAIN).
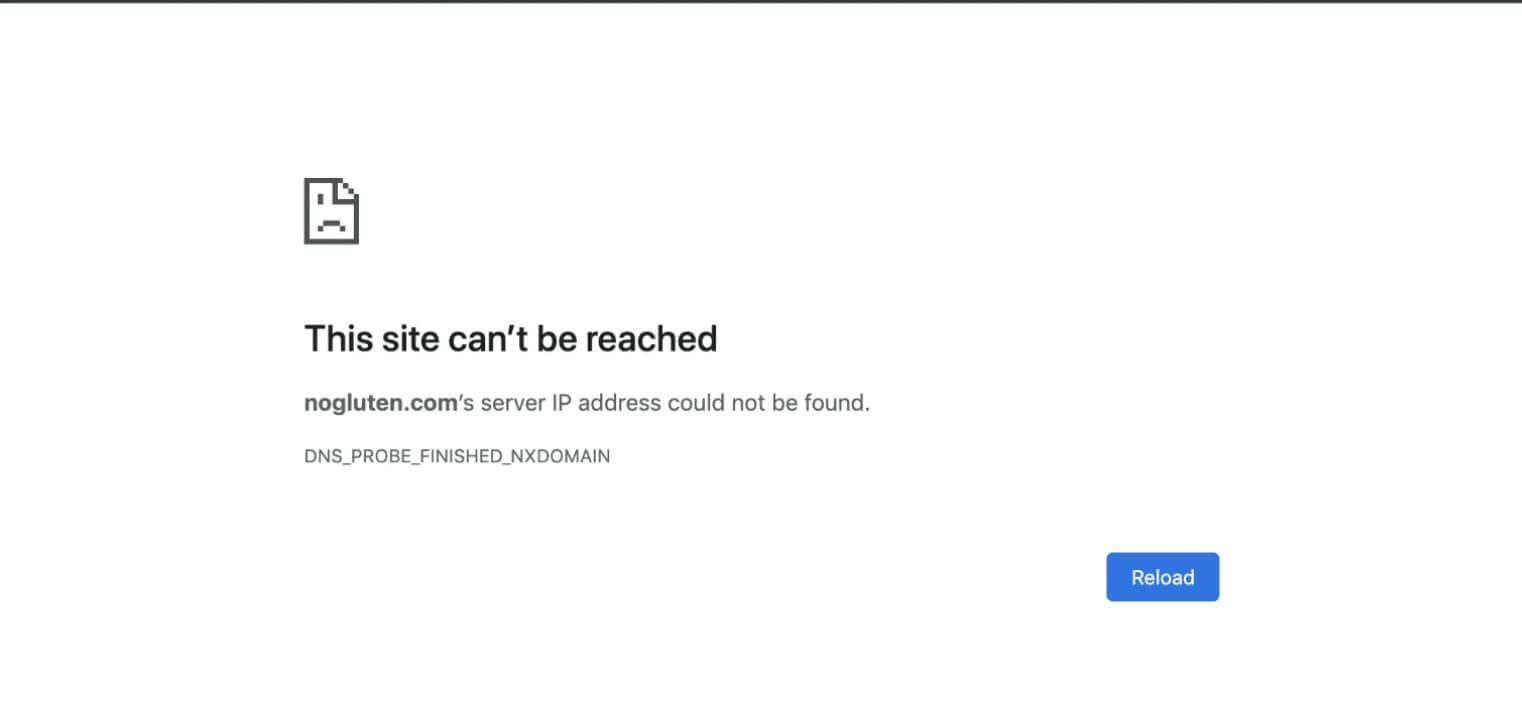
Because the DNS server could not resolve the domain to an IP address, your browser will display an error message. The error message reads, “Server IP address could not be found,” with “dns probe finished nxdomain.”
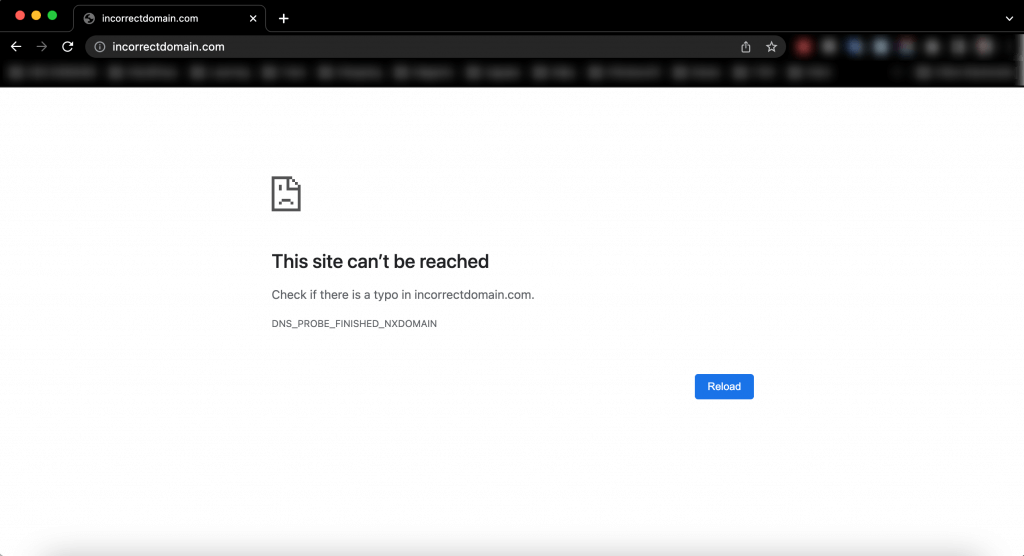
The error may look different depending on your browser. For example, on Chrome, it looks like this:
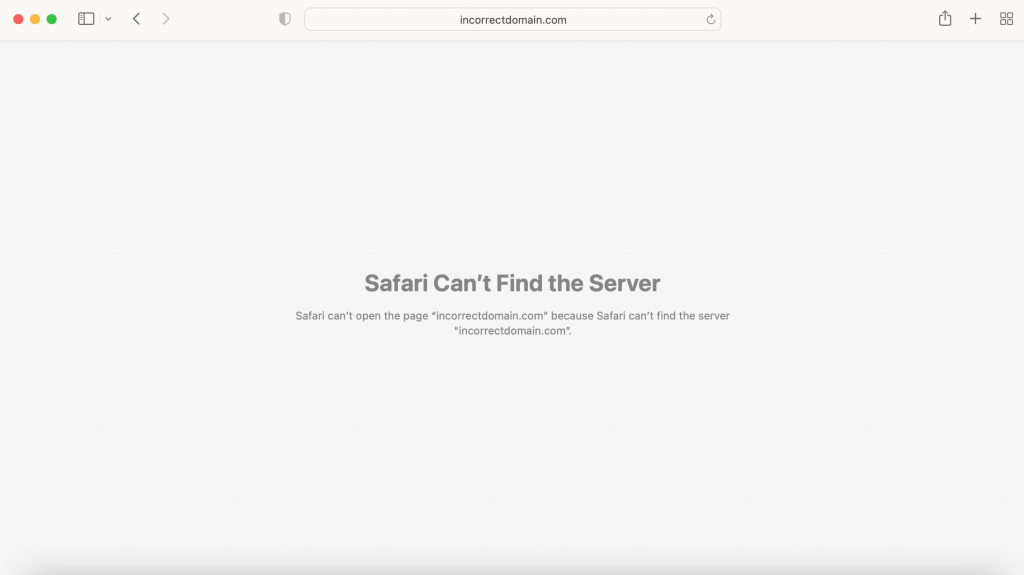
On Safari, the DNS probe error looks as follows:
What Causes the DNS_PROBE_FINISHED_NXDOMAIN Error?
The DNS PROBE FINISHED NXDOMAIN issue can occur for several reasons, but the most common are as follows:
1. The destination website isn’t available
It is possible that the website you are accessing does not exist or that its domain name has not yet been registered.
You may also have typed the wrong URL into the browser’s address bar in haste. As a result, the browser cannot connect to the correct IP address in DNS.
If you typed the correct URL but still received the error, there could be a problem with the domain you are attempting to access.
2. Problem with the internet connection or browser
It is also possible that only your system is experiencing the DNS PROBE FINISHED _NXDOMAIN error, while other users are not.
To determine whether your internet configuration or browser is the primary culprit. Try accessing the same webpage using a different browser, a different internet connection, or an entirely different system.
If the error does not appear in another browser or system, it indicates a problem with your device or browser.
However, you can try the solutions listed below to resolve your dns probe finished nxdomain error.
9 Methods to Fix DNS_PROBE_FINISHED_NXDOMAIN Error
DNS errors are typically caused by the users themselves. All they need to do is follow a few generic steps, and these lengthy errors will be resolved in no time. Here are the quick methods to fix the error:
Method 1. Ensure Your URL Is Correct
The most basic reason you might see the DNS PROBE FINISHED NXDOMAIN error is that you did not enter the domain name correctly.
Recheck the URL for any typos you may have made while entering it into your browser. If you are confident, there are no errors, proceed to the following method.
Method 2. Restart Your Device
Restarting your computer is another simple but sometimes effective way to resolve this error. If you’re getting the DNS PROBE FINISHED NXDOMAIN response from a tablet or phone, try turning it off and then back on again.
This may be inconvenient if you have a lot of applications and browser tabs open. As a result, feel free to save this solution until you’ve exhausted all other possibilities. However, remember that many of these fixes require you to restart your browser.
Method 3. Disable Your VPN or Antivirus Software
VPNs and antivirus software may occasionally interfere with network settings and DNS server configurations. If you have either of these programs installed on your computer, this could be the source of the DNS error message.
The procedure for disabling antivirus software or a VPN varies depending on your applications or tools. However, you can find the software among your device’s applications and programs after right-clicking it. First, look for the ‘disable’ or ‘uninstall’ option.
Method 4. Renew Your Computer’s IP Address
Because this is typically a client-side error, you should begin by releasing and renewing your computer’s IP address. This is required if you are not receiving a valid IP address from your internet router.
To be able to renew your computer’s IP address, you must first release it. Then, renewing your IP address sends a request to a DHCP server, which assigns you a new IP address.
Step-by-step instructions for doing so on Windows and Mac are provided below.
On Windows
Step 1. On a Windows PC, you can renew your IP address as an Administrator by using the Command Prompt application. To find this app, go to the Start menu, type “cmd” into the search bar, and then select “Run as administrator.”
Step 2. When the Command prompt appears, enter the command ipconfig /release and press Enter.
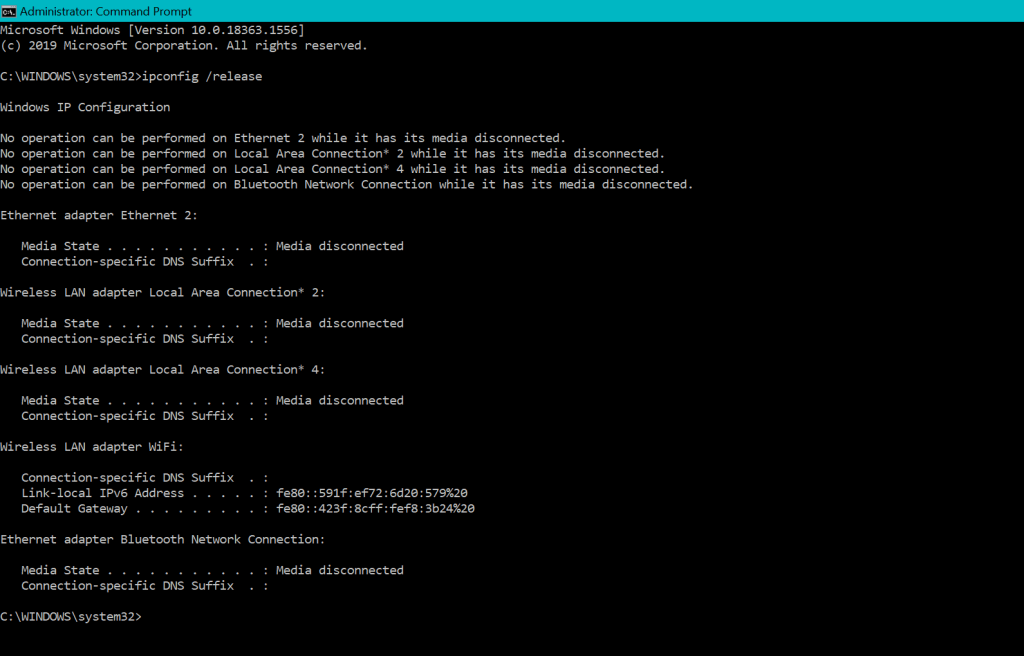
Step 3. When the current IP address is released, use the command ipconfig /renew to request a new one.
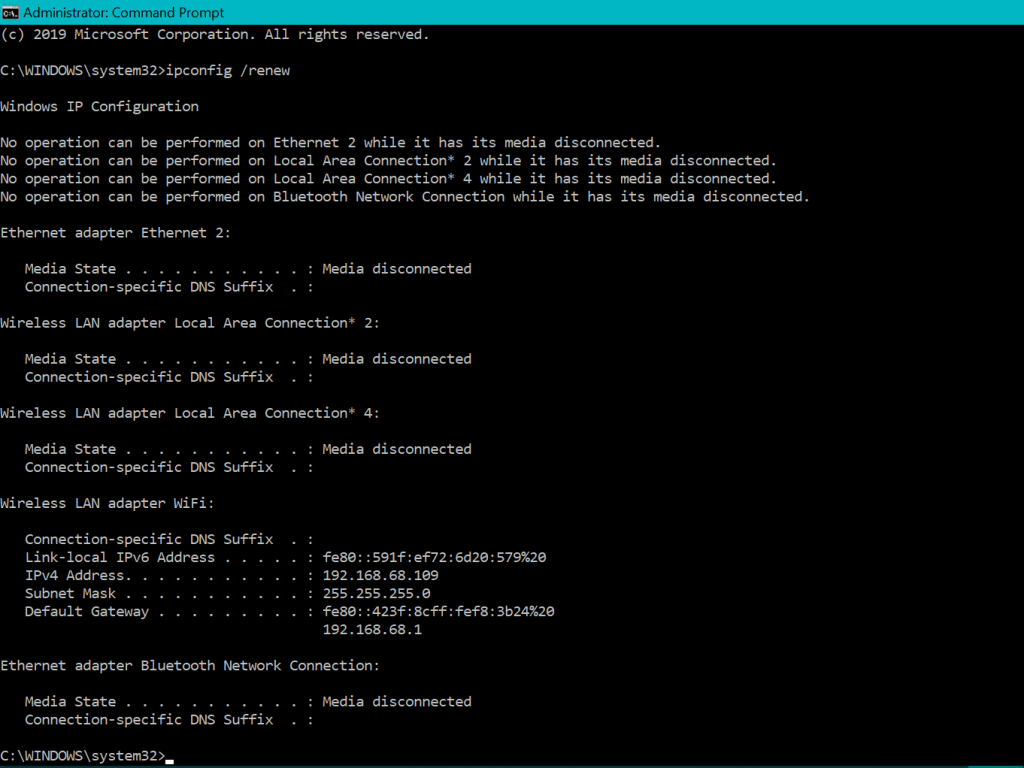
It should now be resolved if your connection fails because of an invalid IP address.
If you continue to see the dns probe finished nxdomain in Windows 7 or later versions, restart the Winsock. This interface specifies how the Windows network should access IP/TCP services. You can renew it with the following command:
netsh winsock reset
On Mac
If you encounter, dns probe finished nxdomain on a Mac, access System Preferences, and click the apple icon in the upper left corner.
Select the Network icon, then the Advanced button. Then, on the TCP/IP tab, press the “Renew DHCP lease” button to renew your computer’s IP address.
Method 5. Flushed Your DNS Cache
The DNS cache is your Operating System’s (OS) catalog of domain-to-IP translations for previously visited websites. The stored history could be outdated or corrupted, resulting in the dns probe finished nxdomain error. Resetting your DNS cache will clear all DNS records that your operating system has accumulated.
The steps for flushing the DNS cache differ depending on your computer’s operating system.
On Windows
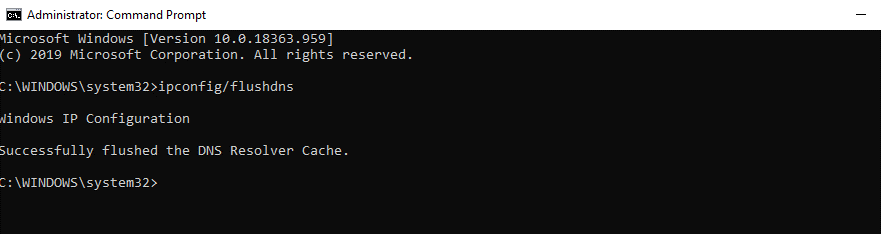
To clear the DNS cache in Windows, click the Windows logo and type “cmd” into the search bar. Select Run as administrator from the Command Prompt application.
It may ask you to grant the app permission to change your device. Choose the Yes option. Enter the following command when the Command Prompt window appears:
ipconfig/flushdns
Enter your password. When it’s finished, a message will appear indicating that the DNS cache was successfully flushed.
Restart your browser and return to the website. Return to the Command Prompt application in Windows to release and renew your IP address. Enter the commands below, pressing Enter after each.
On Mac
On macOS, you can use the Terminal application to flush the local DNS cache. This app can be found in the Applications > Utilities folder.
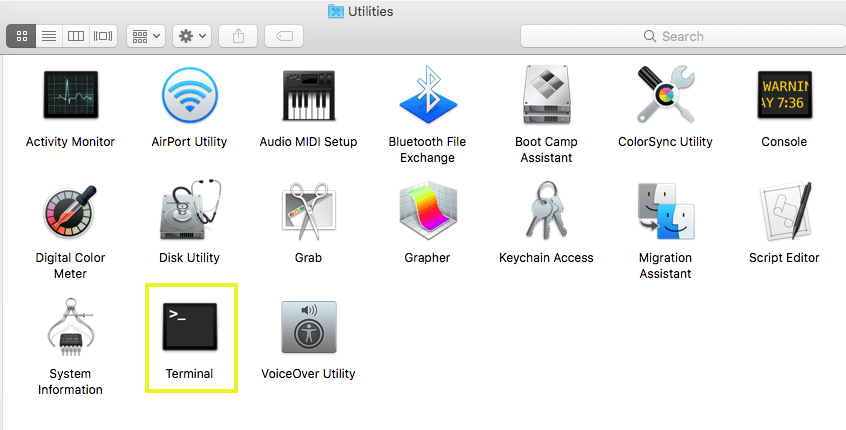
After opening the Terminal application by double-clicking on it, type the following command and press Return:
dscacheutil -flushcache
Method 6. Change the DNS Server
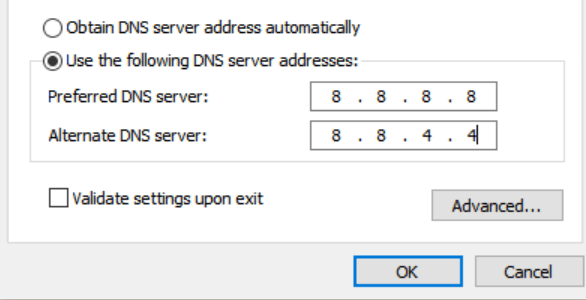
Another option is to change the DNS servers that your computer is using. Typically, your ISP will assign DNS servers to your network automatically. But, you can move to a public DNS server when you need to correct an error, such as dns probe finished nxdomain. Such servers include Google’s (8.8.8.8 and 8.8.4.4) and CloudFlare’s (1.1.1.1 and 1.0.0.1).
Because Google’s Public DNS is the most commonly used, we will demonstrate the steps with them. The steps for using CloudFlare’s Public DNS are the same; the only difference is that you must use the respective IP addresses.
On Windows
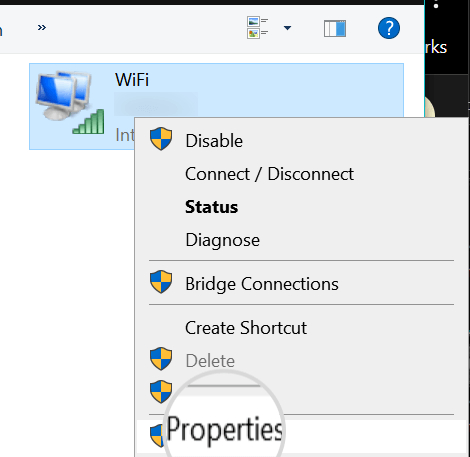
First, open the Control Panel to use Google’s Public DNS on a Windows computer.
When the main window of the Control Panel appears, select “Network and Internet” and click on the “Network and Sharing Center.” Choose “Change adapter settings” on the next screen and right-click on WiFi to load Properties
Select “Internet Protocol Version 4 (TCP/IPv4)” on the new window where you can enter the IP address of Google’s DNS server.
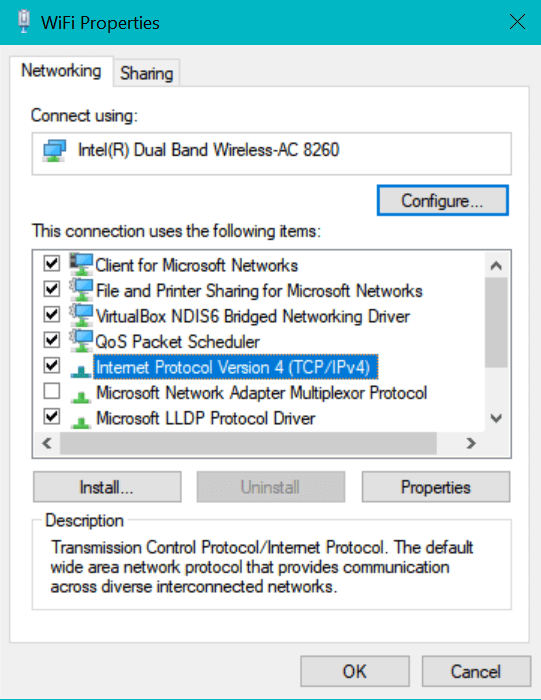
When the following window appears, select “Use the following DNS server address” and enter the two IP addresses for Google’s Public DNS server.
After that, you’ll need to restart your browser to see if the website you’re trying to access is still accessible.
On Mac
To configure your Mac’s Public DNS server, go to System Preferences. Then, click on the Network icon, and select the Advanced settings button.
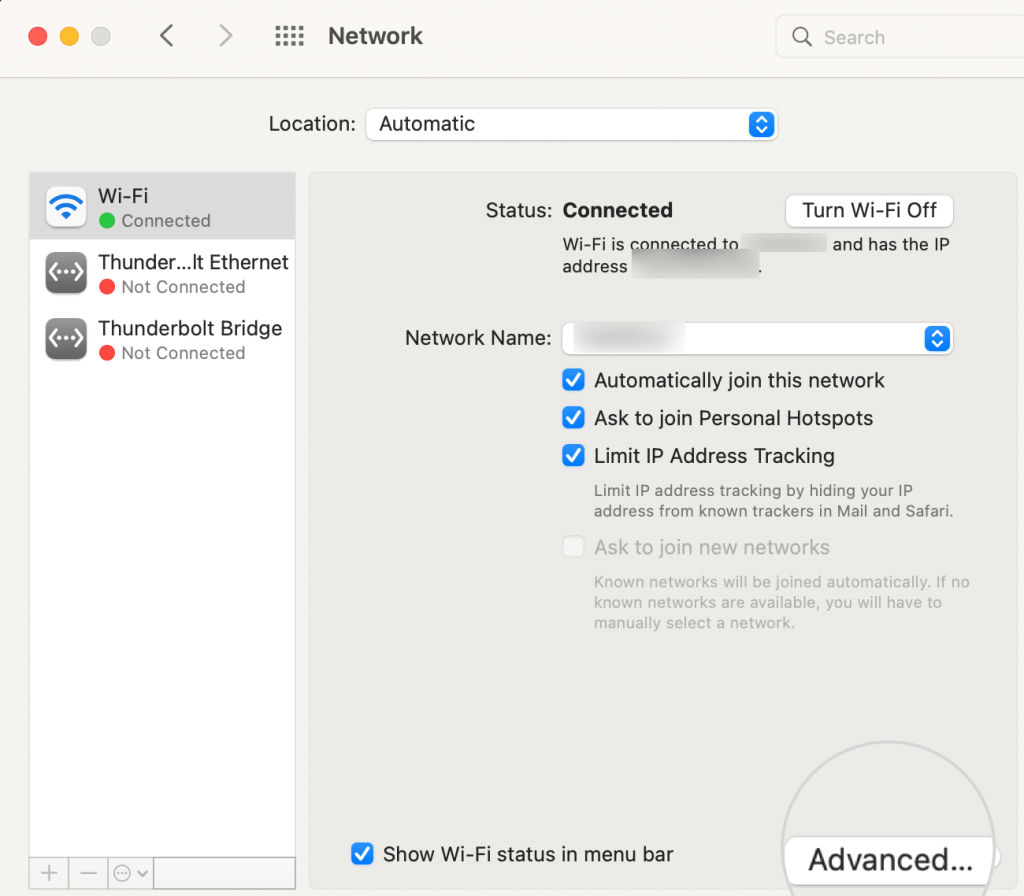
You can add an IPv4 or IPv6 address by clicking the “+” sign under the DNS tab.
After clicking the “OK” button, you should be able to access the target website after restarting your browser.
Method 7. Configure Your Chrome Flags
Installing new features or extensions on your browser may have tampered with Chrome’s settings. This can sometimes interfere with DNS settings, resulting in error messages.
As a result, it’s a good idea to return the Chrome flags to their default settings. Enter chrome:/flags into your browser’s address bar and press Enter.
Click the Reset all button on the Experiments screen.
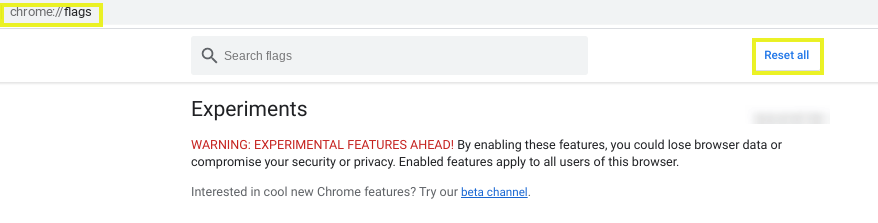
Restart your browser and try again to access the website.
Method 8. Check Local Host Files
You must also go through your computer’s host file. It is a system file where DNS translations can be manually entered (domain to IP). This file is typically edited to preview your website’s content on another server while the domain is not yet pointed to it.
There could be some changes to that file which are interfering with your connection.
As a result, we recommend you review the contents of your host’s file to ensure that it is not causing a conflict for your computer, resulting in the DNS probe error.
Method 9. Reset the DNS Client Service
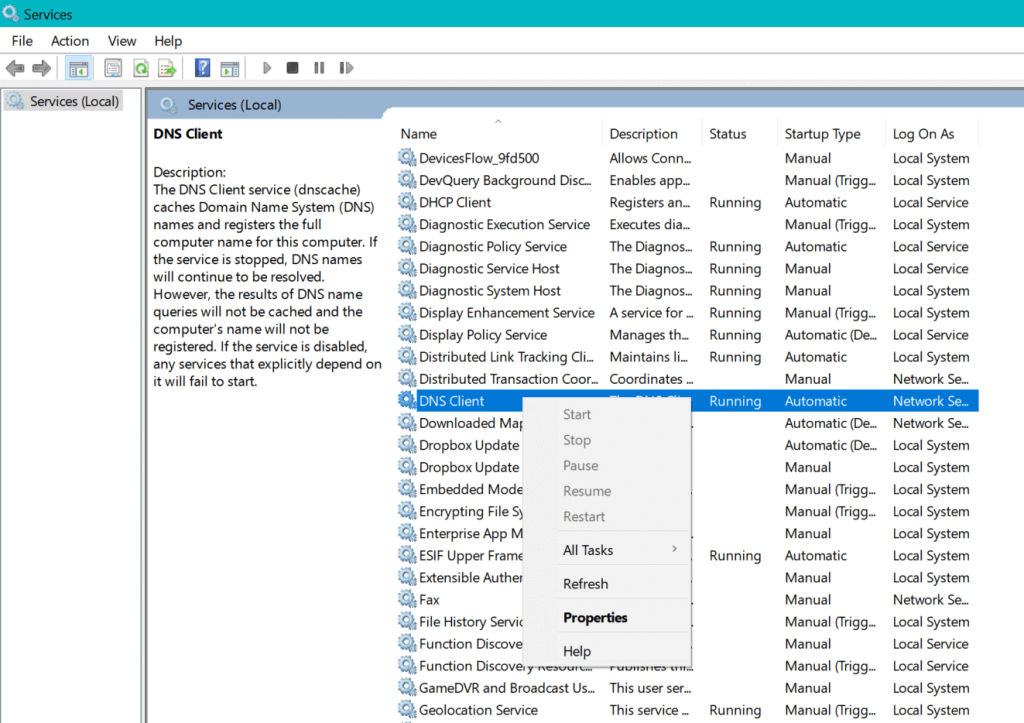
We recommend restarting the DNS Client service for Windows users who encounter such DNS probe errors. The DNS Client service is your computer’s local DNS resolver. This service queries your computer’s DNS cache.
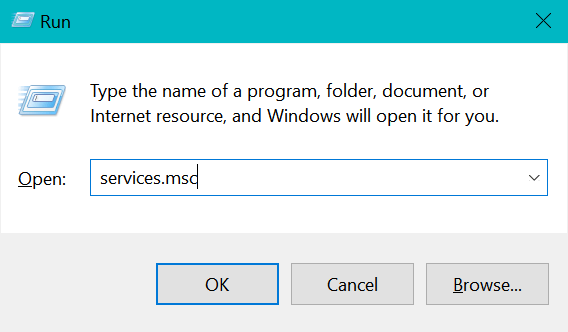
You can use the Run dialog box to restart this service on your Windows PC. Simply press the Windows button + “R” key to launch it, and then type “services.msc” into the command line window that appears.
Another page will load, displaying all services used by the OS in alphabetical order. Scroll down and right-click on “DNS client” to select “Restart.”
To restart the DNS Client service on your Windows operating system, use the commands provided below via Command prompt. The first one terminates the DNS Client service, and the second one restarts it:
net stop dnscache
net start dnscache
Parting Remarks
There you have it, people! We shared 9 awesome steps to fix the dns_probe_finished_nxdomain error on your computer. First, you must start with easy solutions like restarting your device or flushing your web browser cache. If that didn’t work, go for solutions like changing your DNS server. So, let’s wrap up; if you have any questions, please comment below or refer to our other guides.
Popular Post


Recent Post
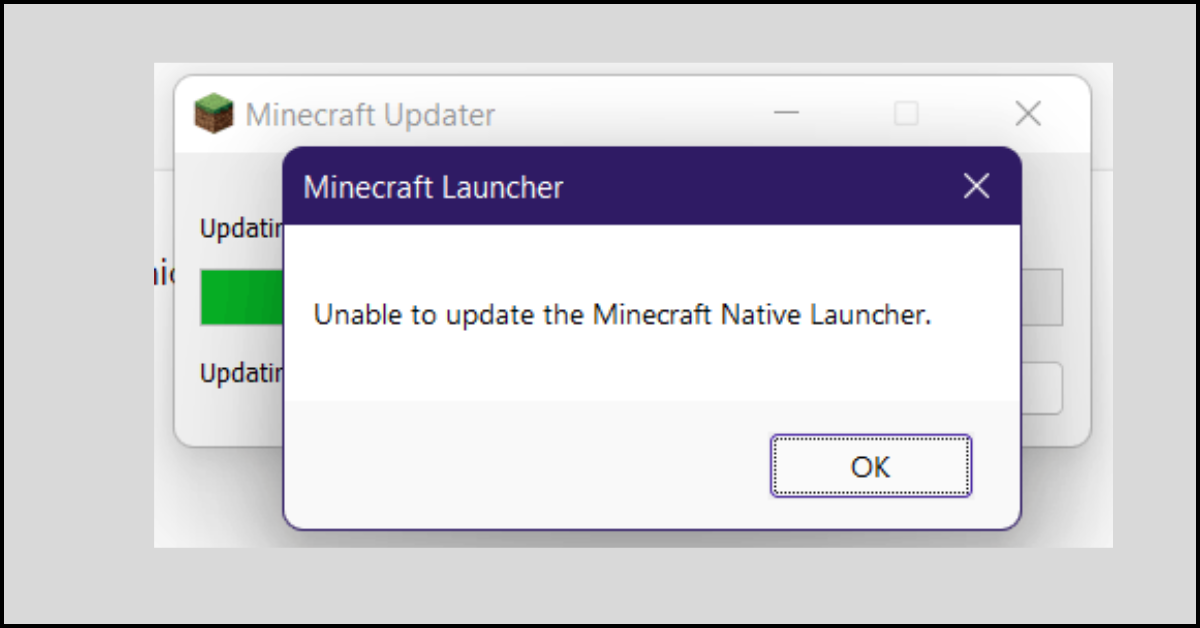
How to Fix Unable to update the Minecraft Native Launcher Windows 11
The “Unable to update the Minecraft Native Launcher” issue can be frustrating. However, there are many ways to fix it. Here, we will discuss some effective ways to fix this problem.

Troubleshooting Guide: How To Fix Copy And Paste Not Working On Windows 10/11
Fix the copy and paste not working issue on Windows 10/11 hassle-free with this comprehensive guide. Here you’ll find effective tried and tested methods that can troubleshoot and permanently resolve the problem.
How to Force Quit on Windows 11 and Windows 10
Encountering unresponsive programs or frozen applications on our Windows devices can be a frustrating experience. When a program hangs or stops responding, it can disrupt our workflow and hinder productivity. This is where the ability to force quit a program comes in handy. Here, we will explore different methods to force quit on Windows 11 […]

How to Enable Secure Boot Windows 11 and Windows 10
One of the key features that can significantly enhance the security of your Windows operating system is Secure Boot. By enabling Secure Boot on your Windows 11 or Windows 10 system, you can protect your device against malware and unauthorized operating systems. Benefits of Enabling Secure Boot in Windows 11 And 10 1. Protection Against […]

How to Change Administrator on Windows 10 and Windows 11
In Windows operating systems, the administrator account holds the highest level of privileges and control over the system. Sometimes, you may need to change the administrator account for various reasons such as security, ownership transfer, or simply to give someone else access to the system. Here, we will explore different methods to change the administrator […]

How to Open BIOS Windows 11 and Windows 10
Here are the best ways to Open BIOS Windows 11 and Windows 10. These steps are very easy.

How to Convert HEIC to JPG on Windows 11 and Windows 10
Learn the best ways to convert HEIC to JPG on Windows and Windows 10 computers.

How to Fix Valorant not uninstalling Windows 11 – Remove Valorant Completely
Online gaming has become increasingly popular, with many gamers enjoying multiplayer games. One such game that has gained a significant following is Valorant. However, like any software, Valorant is not immune to technical issues, and one common problem that players encounter is the difficulty in uninstalling the game, particularly on the Windows 11 operating system. […]
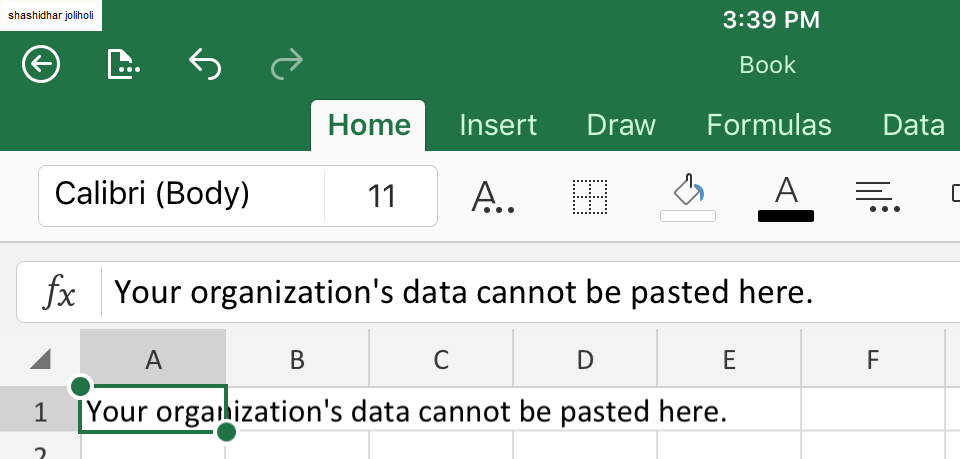
Your Organization’s Data Cannot Be Pasted Here: 7 Ways to Fix It
Encountering the “Your organization’s data cannot be pasted here” error can be frustrating, but armed with the right knowledge and troubleshooting steps, you can quickly overcome this hurdle.
Tenorshare Reiboot Review 2024 [Fully Unbiased]
Read The Complete Unbiased Review of Tenorshare Reiboot

